Best-Home-Lighting-Design-Ideas-By-dpod-studio

Shine Bright: 20+ Best Home Lighting Design Ideas By dpod studio To Brighten Up Your Space!

Discover the elusive secrets to creating the perfect home lighting design ideas with our unique guide. Indulge in a fascinating journey through a harmonious fusion of the latest trends and Vastu-compliant home lighting ideas. This extraordinary exploration promises an enlightening experience that you wouldn’t dare to ignore!

Home lighting design, an ethereal dance of ambiance and emotion, has the power to define the essence of your living space. Any compromise is unthinkable here, as it can either increase or decrease the attractiveness of your abode. Drawing from the rich store of knowledge on diverse lighting designs, we have embarked on a mesmerizing journey to inculcate all the essential knowledge for our dear readers.

Journey with us as we uncover a captivating tapestry, intricately weaving together an array of lighting types, contemporary trends, artistic styles and profound principles of Vastu Shastra. In this exceptional collection, you will find a wealth of knowledge as we uncover every aspect of home lighting design, no detail will be left unturned to ensure that your lighting aspirations are met!

Uncovering the Secret: What Should You Expect in This Article?

  • lighting type
  • Room wise lighting details
  • How to set the right atmosphere with lighting
  • Smart lighting
  • Energy saver
  • Lighting for the festive season
  • Vastu for light
  • Latest trends in Lighting

2023 Path of Light: Let us take you to the dazzling world of different types of lights!

Before plunging into the mesmerizing world of home lighting design, let us embark on a wonderful journey to uncover the myriad types of lighting design ideas that grace the realm of home splendor. Prepare to be mesmerized as we wade through a kaleidoscope of illuminated concepts, each symbolizing inspiration, guiding you toward perfect harmony of light and home.

1. Ambient lighting

Ambient-lighting

When you’re looking for soothing and balanced home lighting ideas, immerse yourself in the allure of ambient lighting. Enjoy the soft glow that comes from natural light filtering through your home or the soft glow from carefully selected indoor lights. The essence of ambient lighting lies in its ability to enrich the ambiance of your abode, weaving an alluring tapestry of calmness and warmth through thoughtful home lighting design.

2. Accent lighting

Accent-lighting

Enter a realm of sophistication as accent lighting casts its enchanting magic. Enhancing the charm of your home, this focused light skillfully illuminates specific areas and corners, complimenting cherished artworks and display cabinets. Unleash the true artistry of Accent Lighting – an eye-catching home lighting solution that adds a touch of elegance and finesse, turning your living space into a gallery of dazzling masterpieces.

3. Track lighting

Track-lighting

Step into a world of seamless brilliance with track lighting – a marvel of ingenuity. This visionary system conveniently melds light fixtures into one continuous track device, eliminating the need for individual wiring. Embrace the art of focal point as track lighting beautifully enhances the look of your home, filling every corner with its radiant touch. Unleash the potential of these home lighting ideas, blending convenience and design, to elevate your living space to new heights of modern beauty.

4. Chandelier

Chandeliers-lighting

From the opulent halls of churches and palaces, the grandeur of chandeliers gracefully emerges a treasured French legacy. Behold their majesty as these lighting fixtures offer a tiered radiance that once bathed regal spaces in luminous splendor. With opulence etched into their very essence, chandeliers have become a symbol of luxury. Embrace the fusion of past and present as contemporary versions preserve the aesthetic allure of their classic predecessors, casting a spell of timeless beauty upon modern home lighting design.

3. Wall-mounted lights

Wall-mounted-lights

In the search for space-saving miracles, wall lights have emerged as the unsung heroes of compact homes. With a single objective in mind – freeing up precious floor space – these illuminating wonders come in a range of shapes and sizes. Like versatile keepers of light, they beautifully illuminate corners and illuminate study tables, turning any corner into a bright haven. Consider their greatest gift in the form of efficient home lighting design solutions that cast a dazzling spell on abodes burdened by space limitations. Embrace a combination of efficiency and elegance as wall lights redefine brilliance in spatially challenged areas.

4. Recessed lights

Recessed-lights

Take a journey into the heart of home lighting design and discover the captivating charm of recessed lighting. Like divine gems placed in the ceiling, these shining wonders adorn the places with a touch of magnificence. An indispensable marvel for false ceiling installations, recessed lighting unveils its alluring gift—a seamless, uniform illumination that transforms every room into an enchanting oasis. Step into a realm where sophistication meets practicality, where hidden lighting weaves its own magical charm, leaving no corner untouched by its radiant embrace.

5. Cove lights

Cove-lights

Nestled amongst the eternal classics of lighting technology, Cove Lights exudes its graceful charm. Lifting a room’s soul, these illuminating wonders direct light from one or more sides to the celestial expanse of the ceiling embracing a bay. Encapsulating the essence of diffused light throughout, cove lights emit a soft and gentle glow that is a testament to their artistic finesse. Nevertheless, versatility is their specialty, and they can display talent as fearlessly as they want. Watch their ingenuity as they take center stage atop crown furnishings or dance in understated elegance behind a valance. Embrace the beauty of Cove Lights, where subtlety meets sophistication in a harmonious embrace.

6. Task lighting

Task-lighting

Enter a realm where talent meets purpose in the art of task lighting. Like skilled artisans, these luminaries shine brightly at specific locations, creating an atmosphere of productivity. Best-loved in kitchens as under-cabinet lights, task lighting provides a bright, cozy embrace that harmonizes with the environment. Discover the magic of focused light, where every task finds its stage, and productivity dances hand in hand with eco-friendly elegance. Embrace the symphony of precision as Task Home Lighting Ideas infuse your living space with artistry that celebrates both form and function.

7. Pendant lights

Pendant-lights

Discover the magic of pendant lights, hung beautifully from the ceiling by a rod or chain. Single or in adorable sets, they add sparkle to your abode. Decorate any corner or capture the spotlight; These pendant lights adapt every space to perfection. From grand waterfalls to contemporary charms, they blend seamlessly into your home’s lighting design scheme, and provide a versatile glow. General, area or task lighting, they represent the essence of eye-catching lighting that elevates every aspect of your living space.

8. Industrial Lighting

Industrial-Lighting

Step into the world of industrial lighting, where raw beauty and rustic finishes meet. Embrace the allure of naked bulbs, open ducts and ropes, weaving an enchanting tapestry of exclusivity into your interiors. Beyond mere quirkiness, these home lighting design ideas infuse your home with an inviting, soulful vibe. Unleash the power of industrial charm, where every corner reflects the raw beauty of a bygone era, creating a space that captivates the heart and stirs the soul.

Bright Insight: Uncovering the Bulb Mystery for Your Favorite Lights! – Lighting Design Ideas

Uncovering the-Bulb-Mystery-for-Your-Favorite-Lighting-Design-Ideas

Step into the world of industrial lighting, where raw beauty and rustic finishes meet. Embrace the allure of naked bulbs, open ducts and ropes, weaving an enchanting tapestry of exclusivity into your interiors. Beyond mere quirkiness, these home lighting design ideas infuse your home with an inviting, soulful vibe. Unleash the power of industrial charm, where every corner reflects the raw beauty of a bygone era, creating a space that captivates the heart and stirs the soul.

The Way To Lighting: Sewing Genius For Every Room In Your Home!

In the captivating realm of home lighting design, there’s a purposeful charm around every corner. A symphony of lights awaits as we embark on a journey through each room, highlighting the artistry of the home’s tailored lighting ideas. With precision and grace, we breathe life into the atmosphere of each space, creating an eye-catching tapestry that matches the essence of your home. Embrace a revelry of radiant brilliance, as each room reveals its own unique identity through an artful dance of light. Immerse yourself in a world where light works in harmony with purpose, converting your home into a sanctuary of ever-radiant charm, from the peaceful glow of bedrooms to the exuberant glow of living spaces.

11. Foyer

Foyer-light

In the fascinating realm of home lighting design, functionality trumps its artistic appeal. Lighting becomes the brush that transforms your interiors into a masterpiece, and it all starts from the entrance of your abode! Whether wide, narrow or modestly hidden, your entryway holds the key to a stylish welcome.

Discover the art of entryway lighting, where spotlights weave their magic, spotlights on accent walls to craft dramatic scenes. Like mesmerizing statements, they grab attention and captivate guests with their radiant charm. Embrace the power of light as it paints a tale of elegance and grace, transforming your entrance into a bright portal of everlasting enchantment.
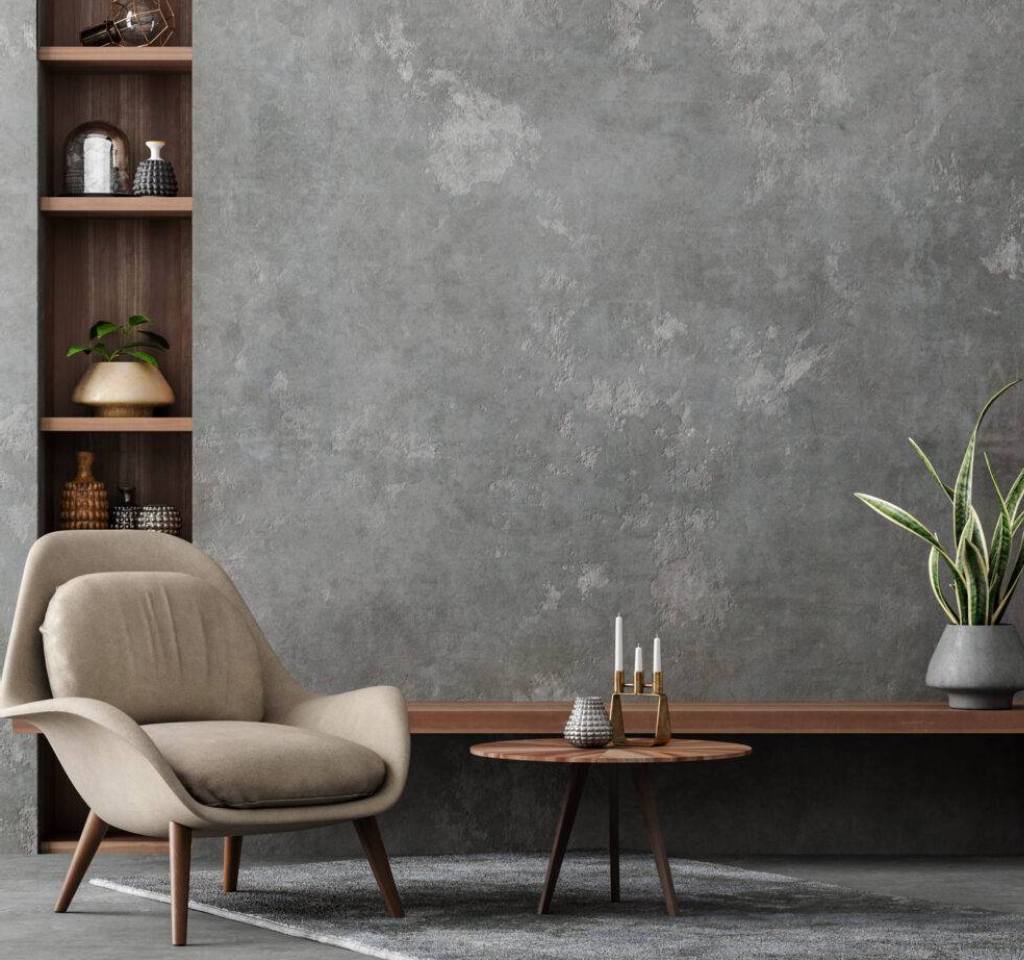
12. Living Room

Living-Room-light

In the captivating gamut of living room lights, a symphony of glamor and dazzle dances with the various fixtures. Timeless chandeliers always grace a space, their charm lasting through the ages. Wall sconces master the art of mood lighting while casting enchanting magic. And if floor space is sacred, fear not, because table lamps are ready to illuminate with beauty. Embrace the art of light as your living room becomes a stage of sparkle, forever adorned with the allure of timeless classics and contemporary wonders.

13. Bedroom lights

Bedroom-lights

Unlock the enchanting realm of bedroom lighting, where mood and sleep are intertwined in an ethereal dance. With the simple flick of a switch, transformative lighting magic awaits. Embrace the wisdom of home lighting design as we advocate the allure of dim lighting, which gives you the power to control the ambiance at will. Discover the art of bedtime bliss as pendant lights and cove lights elegantly adorn your sleeping space. With a range of options at your fingertips, let your imagination run wild as exquisite lighting awaits you in your bedroom that will paint your dreams in vivid colors.

14. Dining Room

Dining-Room

At the heart of every home, the dining area holds an important place, where loved ones gather for warm conversation and delicious food. Lighting this sacred area in style becomes an artistic delight, weaving a symphony of light that celebrates togetherness.

Elevate your dining experience with a feast of sparkle, where cascading pendants cascade like celestial gems, and subtle recessed lighting dances with understated elegance. Embrace the magic of custom home lighting design as we cater to every style, offering a solution that matches your unique vision. Let your dining area sparkle with a glow of memorable moments, where laughter and love unite under the glow of dazzling artistry.

15. Kid’s Bedroom

Kid-s-Bedroom

In the wonderful realm of the kids’ room, where safety takes center stage, lighting becomes an attractive balance of entertainment and functionality. Unleash the magic of home lighting design, create a world where imagination knows no bounds. Pendant lights add their own playful touch, gracing study tables and high-ceilinged play areas, illuminating every adventure with a dazzling glow.

The quintessential table lamp turns out to be an attractive companion, lending luminous magic to its function as little ones engage in their creative pursuits. Embrace the art of unleashing wonder, where security and charm dance side by side, lighting dreams and nurturing young minds. Together, we create an area where laughter, learning and dazzling moments paint a cherished canvas of childhood memories.

16. Home Temple

Home-Temple

Within the sanctified confines of the puja room, the lighting is based on a divine purpose, enveloping the place with a heavenly glow. Home lighting ideas here try to balance the lighting as well while embracing the essence of devotion. Yet, beyond mere functionality, a touch of artistry awaits. The mesmerizing decorative lights add to their divine charm, as the fixtures dance behind the jaali patterns, beautifully enhancing the radiant appearance of the idol. Embrace the symphony of lights, where devotion and aesthetics unite, creating a divine haven that resonates with a sense of reverence and peace.

17. Kitchen lights

Kitchen-lights

In the center of the culinary zone, kitchen lighting shines with purpose. Since the art of cooking demands precision, a harmonious mix of recessed and task lighting takes the stage. Every corner is covered in a warm glow of functionality, ensuring that no detail goes unnoticed.

Task lights, efficient under-cabinet companions, unveil their brilliance, casting concentrated beams that illuminate culinary endeavors. With their bright charm, they transform the kitchen into an inviting space where the culinary arts flourish. Embrace the glow of cooking as we light up every corner, turning your kitchen into a platform where delectable dishes come to life.

18. Bathroom lights

Bathroom-lights

In the field of bathroom design, lighting emerges as a major feature, which casts a radiant spell of enchantment. The art of illumination inspires us to adopt a harmonious mix of lights. Imagine a vanity adorned with pendant or task lights, their focused rays guiding your makeup artistry or shaving ritual with precision.

Above the shower or bathtub, ambient lighting creates a serene haven where relaxation and rejuvenation intersect. Step into the tranquility of your own private oasis, where the dance of lights melds with the essence of indulgence. Unleash the transformative power of bathroom lighting, which will forever transform your resting place into a luminous sanctuary of tranquility and charm.

19. Study Room

Study-Room-lights

Within the sacred area of ​​study, our aspirations converge to focus optimally and conquer tasks with efficiency. In this quest, the search for beautiful and functional study room lighting takes center stage. The ideal sanctuary beckons – a serene room engulfed in the embrace of abundant natural light.

Task lighting plays its part as a perfect ally, offering its bright glow to illuminate your endeavors. But the options are not limited; Recessed or track lighting enters the stage, weaving its magic to achieve the same objective. Embrace the symphony of lights as you step into a field where talent meets functionality, with the artistry of light and the promise of fruitful achievements forever invigorating your studies.

20. Corners

Corners

Step into a world where lighting has the power to shape the mood of a room. From regal chandeliers that exude grandeur to intricately carved wall sconces that embrace subtlety, a diverse gamut of options awaits, ready to breathe life into your decor. As you want to banish the dull corners and add sparkle to your home, embrace a wide array of home lighting design options, including the allure of pendant lights and the enchanting magic of backlit panels.

Discover the art of lighting your space, where each choice becomes a brushstroke on a canvas of ambiance, creating a symphony of sparkling brilliance beyond the ordinary. Enter a realm where lighting design becomes an exquisite expression of your vision, turning every corner into an oasis of sparkle and charm. Unleash the power of light and artistry, for within you lies the key to lighting up your surroundings with an allure that captivates the heart and ignites the soul.

21. Garden/balcony

garden-balcony

Under the enchanting moonlight, pleasant evenings invite us to sit in the lap of the garden, enjoy refreshing drinks and good company. Yet, when night falls, a poorly lit or no-lit garden turns into an inhospitable area. Fear not, because the cure lies in the magic of garden lights.

Unlock the charm of your oasis when you select from a range of garden lights, enhancing your outdoor sanctuary from basic to luxury. Each illumination becomes a radiant brushstroke, painting a tapestry of glamor that enchants the senses. Step into a world where the garden comes alive with light, enveloping you in a luminous embrace that makes an evening in paradise an unforgettable experience. Embrace the charm of the park and rediscover the magic of twilight tranquility amidst the radiant beauty of your garden oasis.

How can dpod studio help you?

In search of beautiful and adorable home interiors, the search ends here. Embrace the transformative power of design with DPod Studio, where dreams come to life. Now, at your fingertips, is the gateway to genius – book an online consultation and embark on a journey of artistic wonder.

Discover the art of creating a space that matches your vision and personality, as each detail becomes a brushstroke on the canvas of your dream home. Leave a lasting impression on your surroundings, as Dpod Studio unveils the magic of design and the allure of exclusive creations. Step into a world where inspiration meets innovation, and beauty thrives amidst the brilliance of your home interiors. Book your consultation today and unlock the keys to creating an enchanting sanctuary that reflects your essence.

In the capricious world of home lighting design, brilliance finds its way into every corner and crevice, lighting up spaces with an enchanting charm. From the grandeur of the chandeliers to the subtlety of the recessed lighting, each fixture weaves a symphony of sparkle, elevating the interiors to new heights of elegance and allure. Purposeful lighting designs breathe life into every room, enhancing its distinctive identity and transforming mere spaces into cherished havens of comfort and creativity.

This magic extends to every aspect of living in the home – the kids’ rooms become a realm of imagination, the study embraces efficiency and focus, and the garden transforms into a dazzling oasis under the stars. Purposeful lighting in the puja room enhances devotion, while entryways become radiant portals that welcome guests with warmth and grace.

As we embrace the art of lighting, we discover that lighting is more than just functionality. It weaves the atmosphere and sets the mood for joyful celebrations, quiet relaxation and productive endeavors. From the sophistication of industrial design to the rustic charm of cove lights, each choice adds its own unique charm to the living experience.

In pursuit of perfection, dpod studio sets out to create dreamy interiors that blend the art of design with the essence of individuality. Their online consultations provide an opportunity to unleash creativity and transform spaces into captivating reflections of one’s vision.

In conclusion, lighting isn’t just a practical necessity – it’s an art form. Each article highlights the immense potential of lighting design to enhance the ambiance, enhance functionality and evoke emotion. Let us embrace the magic of lights and cast our living spaces in a bright realm of enchantment.

The-Ultimate-Interior-Design-Renovation-Guide-for-2023-1024x766

Greatest Renovate Your Space: The Ultimate Interior Design Renovation Guide for 2023!

Transform your living space with our comprehensive interior design renovation guide for 2023! Find expert tips and tricks for renovating your space and creating the home of your dreams. From choosing color schemes to choosing furniture, this ultimate guide has everything you need to know. Begin your renovation journey today and unlock the potential of your space!

Enhance your home’s aesthetic appeal with our unparalleled interior design expertise. Gain valuable insight as we guide you through our concise yet comprehensive 11-step plan to ensure your space’s flawless transformation. Your home, your sanctuary, deserves nothing but the best. Heed our expert advice to enhance the quality of your decor and create an environment where your comfort reigns supreme. Let us help you transform your home into a haven that perfectly reflects your personal style and maximizes your comfort.

As you begin to outline your interior design journey, prioritizing your personal comfort becomes paramount. Your space should reflect your unique style and embody your sense of calm. Let us guide you in crafting an interior design scheme that not only meets your aesthetic aspirations but also fosters a harmonious and inviting ambiance. Discover the joy of designing a space that matches perfectly with your comfort and creates a haven tailored to your individual needs.

Starting the interior design planning process can be overwhelming, especially when faced with so many tempting home interior design ideas. The challenge often lies in determining the ideal starting point amidst this abundance of inspiration. Let us ease your uncertainty and provide you with a clear roadmap to start your interior design journey. Our expert guidance will help you navigate a sea of ​​ideas, enabling you to confidently create a space that reflects your unique vision and captures the essence of your personal style. Say goodbye to indecision and embrace the excitement of transforming your home with clarity and confidence.

Leave your worries behind, as we have the ultimate solution to your interior design dilemmas. Our comprehensive guide is carefully crafted with step-by-step instructions to steer you in the right direction. Say goodbye to uncertainty and embrace the confidence that comes with having a roadmap in hand. From concept to implementation, our guide will empower you with the knowledge and insight you need to navigate the complex world of interior design. Let us be your trusted partner in this transformational journey as we provide you with the tools and guidance to turn your design dreams into a beautiful reality.

Uncovering the Mysteries: Navigating Space and Necessities Like a Pro! – Interior Design Renovation

Beginning with the fascinating field of interior design planning, the beginner steps forward with a determination to understand the particularities of each and every detail of your area.

Nevertheless, a series of enigmatic questions await your discerning gaze to embark on this creative journey.

First, cast your gaze upon the inhabitants who grace the hallowed place of your abode – how many souls find solace within its hallowed walls? Delve deeper, because the purpose that breathes life into the core essence of your home’s interior design is eager to be exposed. Traverse the intricate labyrinths of your mind, uncovering the deepest thoughts that shape your artistic vision.

You will build the pillars of your design on these foundation stones of thinking. Thus, before weaving the fabric of your dreams, ponder over these enigmatic questions, for they hold the key to manifesting your aspirations into reality.

Visualize your home interiors expanding with crystalline clarity, allowing your thoughts to intermingle and unite in a harmonious symphony of aesthetics. In this endeavor, entrust your vision to the nimble hands of a skilled interior designer, who will steer this transformational journey with you. Together, take the carefully methodical steps of this inner workings approach, confident in the knowledge that victory awaits those who forge their own path with unwavering determination.

The-Ultimate-Interior-Design-Renovation-Guide-for-2023

Design Dreams on a Penny: Mastering the Art of Planning Your Interior Design Budget!

After taking the initial steps toward creating your home’s interior design plan, the next important endeavor begins: establishing a well-defined budget.

Allocate your financial resources judiciously, independently determining a specific portion for each room and kitchen. By breaking down your budget, you get a broad estimate of the costs involved in the complex tapestry of your interior design journey.

Many factors will shape monetary considerations, including the size of the room, choice of furniture, selection of furnishings and assortment of accessories, etc. Yet, despite budget constraints, fear not, for there are alternative avenues open to you. Embrace the convenience of flexible EMI options, which provide you with the means to finance your interior design aspirations without compromising on your vision.

With a blend of prudent financial planning and creative ingenuity, your interior design plan will transcend the realm of mere dreams into a tangible reality that seamlessly blends aesthetics with practicality.

Mastering-the-Art-of-Planning-Your-Interior-Design-Budget!

Design Development

Climbing to the pinnacle of the interior design process, we now embark on a transformative endeavor to translate a carefully crafted interior design plan into reality.

A skilled interior designer enlisted on your behalf will provide you with a design blueprint or a virtual representation, which will give you invaluable insight into the artistic orchestration of the interiors of your home. This in-depth view enables you to understand the optimal use of space and the harmonious proportions that will define your sanctuary.

Within the confines of dpod studio, our design experts harness the powerful brushstrokes of our state-of-the-art 3D design tool, Spacecraft. Through this technological marvel, we push the boundaries of imagination, giving life to your inner design aspirations.

Equipped with Pro Cad skills, our designers are able to materialize distinctive interior designs that integrate seamlessly with your plan. Using vast sources of data, they curate personalized creations drawn from every corner of inspiration.

Embrace the wonders of the digital realm, as in this limitless domain, you get access to a wealth of live 3D interior design plan ideas. Traverse through virtual scenarios, and watch the evolution of your vision in real-time. Plus, check out the dynamic nature of pricing, as estimates transform synchronously as you select and refine your desired products, ensuring transparency and adaptability throughout your creative journey.

At dpod studio, we aim to empower you with the tools and expertise to shape the home of your dreams, allowing you to push the limits of only imagination and step into a realm where the possibilities are limitless.

Design-Development

Power and Flow: A Master Plan for the Electrical and Plumbing Points in Your Location!

As we move through the complex tapestry of your interior design journey, the next step looms with utmost importance – the careful planning of electrical points and light fittings.

Inextricably linked with this effort is the vital combination of plumbing and plumbing work, which harmonizes the complex networks that power your residence. Before embarking on endeavors such as painting the rooms or decorating them with exquisite wallpaper, it is imperative to prepare the groundwork for the electrical points.

By taking this strategic foresight, you infuse your step-by-step interior design process with a sense of structure and coherence. With a well-organized blueprint guiding your every step, the symphony of your interior design approaches will resonate in harmony.

By piecing together electrical planning, plumbing considerations and careful plumbing, you ensure that the foundation of your dream home is built strong with careful attention to detail. Approach this important step with unwavering determination, as it paves the way toward a space that seamlessly blends aesthetic beauty with functional practicality.

A Master-Plan-for-the-Electrical-and-Plumbing-Points-in-Your-Location!

Upgrade Your Space: The Art Of Planning A Fabulous False Ceiling Design!

Venturing further into the realm of refined interior design, we encounter a captivating feature that adds both functional and aesthetic dimensions to your space—the elegant artistry of a false ceiling.

Crafted with precision, a false ceiling beautifully descends a foot below the actual ceiling, concealing an intricate network of electrical ducts and points that intricately navigate the expanse above. Beyond its utilitarian purpose of veiling the underlying infrastructure of plumbing pipes and electrical wiring, false ceilings play an important role in enhancing the overall grandeur of your interior design scheme.

Imagine the transformative power of this architectural masterpiece, as depicted in the image below. Witness how it blends harmoniously with the aesthetics of the room, and imparts a sense of exquisite elegance and visual grandeur. The false ceiling becomes an integral element, seamlessly combining functionality with artistic expression.

By incorporating a false ceiling into your interior design narrative, you unlock the potential to elevate the ambiance of your space, infusing it with an aura of sophistication. Delve into the realm of creative possibility, where the interplay of light, texture and form reveals a mesmerizing visual spectacle.

Incorporate this captivating element into your interior design scheme, and watch it radiate beauty, transforming your space into a sanctuary that reflects your unique style and taste.

The-Art-Of-Planning-A-Fabulous-False-Ceiling-Design!

Step Up Your Style: Breathtaking Flooring Designs & Materials Unveiled!

In the spirited endeavor of designing the interiors of your home, choosing the right flooring becomes an essential and sometimes time-consuming task.

As you delve into the depths of interior design planning, immerse yourself in a wealth of knowledge about the diverse range of flooring options that lie before you. Allow your exploration to explore the realms of hardwood, laminates, tiles, or vinyl, each offering a distinctive allure and unique set of characteristics. The final choice depends on a delicate balance considering factors such as cost, area and the inherent advantages and disadvantages associated with each option.

For example, consider the careful decision-making process involved with bathroom flooring. Consider the effects of the material chosen – will it create a slippery hazard when exposed to water? Keep in mind practical considerations that are intertwined with aesthetic appeal, ensuring that your design choices mesh seamlessly with the functional needs of the space.

Embark on an immersive journey of discovery, as within its folds lie the keys to creating an interior design that is beyond ordinary imagination. Each flooring option has its own unique charm, texture and character just waiting to be used to breathe life into your vision.

With an informed approach, you’ll navigate the maze of options, carving out a path that best suits your preferences and aspirations. Unleash your creativity, and watch as carefully chosen flooring establishes the foundation of a space that seamlessly blends beauty with functionality, transcending the boundaries of traditional design.

Breathtaking-Flooring-Designs-&-Materials-Unveiled!

Crafting Space: Uncovering the beauty of woodworking and furniture!

Entering the field of custom-designed furniture requires a thorough understanding of the intricacies of woodworking and familiarity with a variety of materials.

Before making a purchase, think deeply about the purpose of your furniture and the essence of the space it occupies. Within an all-encompassing interior design scheme, utility and beauty harmoniously intertwine, paving a path towards a transformative aesthetic experience. When faced with limited living space, embrace the versatility of modular furniture, thoughtfully engineered to seamlessly combine form and function while maximizing storage capacity.

Empower yourself with knowledge, for it opens up a world of possibilities. Familiarize yourself with the different materials, their unique characteristics, and their visual appeal. With this astute insight, you can design a collection of furniture that not only complements your interior design vision but also stands the test of time.

Craft a story where the furniture serves as the embodiment of your discerning taste and refined sensibilities. In this symphony of design, each piece plays its part, harmonizing with its surroundings and serving its intended purpose. Think thoughtfully about the relationship between utility and beauty, as they combine to create a space that goes beyond mere functionality.

With careful thought and a discerning eye, create a furniture combination that matches the essence of your space. Let the furniture be an extension of your unique personality, contributing to a balanced interior design scheme where every element is present in perfect balance.

Uncovering-the-beauty-of-woodworking-and-furniture!

Expression Color palette for choosing the right wall colors!

Embarking on the fascinating journey of choosing a color palette for your walls, you are ready to unveil the most fascinating aspect of the interior design process. With careful consideration, choose colors that blend seamlessly with the lighting nuances and furniture combinations that bring life to your carefully crafted interior design scheme.

Immerse yourself in the captivating world of color, discovering the diverse range of shades and tones that exist. Look for a harmonious mix, where the walls become a canvas that unifies the entire space, creating a sense of harmony and visual grandeur.

If you want to provide a faux finish to your walls, then delve deep into the realm of paint finishes. From matte to satin, eggshell to gloss, discover the artistry and versatility inherent in each option. Each finish has its own distinct charm, allowing you to create a visual texture that adds depth and character to your walls.

Educate yourself about the intricacies of paint finishes, learning their nuances and understanding how they interact with light and space. With this knowledge at your fingertips, you have the power to transform your walls into captivating masterpieces, filling your interior design narrative with a touch of artistic finesse.

Let the colors resonate with your vision, breathing life into the essence of your space. As walls become an integral part of your interior design symphony, they evoke emotion, set the mood and create an enchanting ambiance that transcends the boundaries of ordinary living.

Expression-Color-palette-for-choosing-the-right-wall-colors!

Style Your Sanctuary: The Art Of Choosing Home Accessories And Furnishings!

In the realm of interior design, the realm of accessories reveals itself as a realm of endless possibilities, allowing you to fill each room with its own unique charm.

Indulge in the art of decor, for it has the transformative power to take your living room and bedroom to new heights of visual elegance. Embrace the vibrant allure of colorful accessories as they dance harmoniously with your chosen design aesthetic, infusing life and vigor into the space. Judicious use of color can evoke emotion, create a focal point and fill your room with an atmosphere that reflects your unique personality.

Yet, beyond the realm of color lies another dimension of artistic expression – the tactile realm of texture. Embrace the interplay of different textures as it weaves a tale of joy and playfulness within your interior design scheme. Experiment with soft fabrics, woven materials and interesting surfaces that invite touch and sensory enjoyment into your living space.

Even in the sacred space of your bathroom, careful attention to detail deserves attention. Plan ahead, carefully selecting faucets and plumbing fixtures that integrate seamlessly with the overall design aesthetic. By doing so, you ensure a harmonious and harmonious composition, where functionality and style meet in perfect harmony.

Let your creativity unfold as you craft a variety of accessories, each weaving its own story within the larger tapestry of your interior design. With an artistic touch and a discerning eye, transform your living spaces into a haven that embodies your personal style, stirs the senses and enchants all who enter.

The-Art-Of-Choosing-Home-Accessories-And-Furnishings!

Installation

As we enter this important phase of the interior design process, the culmination of careful planning and thoughtful decision making takes center stage. It’s at this point that all the carefully chosen elements and accessories enter your space, becoming the building blocks of your imagined masterpiece.

With precision and expertise, skilled hands work diligently to install each component, ensuring seamless integration with the overall design scheme. Elements that were once mere concepts and ideas now materialize before your eyes, giving life to your sight.

From the placement of furniture to the installation of fixtures, every detail is given the utmost care. Skilled craftsmen bring their expertise to the forefront, delicately handling each piece to create a harmonious and functional environment. As the installation process unfolds, the space begins to transform, revealing its true potential and adding to the essence of your interior design scheme.

This is the moment when abstract concepts become concrete realities. It’s a time of excitement and anticipation, as your vision takes shape and your dreams manifest into a living, breathing space.

Witness the evolution of your interior design project as it goes beyond imagination and becomes a tangible expression of your unique style and taste. Embrace change as it unfolds before you, knowing that each carefully installed element contributes to the symphony of your desired aesthetic, creating a space that reflects beauty, functionality and your personal narrative.

Installation

The Final Touch: A Checklist To Improve Your Interior Design!

As you approach the final stages of your interior design journey, it is of utmost importance to focus on the impeccable execution of the finishing touches. These fine elements have the power to elevate your space from ordinary to extraordinary, showcasing the meticulous care and attention given to every detail.

Direct your discerning eye towards the polished wood, where craftsmanship and artistry converge to create a stunning visual spectacle. The smooth and flawless finish of wooden surfaces not only enhance their natural beauty but also add a touch of elegance and sophistication to your interior design scheme. Enjoy the rich colors and lustrous shine that reflect the dexterity of the craftsmen who brought your vision to life.

Evaluate paint and furniture finishes carefully. A seamless and spotless finish enhances the overall aesthetic appeal of your space, creating a sense of harmony and togetherness. Whether you choose a velvety matte or sleek glossy finish, be sure it complements the desired ambiance and reflects your personal style. The interplay of colors and textures on these surfaces becomes a canvas for self-expression, encapsulating the essence of your interior design approach.

Pay attention to the strength and functionality of cabinet handles, as they serve as both utilitarian and decorative elements. Make sure they stand up to the rigors of daily use while adding a touch of beauty to your cabinetry. The smooth operation and sturdy construction of these handles contribute to the overall quality and longevity of your interior design scheme.

Lastly, take a close look at the corner finishing of each room. The attention to detail in this aspect reflects a commitment to excellence. Seamlessly blending lines and edges, creating a harmonious transition from wall to wall, showcasing mastery of craftsmanship and creating an atmosphere of visual perfection.

By carefully evaluating and refining these final touches, you elevate your interior design scheme to the realm of extraordinary beauty and sophistication. Every element, from the wood polish to the corner finishing, works together to create a space that pleases the senses and showcases your impeccable taste. Embrace this final step of the process as the culmination of your vision, resulting in a space that exudes timeless charm and invites admiration from all who enter.

A-Checklist-To-Improve-Your-Interior-Design

Frequently Asked Questions (FAQ) – Interior Design Process

What is the first step in the interior design planning process?

The first step in the interior design planning process is to understand the space and needs of each room. This involves assessing the size, layout and purpose of each room, as well as considering the specific needs and preferences of the occupants.

Why is it important to plan the interior design of the house based on the number of people living in the house?

Understanding the number of people living in the home is important because it helps determine furniture layout, storage needs and the overall functionality of the space. By considering the needs of the occupants, you can create a design scheme that optimizes comfort and convenience for all.

How do I set a budget for my home interior design plan?

Setting a budget for your interior design plan involves allocating funds for various aspects such as furniture, materials, accessories and professional services. Consider factors such as the size of the room, desired quality and scope of work to get an accurate estimate of the cost. You can also explore flexible financing options like EMI plans to finance your project, if required.

How can 3D design tools like Spacecraft in the interior design process?

3D design tools like Spacecraft can be invaluable in the interior design process. They allow you to visualize your design ideas and make informed decisions regarding furniture placement, color schemes and overall aesthetics. With the help of these tools, designers can create virtual designs that provide a realistic representation of what the end result will look like.

Why is it important to plan ahead for electrical points and light fittings?

It is essential to plan electrical points and light fittings in advance to ensure smooth execution of the interior design process. By determining these details in advance, you can avoid the need for rework or adjustments later when the rooms are already painted or decorated. It also helps to achieve optimal lighting and integrate electrical components seamlessly into the overall design.

What is the purpose of false ceiling in interior design?

False ceilings serve many purposes in interior design. In addition to hiding infrastructure elements such as plumbing pipes and electrical wiring, it adds a touch of elegance and sophistication to the room. It provides an opportunity to incorporate decorative light fixtures and create visual interest with its unique design elements, enhancing the overall aesthetic appeal of the space.

How do I choose the right flooring for the interior design of my home?

Choosing the right flooring involves considering factors such as cost, area and the specific needs of each room. Hardwood, laminates, tiles and vinyl are popular choices, each with their own advantages and disadvantages. Assess the durability, maintenance needs and suitability of each type of flooring to make an informed decision that best complements your design approach and lifestyle.

What factors should I consider while selecting furniture for my interior design scheme?

When selecting furniture, consider the purpose of the furniture, the available space and the desired aesthetic. Balance utility and beauty by choosing modular furniture with ample storage space in small living areas. It is also important to understand the materials and construction of furniture to ensure durability and longevity.

Why is it important to pay attention to the final touches in interior design planning?

Finishing touches add the final layer of sophistication and attention to detail to your interior design scheme. Assess the polish of the woodwork, the finish of paint and furniture, the sturdiness of cabinet handles, and the finish of each room corner. These details contribute to the overall aesthetic appeal, durability and finish of the space.

    Unveiling-The-Captivating-Charm-Of-18-Small-Pooja-Room-Designs-For-Your-Home

    Sacred Serenity: Unveiling The Captivating Charm Of 18 Small Pooja Room Designs For Your Home

    Find the right solution: Small Pooja Room Designs for your home. From freestanding to wall-mounted, find the ideal worship space to fit your living room interiors. Don’t let limited space hinder your spiritual journey – check out the various designs today!

    Finding the best niche concepts for compact home sanctuaries can prove to be quite a daunting task. Delving deep into the confines of the space available within your abode, whether situated next to a royal pillar, harmoniously integrated into a piece of wall, or discreetly hidden in a quiet corner, becomes imperative. Is. In these contemporary times, simply accommodating storage and furnishings within a restricted area has become a formidable challenge, adding to the complexity when creating a sacred space for devotion. Don’t worry though! We proudly present an exclusive collection of over 25 avant-garde temple designs that have been carefully crafted to blend seamlessly with the essence of your living room.

    Adopting the wisdom of Vastu Shastra, the living room presents itself as a delightful space in the form of a beautiful worship room. Nestled within this shared sanctuary, each loved member of your family will enjoy the divine closeness it brings. Moreover, furnished with far more ample space than its counterparts, the living room graciously welcomes the setting up of a small temple, which seamlessly harmonizes with its surroundings.

    Table of Contents

    Embarking on a fascinating journey, let us head straight to the exquisite collection of unique small pooja room designs specially crafted for the residence.

    Enter your contact here:

      1. Enchanting Beauty: Unveil The Allure Of Jali Doors In Simple Small Pooja Room Designs

      Unveil-The-Allure-Of-Jali-Doors-In-Simple-Small-Pooja-Room- Designs

      Unveiling an exquisite treasure, witness the allure of modern wall-mounted temple design meticulously crafted for compact flats. Adorned with intricately carved Jaali doors, this divine masterpiece casts a mesmerizing spell on any living room, transporting it into a realm of peerless beauty.

      2. Divine Dimensions Unveiled: Layered Temple Designs For Small Flats That Exude Serenity

      Divine-Dimensions-Unveiled-Layered-Temple-Designs-For-Small-Flats-That-Exude-Serenity

      Harness the latent potential of an unused wall by creating a small elevation, serving as a divine abode for your revered deities. Exuding an aura reminiscent of a holy temple, the eye-catching mesh design blends seamlessly with the ambiance, while the meticulous CNC-carved back panel provides an exquisite touch of divine craftsmanship. Let your home embrace the ethereal charm of this transformative masterpiece.

      3. Embracing Serene Simplicity: Rustic Small Pooja Room Designs That Inspire Home Serenity

      Embracing-Serene-Simplicity-Rustic-Small-Pooja-Room-Designs-That-Inspire-Home-Serenity

      Bask in the elegance of a carefully crafted design that exudes serenity, complemented by a luxurious wood finish and an exquisite stonework backdrop. A testament to exquisite craftsmanship, this masterpiece resonates with serenity, filling its surroundings with a mesmerizing aura. Embrace the full potential of a captivating wall like this, allowing its ethereal presence to flourish and its magnificence to mesmerize all who view it.

      4. Elevated Sanctum: Fabulous Wall Mounted Wooden Temple Designs For Small Flats

      Elevated-Sanctum-Fabulous-Wall-Mounted-Wooden-Temple-Designs-For-Small-Flats

      Opening up a realm of limitless possibilities, pooja room designs for homes transcend the limitations of smallness, providing a spacious haven that signifies divine peace. Embrace the artistry of space optimization by embracing a gorgeous wall-mounted unit that is equipped with thoughtfully designed shelves to house your favorite worship items. Witness the harmonious fusion of functionality and elegance as your sacred furnishings find a home within this colossal masterpiece, sure to inspire reverence and calmness within the confines of your abode.

      5. Sophisticated Simplicity: Minimalist Pooja Room Ideas For Small Flats With Style

      Sophisticated-Simplicity-Minimalist-Pooja-Room-Ideas-For-Small-Flats-With-Style

      Unleash the genius potential within even the simplest temple design for homes, as a vibrant burst of colors infuses life into its essence. Embrace the charm of audacity, adorn the pooja shelf with a vibrant color that enhances its appearance, as well as infuse your living room with an irresistible charm. Witness the metamorphosis as the subtle becomes sublime and your abode reverberates with a captivating vibrancy that mesmerizes the heart and enchants the soul.

      6. Space-saving sanctuaries: discovering the charm of narrow temple designs with storage for tiny homes

      Space-saving-sanctuaries-discovering-the-charm-of-narrow-temple-designs-with-storage-for-tiny-homes

      Unleash your creativity and create a holy haven by building a puja room within the comfortable confines of small flats. Employ a slim partition to demarcate this ethereal space from the rest of your living room, weaving a tapestry of divine calm. Amp up the functionality with a chest of drawers, which is an excellent repository for holding all the sacred essentials. To take beauty to new heights, adorn the extension with a captivating false ceiling, providing an ethereal touch that dances with divine sparkle. Witness the effortless fusion of functionality and elegance as your humble abode evolves into a sanctuary of peace.

      7. Divine Complications: Unveiled exquisite temple designs for small flats with lattice partitions

      Divine-Complications-Unveiled-exquisite-temple-designs-for-small-flats-with-lattice-partitions

      Embark on a journey of opulence and opulence with this exquisite small pooja room design, where a stunning gold mesh partition takes center stage, enveloping your abode in an air of regal charm. As a testament to its ingenuity, this low-cost, easy-to-install partition not only provides a sense of privacy but also serves as a cool haven for your sacred offerings. Enjoy the divine ambiance, as this meticulously crafted masterpiece lends an aura of unparalleled elegance to your prayers while ensuring that your devotional moments are blissfully secluded.

      8. Eye-catching Beauty: Eye-catching Pooja Unit Design With Wooden Back Panel Unveiled

      Eye-catching-Beauty-Eye-catching-Pooja-Unit-Design-With-Wooden-Back-Panel-Unveiled

      Elevate the design of your small pooja room to the pinnacle of visual elegance as this one boasts of a worthy center stage, adorned with a captivating golden decal that casts an alluring spotlight on the sanctum. Enjoy the mesmerizing interplay of light and intricately crafted patterns, as this exquisite embellishment lends an ethereal charm, giving the sanctum sanctorum an aura of divine grandeur. Embrace the transformative power of artistic expression as the golden decal weaves its magic, transforming your humble worship room into a captivating masterpiece that captivates the senses and uplifts the soul.

      9. Echoing Bhakti: Design of a wall-mounted temple with traditional bells for holy joy unveiled

      Echoing-Bhakti-Design-of-a-wall-mounted-temple-with-traditional-bells-for-holy-joy-unveiled

      Transcend the realms of simplicity with a small flat temple design, and embrace the art of making a statement that mesmerizes with its delicate detailing. Cast aside the ordinary and embrace the extraordinary as a gray mesh drapery elegantly drapes the sanctuary, imparting an air of refined elegance. Amp up the charm by adding small floating shelves, creating a harmonious symphony of functionality and aesthetics. As the soft sound of the bells reverberates in the air, the design becomes a perfect embodiment of divine peace, transforming the tiny flats into a haven of peace and spiritual satisfaction.

      10. Dynamic spirituality: Unveiled movable temple designs for small flats with versatile beauty

      Dynamic-spirituality-Unveiled-movable-temple-designs-for-small-flats-with-versatile-beauty

      Unleash the versatility of portable temple designs, a transformative solution for small spaces that meets the ever-changing demands of various occasions, be it joyous festivals or solemn ceremonies. Embrace the freedom of mobility as this divine paradise adjusts beautifully as per your convenience, effortlessly adjusting to the dynamic needs of your spiritual journey. Seamlessly integrated into the structure of your abode, this portable temple becomes an epitome of design adaptability, ensuring that the sacred space evolves harmoniously with the rhythm of your life, infusing the essence of devotion in every fleeting moment.

      11. Sacred Heights: Uncovering the beauty of full-height worship units with storage for divine organization

      Sacred-Heights-Uncovering-the-beauty-of-full-height-worship-units-with-storage-for-divine-organization

      Immerse yourself in the ingenuity of design as this captivating pooja unit finds its rightful place, nestled in a corner of the living room, judiciously creating its own sacred space. Flanked by two graceful latticed partitions, it stands as a testimony to the seamless fusion of divinity and aesthetics. The secret lies in the art of selecting a color scheme that harmonizes with the living room’s existing palette, creating an attractive unity that transcends boundaries. Witness the transformation as the interplay of colors conjures up a symphony of visual delight, where the sacred and the mundane co-exist in perfect harmony, leaving a lasting impression on all who enjoy its exquisite presence.

      12. Holy Land: Adopting traditional floor-mounted temple designs for eternal devotion

      Holy-Land-Adopting-traditional-floor-mounted-temple-designs-for-eternal-devotion

      Unleash the glory of your temple, break the boundaries of concealment and adopt a design that establishes the pooja room unit as the bright focal point within your small flat. Embrace the power of prominence as it takes center stage, attracting the attention and reverence of all who enter. Transcending the boundaries of traditional placement, the design celebrates sacred space by providing it with a captivating prominence that pleases the eye and nourishes the soul. Embrace the transformative allure of this design as your temple blossoms into a radiant centerpiece, filling your abode with an ethereal charm that resonates with divine energy.

      13. Enhancing Serenity: Inventing the Simple Pooja Platform for the Living Room with Beautiful Harmony

      Enhancing-Serenity-Inventing-the-Simple-Pooja-Platform-for-the-Living-Room-with-Beautiful-Harmony

      Experience the perfect balance between functionality and aesthetics with this remarkable design, offering a dedicated temple that optimizes floor space without compromise. Embrace the allure of opulence as the addition of gold accents adds a touch of divine opulence to the sacred area. Completing the mesmerizing ensemble, the delicate hanging bells dance with melodious grace, filling the atmosphere with a symphony of divine vibrations. Witness the transformation as the design of your temple transcends its utilitarian purpose, becoming an exquisite testimony of devotion, where space efficiency and ornate elegance meet harmoniously.

      14. Pillar Of Bhakti: Exquisite Wooden Temple Designs Full Of Elegance And Spirituality

      Pillar-Of-Bhakti-Exquisite-Wooden-Temple-Designs-Full-Of-Elegance-And-Spirituality

      Unleash the charm of another eye-catching small pooja room design, utilizing the often-overlooked space around the pillars. Embrace the timeless charm of wood as it takes center stage, weaving a tapestry of divine serenity within this ideal temple design crafted for small flats. Embodying grandeur befitting any sacred sanctuary, the inclusion of the double doors becomes a gateway to spiritual peace, inviting all to enter a realm of intense devotion. Witness the effortless fusion of functionality and aesthetics as this masterpiece harmonizes with its surroundings, transforms the mundane into the extraordinary, and fills your abode with an ethereal aura that transcends the boundaries of space.

      15. Sacred Showcase: Inventing Contemporary Pooja Racks for the Living Room with Modern Reverence

      Sacred-Showcase-Inventing-Contemporary-Pooja-Racks-for-the-Living-Room-with-Modern-Reverence

      Embark on a journey of effortless integration as this temple design for small flats harnesses the power of a multi-shelving unit, turning it into a haven of divine expression. Embrace an exotic mix of tradition and contemporary aesthetics as this design is timeless, harmonizing seamlessly with the essence of modern Indian homes. Witness the artistry of customization as this masterpiece finds its place within the framework of your abode, paying homage to age-old customs while embracing the spirit of the present. Let this design elevate your sacred space, bridge the gap between past and present, and create a divine sanctuary that resonates with the spirit of your soul.

      16. Floating Pooja Units for Living Rooms

      Floating-Pooja-Units-for-Living-Rooms

      Amidst the tumultuous dance of an energetic world, immerse yourself in the stillness of a meditative space where peace reigns supreme. A testament to this profound concept, check out this carefully crafted temple design for small flats, subtly undermining the vibrancy of the orange walls with its restrained yet luxurious wooden presence. In this harmonious composition, density and richness meet, giving rise to a sacred space beyond the physical dimension, filling the atmosphere with an aura of profound peace. Embrace this captivating design as a sanctuary for the soul, a refuge from chaos and an oasis of calm that nourishes the mind amidst the bustling symphony of the world.

      17. Timeless Treasure: Adopting The Beauty Of Solid Wood Pooja Unit For Living Areas

      Timeless-Treasure-Adopting-The-Beauty-Of-Solid-Wood-Pooja-Unit-For-Living-Areas

      Embrace the harmonious fusion of modern aesthetics and timeless elegance as the Wooden Pooja Unit elegantly integrates into a world of clean, straight lines. In the contemporary realm of design, witness a fascinating transformation as this exquisite combination lends a soothing charm to its surroundings. Nestled within an under-utilized space, it finds its purpose, merging seamlessly with the basic fabric of the interior design. Beyond its functional significance, this wooden masterpiece becomes an artistic expression, a symbol of peace that resonates with the soul and enhances the visual tapestry of the space. Immerse yourself in the serene beauty it exudes as it becomes an integral part of your abode, creating a sense of calm that goes beyond mere aesthetics.

      18. Elegant effect: discover the charm of veneered small worship units for wall decor

      Elegant-effect-discover-the-charm-of-veneered-small-worship-units-for-wall-decor

      Unlock the power of peace with a humble yet impressive wall-mounted unit that effortlessly creates a dedicated space for peaceful prayer. Embracing the subtlety that gently soothes the mind, the Puja Room embodies the sacred principle of Vastu which this design beautifully follows. As soon as you step into this sacred area, immerse yourself in the calmness that emanates from it, letting your soul find solace amidst the harmonious blend of simplicity and divine energy. Witness the transformative power of a well-aligned design, as it becomes a medium for inner peace, creates an oasis where the soul finds respite, and the timeless wisdom of Puja Room Vastu guides the essence of the space.

      Lastly, at dpod Studio in Ahmedabad, we are passionate about interior design and creating spaces that incorporate both beauty and functionality. Our expertise extends to creating exquisite small pooja room designs for homes where spirituality finds its place amidst modern life. By seamlessly blending contemporary elements with traditional aesthetics, we strive to bring a sense of calm and serenity to your sacred space.

      Through careful consideration of design principles and a deep understanding of your needs, we provide solutions that optimize space utilization, whether it’s making use of unused corners or incorporating wall-mounted units. Our commitment to detail ensures that every aspect of the design aligns with the principles of Pooja Room Vastu, thereby creating a harmonious environment for prayer and reflection.

      At dpod Studio, we believe that a well-designed Puja room is not just a physical space, but a sanctuary that nurtures the mind, body and soul. With our expertise in interior design, we aim to create an ambiance that not only complements the interior of your home but also provides a dedicated area for quiet moments of prayer and meditation.

      Trust dpod Studio in Ahmedabad to bring your vision to life, as we combine our passion for interior design with a deep understanding of your unique needs. Let us transform your small pooja room into a haven of spiritual bliss, where aesthetics, functionality and spirituality meet in perfect harmony.

        Interior-design-cost-or-4bhk-in-Ahmedabad

        Best 2023 Interior design cost for 4bhk in Ahmedabad

        Discover the Interior design cost for 4bhk in Ahmedabad. Our expert designers provide tailored solutions to enhance your living space considering your budget. Take a look at pricing, trends, and trends to create a stylish and functional home. Get to know about the ideas. Contact us today. Get a personalized quote and turn your 4BHK into a dream paradise.

        Interior-design-cost-for-4bhk-in-Ahmedabad

        Embarking on the journey of designing a spacious abode can often lead to a feeling of bewilderment. The task of designing an awe-inspiring interior for your 4BHK abode involves many aspects including considering the costs involved in the 4BHK flat interior design process. This is mainly because of the specific requirements that come with 4BHK apartment or villa designs, which makes them different from contemporary villa designs. However, fear not! We present to you an in-depth exploration that is within reach to effortlessly calculate the expenses associated with your dream Villa House Design or 4BHK Flat Interior Design project.

        Unveiling the Aesthetic Divide: Exploring Contrasts in Design Costs between a Luxurious 4BHK Flat and a Cozy 4-Room Small Villa

        Are you worried about the disparities between the cost of designing a beautiful villa and a lavish 4BHK flat? Let’s get into the interesting realm of financial comparisons. In India, the average cost of building a 4BHK flat design usually ranges from ₹1,200 to ₹1,700 per sq. ft. In contrast, when stepping into the realm of 4BHK house designs, the minimum expenditure increases to ₹1,500 per sq. ft. As a result, it becomes clear that the financial outlay for the design of villas leans towards the higher end of the spectrum.

        How Does a 4BHK Flat Interior Design Cut Down Costs?

        How-Does-a-4BHK-Flat-Interior-Design-Cut-Down-Costs

        Want to know about the cost-based benefits that await you when you choose to invest in 4BHK Flat Design? Let us look at some of the attractive benefits:

        • One of the exceptional advantages of choosing a 4BHK flat design is the pre-defined demarcation of spaces including bedrooms, kitchens, bathrooms, and others. This strategic layout not only enhances functionality but also eliminates the need of hiring an architect to create a customized 4BHK house plan. By taking advantage of these designated locations, you can save a lot on expenses, while ensuring a budget-friendly approach to your dream home.
        • When you choose a 4BHK flat, you can avail the basic facilities provided by the construction company or builder. These essential fixtures and fittings are seamlessly incorporated into your home, with the associated cost already included in the final amount. This inclusive feature ensures that you can optimize your spending without requiring additional outlay on these basics. Embrace the convenience and financial ease of a 4BHK flat, where the construction company takes care of the necessary installations, allowing you to focus on transforming your space into a personal haven.
        • Customize your new house to align with your preferences and enjoy long-term cost savings. From flooring to plumbing and electrical points, personalization empowers you to make informed decisions, improving quality and efficiency. By strategically planning these elements, you can optimize energy consumption, lower utility bills, and reduce future maintenance costs. Embrace the opportunity to create a space that reflects your style while reaping the benefits of reduced expenditure.
        • Customize your kitchen and cupboards with a few construction companies/builders, and save on cost while adding personal flair. Choose materials, layouts, and finishes to suit your vision, avoiding the need for outside contractors. Take advantage of this opportunity to build a suitable home without breaking the bank.

        Why can the cost of 4-room villa interior design be high?

        Why-can-the-cost-of-4-room-villa-interior-design-be-high

        Owning an independent house is a dream of many individuals. As you embark on this exciting journey, it is imperative to delve deeper into the cost-based factors that require careful consideration. Let us take a look at the financial aspects that warrant your attention, paving the way for an informed and budget-conscious decision.

        • To truly unleash your vision and design the perfect home, 4BHK house plans customized by an architect are essential. This gives you complete freedom to shape your living space as per your choice. However, it is important to consider the associated costs, as architects typically charge fees ranging from ₹60,000 to ₹2,00,000 for preparing these meticulous plans. This investment ensures that your dream home becomes a tangible reality, carefully designed to suit your specific needs and aspirations.
        • Embarking on the ambitious journey of designing a 4BHK home completely on your own brings with it an added responsibility – the financial burden of sourcing construction materials. As the visionary behind every aspect of your project, you must consider the necessary materials needed and allocate funds for the construction process. From cement and bricks to flooring materials and fixtures, these expenses are an important component of making your dream home a reality. By diligently taking material costs into account, you ensure smooth progress toward turning your dreams into a tangible reality, reflecting your personal taste and style.
        • In your careful planning for 4BHK home design, it is imperative to consider various expenses associated with electrical work, plumbing, water pipes, and additional civil work. These important components play an important role in ensuring the functionality and comfort of your future home. Therefore, it is essential to allocate funds accordingly for the professional services, materials, and labor required to perform these tasks efficiently. With these expenses in mind, you can proceed with your project with financial prudence, guaranteeing a complete and harmonious living space that meets and exceeds your expectations.
        • As you embark on the construction journey of your dream 4BHK home, it is important to note that all the expenses related to the construction of the walls and pillars of the rooms are within your purview. This includes the cost of materials, labor, and any special services required to erect strong and visually appealing walls and pillars throughout your home. By taking on this responsibility, you ensure the integrity and aesthetic appeal of your living spaces, tailoring them to your unique preferences. Seize the opportunity to design a structurally sound and visually stunning home, with the cost of building the room’s walls and pillars in your capable hands.

        Unraveling the Secrets of Bespoke Luxury: Decoding the Price Tag of Transforming Your 4BHK with an Interior Designer

        Decoding-the-Price-Tag-of-Transforming-Your-4BHK-with-an-Interior-Designer

        When it comes to determining the cost of hiring an interior designer, the answer can vary from professional to professional. However, there are essential factors to consider when calculating expenses. Let us explore some of the key aspects that contribute to the overall cost estimate:

        • The cost of interior design varies between designers. Design services alone usually range from ₹10 to ₹100 per square foot. Incorporating additional elements such as carpentry, furniture and civil work can increase the cost by ₹2,000 to ₹3,000 per sq ft. It is important to discuss your budget and requirements with your designer for a transparent and informed financial arrangement. Early communication enables effective budget planning, ensures harmonious collaboration and ensures the realization of your design vision.
        • Designers may charge a percentage of the total cost of the home, usually anywhere from 5% to 20%. This approach considers the overall project expenditure. It is important to discuss fee structures with your designer to find the best arrangement. Clarify your budget and expectations to strike a balance between design excellence and financial feasibility. Remember, designers may have different billing approaches, so open dialogue ensures a cohesive design journey.
        • In addition to service fees, designers can apply markups to project products. This markup represents a premium fee to cover the sourcing and coordination efforts. The percentage of product markup can vary, typically from 10% to 30% or more. Open discussion about markup ensures clarity on costs and helps align expectations and budget. Effective communication with your designer is essential to a balanced and mutually beneficial design experience.

        Interior designers in India use a variety of charging methods, such as percentage-based fees, per square foot interior design cost, commission-based fees, or a combination thereof, depending on their preferences and project requirements. To understand the full scope and associated costs of hiring an interior designer, we recommend researching fee structures and pricing considerations. Equipping yourself with this knowledge helps in making informed decisions and finding a designer that aligns with your vision and budget, ensuring a productive and satisfying partnership.

          Factors Affecting The Cost Of 4BHK Interior Design

          On undertaking a 4BHK interior design project, the estimated cost is usually around ₹36,00,000. However, it is essential to note that this figure can fluctuate depending on a number of critical factors, including the size of the venue, the complexity of the design, the choice of materials and finishes, the scope of work involved, the extent of customization involved, Furniture selection and furnishings, electrical and plumbing requirements, hiring of additional professionals, and geographic location. Considering these factors will help you obtain a more accurate cost estimate tailored to your project needs.

          1. Location

          Factors-Affecting-The-Cost-Of-4BHK-Interior-Design

          The cost of 4BHK interior design can be greatly influenced by the location of your property. Expect to spend more for a 4BHK flat interior design located at a prime location of the city as compared to one located on the outskirts. The same principle applies to 4BHK home designs as well. Geographical location plays a significant role in determining overall cost, which emphasizes the importance of considering location-specific factors when estimating the expenses involved in your project.

          2. 4bhk house plan size

          4bhk-house-plan-size

          In the area of ​​4BHK house designs, it is a matter of simple maths – the bigger the area, the higher the cost. A spacious 4BHK layout requires more raw material and labour, thereby increasing the overall expenditure. It is important to note that the size directly impacts the cost of 4bhk house designs.

          3. Structural Changes in 4 BHK House Design

          Let’s imagine a scenario where you acquire an under construction 4bhk flat design located in the bustling center of the city. The layout appears ideal, but one requirement is missing—the desire for an open kitchen. However, at this stage of construction, with the walls already erected, modifying the structure to accommodate an open kitchen incurs additional costs. The builder can make the requested changes, but at a cost. This example highlights how a structural change can affect the overall cost of a project, emphasizing the importance of considering such factors when making design decisions.

          When it comes to structural changes to interior design, a variety of modifications can be made, from knocking down walls to replacing units or implementing carpentry changes during a home renovation. Typically, the average cost of such changes falls between ₹80 to ₹100 per change. However, it is important to note that the actual cost varies depending on the specific needs and characteristics of the location. If the wall involves significant civil work or complex modifications, the cost is likely to increase accordingly.

          4. Electrical work for 4bhk flat design and villa design

          Electrical-work-for-4bhk-flat-design-and-villa-design

          When it comes to electrical wiring in India, the average cost is around ₹250 per square foot. However, this cost can vary depending on a number of factors, including the number of electrical points required and the extent of renovation required, especially in the case of older homes. These factors are important to consider because they can contribute to an increase in the overall cost of electrical wiring over the course of your project.

          5. wall and floor treatment

          wall-and-floor-treatment

          When it comes to wall treatments, there are various options available, including stone cladding, wallpaper installation, painting and panelling. The cost of these treatments fluctuates depending on factors such as the total area to be covered and the prevailing market rates. Keeping in mind the current market standards, here is a brief overview of their estimated costs:

          Wall treatmentCost per sq. ft.
          Stone cladding₹50 to ₹700
          Wallpaper₹2,000 to ₹20,000
          Painting₹12 to ₹80
          Panelling₹500 to ₹1800
          In India, floor treatments play an important role in interior design and can make a notable impact on your budget. Tiling is a common choice, and the cost includes not only the initial installation but also ongoing maintenance. The type of flooring material you choose can greatly affect overall expenses. From lavish options like marble to more cost-effective options like stone, you have the flexibility to adjust this aspect according to your budgetary considerations. By carefully evaluating your preferences and exploring different flooring options, you can strike a balance between aesthetics, durability and financial feasibility.

          6. Modular vs custom carpentry

          With all the selections made and the interior design of your flat or villa nearing completion, it is now time to turn your attention to the carpentry work. An important decision before you will be whether to choose a modular design or opt for customized carpentry. If you choose to have your carpentry customized, it’s important to be prepared for the associated costs. While personalized carpentry can bring a unique touch and meet your specific needs, it often requires an additional financial investment. Balancing your budget and design preferences will be essential when evaluating the best approach for your project.

          Modular designs offer a cost-effective solution when it comes to furniture for your interiors. These furniture pieces are manufactured using predetermined units and are assembled on-site, resulting in lower costs than custom designs. However, the quality of the end result also depends on the expertise of the carpenter you choose to hire. While contractors typically charge less than interior designers, their services may come with limitations in terms of material and finish options.

          At dpodstudio, we take a different approach. We utilize mechanized, precision manufacturing techniques to create impeccable interiors that meet your exact specifications. With us, you’ll have access to a wide range of finishes and materials, giving you more options to bring your vision to life. By combining affordability with superior craftsmanship and a wide selection of options, we strive to give you the best of both worlds.

          7. Finishes and Materials Used in 4BHK Home Design

          While considering the cost estimate for 4BHK flat interior design, it is necessary to account for the expenses associated with materials and finishes. This aspect plays a vital role in shaping the overall aesthetic and quality of your carpentry work, which ultimately influences the final look of the interior design of your flat or villa. With so many materials and finishes available on the market, it is important to understand the options and their associated costs. To provide you a starting point, here is a summary of popular materials and finishes for storage cabinets and furniture, along with approximate costs. This will help you make an informed decision and plan your budget accordingly.

          MaterialsCost per square ft.
          Plywood₹70 to ₹160
          MDF₹30 to ₹200
          Blockboards₹90 to ₹140
          Particle Board₹30 to ₹70
          FinishEstimated cost per sq. ft.
          Laminate₹60 to ₹200 (or higher)
          Veneer₹150 to ₹350 (or higher)
          Membrane₹120 to ₹500
          Acrylic₹120 to ₹460 (or higher)
          While the previously mentioned materials and finishes serve as a foundation for kitchen cabinets and storage units, there are additional options to be explored for kitchen countertops, polishes, and floors, which can further affect your overall budget. These elements contribute to the aesthetics, functionality, and durability of your home. From luxurious countertop materials to premium flooring options, the choices you make in these areas can affect the overall cost of your project. It is important to carefully consider these factors and strike a balance between your design preferences and budgetary constraints in order to create a harmonious and cost-effective living space.

          8. Purpose of the 4BHK Interior Design

          Purpose-of-the-4BHK-Interior-Design

          Every homeowner has his or her own distinct preferences when it comes to the interior design of their flat or villa. While the design should suit your needs and lifestyle, there are some general considerations that many homeowners prioritize. These include making the most of space, creating a functional layout, incorporating adequate storage solutions, ensuring proper lighting and ventilation, choosing appropriate color schemes, and integrating aesthetic elements that reflect personal style. By understanding your specific preferences and working closely with a professional designer, you can bring your vision to life and create a personalized living space that truly enhances your daily living experience.

          • Space Optimization and Storage: Indians have a penchant for storage, and homeowners often prefer adequate storage solutions in their modern villas or flat designs. Designers need to give careful consideration to incorporating enough storage spaces to accommodate the homeowners’ belongings, thereby ensuring a functional and organized living environment.
          • Luxury interiors: For some homeowners, creating a luxurious interior is a priority in their design aspirations. This pursuit of opulence often involves the use of high-end materials and premium products, increasing the overall cost of an interior project. By prioritizing luxury, homeowners can enhance the aesthetic appeal and create a truly opulent living space that reflects their refined taste and style.
          • Residence of family members: The design and layout of the interiors have been intricately crafted to accommodate the specific needs and requirements of the family living in the house. The number of family members plays an important role in determining the space required within the house. For example, a small family may find two bathrooms sufficient, while a large family may require an additional bathroom to ensure convenience and comfort for all. By considering family size and dynamics, interior designers can optimize the functionality and utility of living spaces, while promoting a harmonious and comfortable environment for all occupants.
          • Pet-friendly: Creating pet-friendly interiors is a great way to ensure the comfort and well-being of our beloved furry companions. Designing with pets in mind involves paying extra attention to certain details and considerations. For example, incorporating durable and pet-friendly materials that are resistant to scratches or stains can help maintain the aesthetics of the space. Designating designated areas for pet beds, feeding stations, and toy storage can add to organization and convenience. Additionally, ensuring proper ventilation, easy-to-clean surfaces, and strategic placement of furniture to accommodate pet movement and activities are important aspects of pet-friendly interior design. By adopting these ideas, we can create a harmonious living environment that meets the needs of both our human and animal family members.

          9. Themes or Styles in the 4BHK Home Design

          The choice of style for your flat or small villa design can have a significant impact on the overall cost. Different styles have different requirements and complexities, which can affect the budget. For example, choosing a Scandinavian or minimalist style often involves a focus on simple design and functionality, resulting in relatively low costs. On the other hand, a home with a colonial or vintage theme may require more custom carpentry and intricate furniture designs, which can increase the expense. Additionally, maintaining the authenticity of a vintage theme may involve using premium finishes such as membrane finishes, which are more expensive than laminates. Considering these factors can help you make an informed decision about the style of your home while managing your budget effectively.


          Room-by-Room Cost Details of 4BHK Home Design

          To effectively plan the interior design of a 4BHK flat or a small villa, it is beneficial to consider a basic cost breakup for each room. Although these essentials are important, you can always incorporate additional luxury elements depending on your budget and personal preferences. By understanding the basic needs and customizing them to suit your desired comfort and style, you can create a well-balanced and personalized living space that meets your needs.

          1. A simple foyer for 4BHK interior design

          2024 Interior designer in Ahmedabad

          While designing the foyer of your 4BHK flat or small villa, it is essential to consider the inclusion of a shoe cabinet. The cost of a shoe cabinet will depend on factors such as the material, the finish, and the labor involved. Additionally, the size of the cabinet will also affect the price. For example, a single-door shoe cabinet can range from around ₹7,000 to ₹30,000 for a custom design. By choosing the right shoe cabinet to suit your budget and design preferences, you can create an organized and functional entryway for your home.

          2. Beautiful Living Room and 4BHK Flat Interior Design for Villa

          Elegant-Living-Room-for-Villa-and-4BHK-Flat-Interior-Design

          When it comes to designing the living room of your 4BHK flat or small villa, there are several essential elements to consider. These include a comfortable sofa, a functional coffee table, and a stylish TV unit. Many homeowners also opt for wall treatments to enhance the overall aesthetics of the space. On average, the cost of a living room design can vary greatly, from around ₹3,00,000 to ₹10,00,000. Of course, you can customize the design and include additional elements based on your budget and personal preferences. By carefully selecting the right furniture, accessories, and decor, you can create a beautiful and inviting living room that reflects your unique style.

          3. Simple or luxurious dining space in 4BHK home design

          Simple-or-luxurious-dining-space-in-4BHK-home-design

          When it comes to designing the dining area of ​​your 4BHK flat or small villa, the possibilities are endless. This can range from a simple dining table setup to a fully decorated space with wall furnishings, treatments, and special lighting. Dining area budgets can vary greatly and cannot be accurately estimated without discussing your specific needs and design vision with your designer. By collaborating closely with your designer and sharing your preferences, you can create a dining area that’s a perfect fit for your style, needs, and budget.

          4. kitchen cost estimate of 4bhk house design

          kitchen-cost-estimate-of-4bhk- house-design

          When it comes to the cost of designing a kitchen for your 4BHK flat or small villa, there are several factors to consider. The choice of countertop material, finish, cabinet material, and backsplash can significantly affect the overall cost. Additionally, the size of the kitchen and your personal preferences play a role in determining expenses. It is advised to discuss your specific requirements and design preferences with your designer to get a more accurate estimate of kitchen cost that suits your project.

          5. A luxury master bedroom for your village or 4bhk flat design

          A-luxury-master-bedroom-for-your-village-or-4bhk-flat-design

          Personalization and comfort are key considerations when it comes to designing the master bedroom in your 4BHK flat or small villa. With essential elements such as a bed and wardrobe, the cost of a master bedroom can vary based on personal preferences. Beds can be customized or bought from shops, with prices varying accordingly. Wardrobe in India typically ranges between ₹20,000 to ₹80,000 depending on factors such as size, design, and material. It is advised to explore the various options and consult your designer to find the best option that suits your budget and desired aesthetics.

          6. Unique kid’s room

          Unique- kid's-room

          Designing the kid’s room in your 4BHK flat or small villa involves considering their growing needs and preferences. It’s important to create a space that allows for play and flexibility. Many homeowners choose vibrant and eye-catching colors to encourage creativity. Along with essential elements such as wardrobe storage, a study unit, and a bed, the cost of a kid’s room design can vary depending on factors such as the quality of materials, customization, and additional decor items. Striking a balance between functionality, safety, and budget is recommended to create a joyful space that will grow with your child.

          7. A minimalist guest bedroom

          A-minimalist-guest-bedroom

          Guest bedrooms in Indian homes often prioritize simplicity and versatility to accommodate visitors of different age groups. It is common for these places to adopt a minimalist approach. Essential elements such as comfortable beds and functional wardrobes are usually chosen to ensure ease of use and accessibility.

          While the total cost of a guest bedroom design can vary depending on factors such as the quality of the materials and any additional features or amenities, it is important to strike a balance between functionality and cost-effectiveness in order to create a welcoming and comfortable space for your guests. It is recommended.

          8. A Balcony

          A-Balcony

          The design of the balcony may vary depending on its size and intended purpose. For those looking for a quiet place to enjoy some respite, a small and comfortable seating arrangement will suffice. However, if you envision using the balcony to host dinner parties or set up a bar, additional interior work may be necessary to turn it into a functional and attractive space. Balcony design costs can fluctuate depending on the extent of modification and material choice, so it’s important to discuss your specific needs with your designer to ensure a tailored and budget-friendly solution.

          9. Pooja room cost estimate

          Pooja-room-cost-estimate

          Incorporating a puja room into your 4BHK house plan can be budget-friendly. Pooja rooms in India can generally be built within a reasonable cost range, starting from less than a lakh. Depending on your preferences, you have the flexibility to design a minimalist puja room or add intricate latticework to enhance its aesthetic appeal. With careful planning and consultation with your designer, you can create a calming and spiritual space that suits your budgetary constraints.


          The cost difference between a new home and a renovation

          When discussing new home costs, it’s important to consider the potential variations when it comes to renovation projects. Resale value plays an important role in determining whether investing in interiors will increase the value of your property. If the answer is negative and the interior refurbishing will not significantly increase the resale value, then undertaking an extensive interior renovation may not be a viable option. Evaluating the potential return on investment and consulting real estate experts can help you make an informed decision about the feasibility of the interior renovation of your home.

          Renovating an existing home can be challenging, especially if you already live in it. Civil work cost can also be an important factor to consider. However, if your home is worth the effort, opting for renovation can provide a cost-effective way of enjoying a fresh flat or villa design. With the ability to customize the design, this can be a more cost-effective option than buying a new property.

          We hope this guide has provided you with the required information to estimate the cost of your 4BHK. If you are interested in finding out the budget for 3BHK, we at dpod studio have compiled specific interior design cost information for 3BHK apartments. To gain further confidence in our services, you can browse our portfolio of previous interior projects showcasing our expertise and creativity. If you have any inquiries or need assistance with your interior requirements, please do not hesitate to contact us. We look forward to cooperating with you!


          In conclusion, as you embark on your journey to create a beautiful as well as functional living space, we hope that the information provided by dpod studio, a reputed interior design company in Ahmedabad, helps you in understanding the various factors involved in a design and Has been helpful in understanding the costs. 4BHK Flat or Small Villa. From assessing the location and size of the property to considering structural changes, electrical wiring, wall treatments, and furniture options, every aspect plays an important role in shaping your dream home.

          At dpod studio, we understand the importance of personalized and thoughtful designs that suit your preferences and lifestyle. Our team of experienced designers is dedicated to bringing your vision to life while considering your budgetary constraints. We take pride in offering tailored solutions, whether you prefer modular furniture or customized carpentry work, ensuring that every detail is carefully planned and executed.

          With a focus on providing exceptional client satisfaction, dpod studio invites you to explore our portfolio of past interior projects showcasing our expertise and creativity. We value our customers’ feedback and encourage you to share their experiences, as we believe their testimonials speak volumes about the quality and professionalism of our services.

          dpod studio is here to guide you every step of the way as you embark on your interior design journey. Our team is committed to providing innovative and functional designs that transform your living space into a true reflection of your personality and style. Contact us today to discuss your interior design needs and let us create a space that exceeds your expectations.

            Ultimate-Guide-to-Room-Interior-Design-for-Bedrooms-Creating-Your-Dream-Sanctuary

            2023 Ultimate Guide to Room Interior Design for Bedrooms: Creating Your Dream Sanctuary

            Discover the ultimate guide to room interior design for bedrooms, and learn how to create your dream sanctuary with expert tips and inspiration.

            Ultimate-Guide-to-Room-Interior-Design-for-Bedrooms-Creating-Your-Dream-Sanctuary

            Design for Bedrooms Layout and Space Optimization

            When it comes to bedroom layout and space optimization, there are several important factors to consider. Here are some tips and ideas to help you make the most of your bedroom:

            • Assess Your Needs: Before planning the layout, consider how you will use the bedroom. Consider the furniture you’ll need, storage needs, and any specific activities you’ll be doing, such as reading or working.
            • Bed placement: The bed is usually the most significant piece of furniture in the bedroom, so start by deciding where to place it. Ideally, place it against a solid wall away from doors and windows to create a cozy and relaxing environment.
            • Functional Furniture Arrangement: Arrange your furniture to optimize functionality and flow within the room. For convenience, place nightstands or bedside tables on either side of the bed. If you have enough space, add a small desk or vanity for added functionality.
            • Use Vertical Space: Maximize your storage options by using vertical space. Install shelves or wall-mounted cabinets to keep items off the floor and create a sense of openness. Make use of the space under the bed by using storage containers or choosing a bed frame with built-in drawers.
            • Multi-Purpose Furniture: Consider using multi-functional furniture pieces to save space. For example, choose a bed frame with a headboard that includes storage shelves or a built-in desk. A folding desk can double as a workspace during the day and fold away when not in use.
            • Lighting Choices: Proper lighting can enhance the ambiance and functionality of the bedroom. Use a combination of ambient, task and accent lighting to create a layered effect. Use wall sconces or pendant lights instead of table lamps to free up space on the surface.
            • Mirror placement: Mirrors can make a small room appear larger by reflecting light and creating the illusion of depth. Place a full-length mirror on one wall or consider a mirrored closet door to add visual space.
            • Closet Organization: Keep your closet tidy to maximize storage efficiency. Use hanging organizers, shoe racks, and drawer dividers to optimize space. Consider removing unnecessary items or using under-bed storage for out-of-season clothing.
            • Window treatments: Choose window treatments that allow maximum natural light to enter the room. Choose light and airy curtains or blinds that can be easily opened during the day. This helps create an open and spacious feel.
            • Declutter and Simplify: Lastly, declutter your bedroom and keep only the essentials. A clutter-free space instantly feels more open and peaceful. Evaluate your belongings regularly and donate or discard items you no longer need or use.

            Remember, every bedroom is unique, so adapt these tips to suit your specific space and personal preferences. Experiment with different layouts and furniture arrangements until you find one that maximizes functionality and creates a harmonious environment in your bedroom.

            Designing a bedroom layout that maximizes space utilization

            Designing a bedroom layout that maximizes space utilization is essential, especially in small bedrooms. Here are some tips to help you optimize your bedroom space:

            • Assess your needs: Before planning the layout, assess how you use your bedroom and identify your specific needs. Consider factors such as sleeping, getting dressed, storage, and any additional activities you want to accommodate in the space.
            • Scale your furniture: Choose the right size of furniture that suits the dimensions of your room. Avoid oversized or bulky pieces that can make the space feel cramped. Choose compact furniture with clean lines.
            • Bed Placement: The bed is usually the focal point of the bedroom. Place it against a wall to free up space in the center of the room. To maximize functionality consider a bed frame with built-in storage options such as drawers or shelves.
            • Use vertical space: Use vertical space in your bedroom. Install tall bookshelves, floor-to-ceiling closets, or wall-mounted cabinets to take advantage of the height. Use these storage solutions to keep items off the floor and maximize storage potential.
            • Multifunctional Furniture: Incorporate multifunctional furniture pieces that serve dual purposes. For example, choose nightstands with drawers or shelves, or a desk that can also serve as a vanity. This allows you to make the most of limited space.
            • Consider wall-mounted solutions: To save floor space, consider wall-mounted options for storage and decor. Install floating shelves, wall-mounted lights, or hanging organizers to keep items within reach while keeping the floor clear.
            • Use mirrors strategically: Mirrors create the illusion of space and reflect light, making a room seem larger. Install a large mirror on one wall or use mirrored closet doors to enhance the feeling of openness.
            • Optimize Closet Space: Organize your closet effectively to maximize storage potential. Use space-saving hangers, hanging organizers, and closet dividers to make use of every inch. Consider adding additional shelves or drawers to make the most of the available space.
            • Streamline Technology: Minimize the presence of technology in the bedroom to create a more serene and spacious environment. Hide cords and cables, and opt for a wall-mounted TV or compact entertainment unit to save floor space.
            • Create a functional layout: Consider the flow and movement within the room. Make sure you have enough room to navigate comfortably. Arrange furniture in a way that allows easy access to essential areas such as the bed, closet, and any work or seating areas.
            • Keep it organized: Clean your bedroom regularly and keep surfaces clear of unnecessary items. Implement storage solutions such as bins, baskets, and drawer dividers to maintain an organized space.

            Remember, optimizing space use in a bedroom requires thoughtful planning and strategic furniture placement. Adapt these tips to suit your specific needs and the dimensions of your room. By making efficient use of the available space, you can create a functional and comfortable bedroom.

            Small bedroom design tips and tricks

            • When it comes to designing a small bedroom, it’s important to maximize the available space and create the illusion of openness. Here are some tips and tricks to help you make the most of your small bedroom:
            • Optimize the layout: Consider the most efficient layout for your bedroom. Place the bed against the longest wall to create a sense of depth and free up floor space. Avoid closing windows and doors to maintain an open feel.
            • Use light colors: Light colors, such as white, cream, and pastels, can make a small space appear larger and brighter. Choose a light color scheme for your walls, bedding, and furniture to create an airy atmosphere.
            • Use vertical space: Take advantage of vertical space in your bedroom by incorporating floor-to-ceiling shelves or tall storage units like wardrobes. This allows you to maximize storage while minimizing your footprint.
            • Mirrors: Mirrors can create the illusion of more space by reflecting light and giving the impression of depth. Consider placing a large mirror in front of a window to maximize the effect.
            • Clever Storage Solutions: Check out creative storage solutions to keep your small bedroom organized. Use under-bed storage containers, wall-mounted shelves, hanging organizers, and hooks to maximize storage without taking up valuable floor space.
            • Reduce visual clutter: Keep your bedroom clutter-free by reducing the number of decorative items and opting for a clean and uncluttered design. Use baskets or bins to stash items that would otherwise contribute to a cluttered look.
            • Use lighting strategically: Adequate lighting can make a small space feel more open and inviting. Opt for a combination of ambient, task, and accent lighting to create a well-lit and comfortable environment. Consider using wall sconces or pendant lights to free up bedside table space.
            • Keep window treatments minimal: To maximize natural light and maintain openness, choose window treatments that are lightweight and minimal. Translucent curtains or blinds that can be fully opened during the day are ideal.
            • Go for vertical decor. Decorate your walls with vertical elements to draw the eye upward and create the illusion of height. Use tall artwork, vertical stripes, or a floor-to-ceiling wall mural to add visual interest.
            • Embrace vertical decor: Decorate your walls with vertical elements to draw the eye upward and create the illusion of height. Use tall artwork, vertical stripes, or a floor-to-ceiling wall mural to add visual interest.

            Remember, the key is to keep things simple, organized, and clutter-free. By applying these tips, you can turn your small bedroom into a functional and visually appealing space.

            Creative storage solutions for bedrooms

            When it comes to bedroom storage solutions, creativity can go a long way in maximizing space and keeping your belongings organized. Here are some creative storage ideas for bedrooms:

            • Use under-the-bed storage: Invest in storage containers or drawers that fit under your bed. This often-under-utilized space can be perfect for storing extra linens, off-season clothing, shoes, or even books.
            • Install a Wall-Mounted Pegboard: A pegboard can be a versatile and customizable storage solution. Install it on a wall and use hooks and pegs to hang and organize items like jewelry, hats, scarves, or even small shelves to display decorative pieces.
            • Use the space behind the door: Attach hooks or an over-the-door organizer to the back of your bedroom door. This can be a great place to hang coats, bags, belts, or other accessories.
            • Use vertical wall space: Install floating shelves or wall-mounted cabinets to store books, decorative items, or folded clothing. Vertical wall space is often overlooked but can provide ample storage without taking up valuable floor space.
            • Select a storage ottoman or bench: Choose a storage ottoman or bench for the foot of your bed. These pieces of furniture not only provide seating but also hidden storage space for extra blankets, pillows or clothing.
            • Hang a clothes rod: If you have limited space, consider installing a clothes rod on an empty wall. Hang your frequently worn or favorite clothing on the rod for easy access and a visually appealing display.
            • Use baskets, bins, and containers: Incorporate decorative baskets, bins, or containers on shelves or inside closets to corral smaller items and reduce clutter. Label them for easy identification and access.
            • Install a bookshelf headboard: If you have a small bedroom and limited space for a bedside table, opt for a bookshelf headboard. It provides storage for books, a lamp, an alarm clock, or other items you like to have close at hand.
            • Build a vanity or desk with storage: If you need a vanity or desk in your bedroom, choose one with built-in drawers or shelves to neatly store makeup, office supplies, or other essentials.
            • Consider a wall-mounted folding desk: For those with limited space, a wall-mounted folding desk can provide a functional workspace without taking up valuable floor space.

            Remember, creativity and customization are key when it comes to storage solutions. Assess the layout of your bedroom and your specific storage needs to find the best solution that works for you.

            Color Schemes and Themes for Bedroom Interiors

            Color-Schemes-and-Themes-for-Bedroom-Interiors

            Choosing the right color scheme for your bedroom is important as it sets the tone and ambiance of the space. Additionally, exploring different bedroom themes can help you create a cohesive and visually appealing design. Here are some tips for selecting color schemes, researching themes, and incorporating colors to evoke specific moods in your bedroom:

            Choosing the right color palette for your bedroom

            • Consider your preferences. Start by considering the colors you personally like and find comfort in. Your bedroom should be a place that reflects your taste and makes you feel comfortable.
            • Think about ambiance: Different colors create different feelings and can affect the atmosphere of a room. For a calm and serene atmosphere, choose soft and muted colors such as pastels, neutrals, or cool blues and greens. For a more energetic and vibrant feel, consider warm and bold colors like red, orange or yellow.
            • Evaluate natural light: Take into account the amount of natural light your bedroom receives. If it’s a well-lit room, you can experiment with darker or bolder colors. In rooms with limited natural light, light colors can help make the space feel more open and airy.
            • Create a harmonious color scheme: Choose a primary color and then complement or similar colors to create a harmonious palette. Consider using the 60-30-10 rule, where 60% is the dominant color, 30% is the secondary color, and 10% is the accent color.

            Exploring different bedroom themes and their impact on the overall design

            • Minimalist: A minimalist theme focuses on simplicity, clean lines, and a clutter-free environment. Stick to a neutral color palette with white, beige, or gray as the primary colors. Keep furniture and decor to a minimum, emphasizing functionality and simplicity.
            • Scandinavian: Scandinavian design embraces natural elements, light colors, and a relaxing atmosphere. Use a combination of white, gray and light wood tones. Incorporate natural textures and add pops of color through accessories or artwork.
            • Bohemian: Bohemian or boho style is characterized by vibrant colors, patterns, and an eclectic mix of textiles and accessories. Use a variety of warm and earthy colors such as terracotta, ochre, and navy blue. Try layering different patterns and textures for a rich and eclectic look.
            • Coastal: The coastal theme evokes a relaxed and beachy feel. Opt for a color palette inspired by the ocean, such as shades of blue, white, sandy beige and soft green. Incorporate natural materials like rattan or driftwood for furniture and decor.

            Incorporating Colors to Evoke Specific Moods in the Bedroom:

            • Calm and Relaxing: Choose soft and cool colors like pastel blues, greens and lavender. These colors can promote relaxation and create a calming atmosphere in your bedroom.
            • Cozy and warm: Warm colors such as earthy brown, deep red, or warm gray can create a cozy and inviting environment. Pair them with soft lighting and plush textures to enhance the cozy feel.
            • Energizing and Lively: If you want to have a vibrant and energizing atmosphere, choose vibrant colors like bright red, orange, or yellow. These colors can add a sense of energy and vibrancy to a space.
            • Balanced and Neutral: Neutral colors such as white, beige, and gray create a calm and balanced environment. They provide a versatile backdrop that allows you to add pops of color through accessories or artwork.

            Remember, the color choice and theme should suit your personal style and preferences. Experiment, get inspired, and choose colors and themes that make you feel comfortable and reflect the mood you want to create in your bedroom.

            Furniture Selection and Placement

            When it comes to the selection and placement of furniture in the bedroom, there are several important things to keep in mind. Here are some tips to help you choose the right pieces and arrange them in a functional and aesthetically pleasing way:

            Essential bedroom furniture pieces and their functions

            • Bed: The bed is the centerpiece of the bedroom and should be chosen to keep in mind the comfort and size. Consider available space and your personal preferences for bed size (eg, twin, full, queen, king). Select a mattress that provides adequate support and a bed frame or headboard that complements the overall style of the room.
            • Wardrobe/wardrobe: A wardrobe or closet is essential for keeping clothes and accessories. Consider the size of your wardrobe needs and choose a piece that offers ample storage space. If space is limited, consider a wardrobe with built-in storage solutions such as drawers or shelves.
            • Dresser/chest of drawers: A dresser or chest of drawers provides additional storage space for folded clothing, undergarments and accessories. Choose a size and style that complements the overall design of the room while meeting your storage needs.
            • Bedside Table/Nightstand: Bedside tables or nightstands are functional and decorative pieces that provide an essential surface for lamps, books, alarm clocks, and other nighttime items. Select tables that are proportionate to the height of your bed and provide ample storage with drawers or shelves.

            Tips for Selecting the Right Bed, Wardrobe, and Bedside Tables:

            • Consider the available space: Measure your bedroom to determine how much space you have for furniture. This will help you choose appropriately sized pieces that fit comfortably without overcrowding the room.
            • Assess Storage Needs: Assess your storage needs for clothing, accessories and other items. Choose a wardrobe and dresser with ample storage capacity to keep your bedroom organized and clutter-free.
            • Style and Aesthetics: Choose furniture pieces that match the overall style and theme of your bedroom. Consider materials, finishes and design details that complement your desired aesthetic.
            • Quality and Durability: Invest in well-made furniture that is built to last. Look for sturdy construction, quality materials, and fine craftsmanship to ensure durability and longevity.

            Arranging Furniture to Create a Functional and Aesthetically Pleasing Bedroom:

            • Start with the bed: Place the bed in a central and visually appealing position, usually against the longest wall or opposite the door. Make sure there is enough space on either side for bedside tables or nightstands.
            • Balance and symmetry: Aim for symmetry and balance when arranging furniture. Place matching bedside tables or nightstands on either side of the bed to create a cohesive and visually pleasing look.
            • Create functional areas: If space allows, consider creating specific functional areas within the room. For example, place a dresser or chest of drawers near a closet to create a dressing area. Integrate a seating area with a comfortable chair and small table for relaxation or reading.
            • Allow movement: Leave enough space between furniture pieces for easy movement and access. Make sure there is a clear path around the bed and other furniture, so you can move freely within the room.
            • Consider natural light and views: Arrange furniture to take advantage of natural light and any desirable views from windows. Place a seating area or reading nook near windows to enjoy outdoor views and maximize natural light.
            • Consider traffic flow: Arrange the furniture in a way that allows a smooth flow of traffic within the room. Make sure doors, windows, and closets are easily accessible without obstruction.

            Remember, personal preference and the specific layout of your bedroom should guide your furniture selection and placement decisions. Experiment with different arrangements to find the configuration that best suits your needs and creates a comfortable and visually pleasing bedroom environment.

            Lighting and Ambiance

            Proper lighting is essential to create a comfortable and attractive ambiance in the bedroom. It not only serves functional purposes like providing adequate lighting for various activities but also plays a vital role in setting the mood and ambiance. Here’s a breakdown of the importance of proper lighting, the different types of light fixtures, and tips for creating a comfortable and relaxing atmosphere in your bedroom:

            Importance of Proper Lighting in the Bedroom:

            • Task Lighting: Proper lighting allows you to perform specific tasks like reading, getting dressed or working on a laptop more comfortably and efficiently.
            • Ambient Lighting: This sets the overall mood and provides a general level of illumination throughout the room, creating a welcoming atmosphere.
            • Accent Lighting: By highlighting specific areas or items, accent lighting adds depth and visual interest to a bedroom, enhancing its aesthetic appeal.

            Different Types of Lighting Fixtures and Their Role in Creating Ambiance:

            • Ceiling or overhead lighting: Ceiling-mounted fixtures such as chandeliers, pendant lights, or recessed lighting provide general ambient lighting and distribute weight evenly throughout the room.
            • Wall Sconces: Wall-mounted sconces are both functional and decorative. They can provide focused task lighting for reading or add a soft glow to walls, creating a relaxing atmosphere.
            • Table or bedside lamp: Bedside lamps are essential for task lighting, allowing you to read or do other activities in bed. They also add warmth and an intimate atmosphere to the room.
            • Floor Lamp: Floor lamps can serve as both ambient and task lighting. They provide a soft and diffused light that contributes to a comfortable and relaxed atmosphere.
            • Dimmer Switch: Installing dimmer switches allows you to adjust the brightness of your lighting fixtures, allowing you to create different moods and levels of illumination according to your preferences and activities.

            Creating a Cozy and Relaxing Atmosphere with Lighting Choices:

            • Soft and warm color temperature: Choose light bulbs with a warm color temperature (around 2700K to 3000K) as they emit a soft and inviting glow that promotes relaxation and comfort.
            • Layered Lighting: Combine different types of lighting fixtures to create a layered lighting scheme. Use a combination of ambient, task and accent lighting to provide flexibility and control over a room’s ambiance.
            • Indirect Lighting: Incorporate indirect or diffused lighting options such as wall sconces, uplights or string lights to create a soft and soothing glow. These types of light fixtures can help to reduce harsh shadows and create a warm and inviting atmosphere.
            • Lighting Control: Use dimmers or smart lighting systems to adjust light intensity according to your needs and mood. Diminishing brightness in the evening may signal your body to relax and prepare for sleep.
            • Consider bedside reading lights. If you enjoy reading before bed, opt for adjustable reading lights or lamps that can be easily adjusted for optimal lighting.
            • Lighting for relaxation: Incorporate lighting elements that promote relaxation, such as candles, Himalayan salt lamps, or LED light strips with warm colors. These can create a soothing and calming environment.

            Remember, lighting choices should align with your personal preferences and the desired ambiance you want to create in your bedroom. Experiment with different combinations and levels of lighting to find what works best for you in terms of comfort, functionality and relaxation.

            Window Treatments and Curtains

            Window treatments and curtains play an important role in increasing privacy, controlling natural light, and adding style to your bedroom. Here are some tips for choosing window treatments, curtains, blinds, or shades to incorporate into your bedroom design, and to strike a balance between aesthetics and functionality:

            Choosing window treatments that enhance privacy and light control

            • Privacy Considerations: Consider the amount of privacy you desire in your bedroom. If privacy is a top priority, choose window treatments that provide maximum coverage, such as blackout curtains, cellular shades, or blinds with privacy slats.
            • Lighting Control: Determine how much natural light you want in your bedroom. Sheer curtains or light-filtering shades allow soft, diffused light to enter the room while maintaining some privacy. If you prefer a darker sleeping environment, consider blackout curtains or room-darkening shades that block out most of the light.
            • Dual-Purpose Options: Some window treatments offer a combination of privacy and light control. For example, top-down/bottom-up shades allow you to adjust the position of the shade to let in light from above while maintaining privacy from below.

            Incorporating Curtains, Blinds, or Shades into Bedroom Design:

            • Curtain Style: Choose a curtain style that matches the aesthetic of your bedroom. Flowing, floor-length curtains can add a touch of elegance and luxury, while shorter curtains can create a more casual and relaxed vibe. Consider fabrics, patterns and colors that complement your overall bedroom design.
            • Layering Options: Layering curtains with blinds or shades can provide both style and functionality. Sheer curtains paired with blinds allow diffused light to enter while maintaining privacy, and heavy drapes can be added for added insulation or light control.
            • Blinds and Shades: Blinds and shades come in a variety of styles, materials, and opacity levels. Consider roller blinds, Roman shades or Venetian blinds that match the style of your bedroom and provide the desired level of light control and privacy.

            Balancing Aesthetics and Functionality with Window Coverings:

            • Consider the overall style of the room: Choose window treatments that complement the overall aesthetic of your bedroom. Choose colors, patterns and textures that complement your existing decor and contribute to the desired ambiance.
            • Choice of fabric Pay attention to the fabric of the curtain or shade. Lighter fabrics create an airy and flowy look, while heavier materials add a feeling of warmth and comfort. Consider how the texture and drape of the fabric will enhance the visual appeal of the room.
            • Functionality: Make sure your window coverings are easy to use and maintain. Consider the practicality of the window treatments chosen, especially if you’ll be opening and closing them daily. Motorized options can provide convenience and control at the touch of a button.
            • Proper Measurement and Installation: Take accurate measurements of your windows to ensure the proper fit of your chosen window treatments. Improperly sized or poorly installed window coverings can detract from the overall look and functionality.

            Remember, window treatments not only serve practical purposes but also contribute to the overall aesthetics of your bedroom. Take your time to explore the different options, consider your privacy and light control needs, and choose window coverings that enhance both the functionality and visual appeal of your space.

            Textures, Fabrics, and Accessories

            Incorporating texture, fabrics and accessories is a great way to add depth, warmth and personality to your bedroom. Here are some tips for incorporating textures and fabrics, choosing bedding, pillows and throws, and choosing accessories to complement the overall design:

            Incorporating Textures and Fabrics to Add Depth and Warmth:

            • Layering Textiles: Layering different textures and fabrics adds visual interest and warmth to a bedroom. Consider using a blend of materials such as linen, velvet, faux fur, wool, or knits. Incorporate these textures through bedding, curtains, rugs, or upholstered furniture.
            • Wall Treatments: Explore wall treatments such as textured wallpaper, wood paneling, or fabric wall hangings to create a tactile and comfortable environment. These elements can add depth and provide a unique backdrop for your bedroom.
            • Window treatments: Choose drapes or curtains made from a textured fabric such as linen, silk, or jacquard to introduce dimension and visual richness to the space. Textured window treatments can soften the look of a room and enhance its overall ambiance.

            Selecting Bedding, Pillows, and Throws to Enhance Comfort and Style:

            • Bedding Materials: Choose high-quality bedding materials that are both comfortable and visually appealing. Cotton, linen and bamboo fabrics are popular choices for bedding because of their breathability and softness. Consider thread count and choose bedding that best suits your personal preferences.
            • Colors and patterns: Select bedding in colors and patterns that complement the overall color scheme and style of your bedroom. Solid-colored bedding can provide a clean and minimalist look, while patterns and prints can add visual interest and a touch of personality.
            • Pillows and Throws: Use decorative pillows and throws to add texture, pops of color, and comfort to your bedding. Experiment with different sizes, shapes, and textures to create visual interest and achieve the desired level of comfort.

            Choosing Accessories to Complement the Design:

            • Rugs: Incorporate rugs to anchor the space and add warmth underfoot. Choose rugs with different textures and pile heights to create a comfortable and inviting environment. Consider the size and placement of the rug to make sure it complements the furniture arrangement.
            • Artwork: Select artwork that reflects your personal taste and complements the overall design of the bedroom. Consider the size, style and color palette of the artwork to create a focal point and add visual interest to the walls.
            • Mirrors: Use mirrors strategically to increase the sense of space and light in the bedroom. Mirrors can reflect natural light, visually expand the room and serve as decorative elements. Consider the frame style and placement of the mirror to complement the overall design.
            • Decorative items: Choose decorative items such as vases, candles or figurines that align with the overall style of your bedroom. These little touches can add personality and create a cohesive look.

            When incorporating textures, fabrics, and accessories, it is important to strike a balance between comfort and style. Experiment with different combinations, layering techniques, and placements to achieve a harmonious and visually appealing bedroom that reflects your personal style and provides a comfortable and inviting environment.

            Comprehensive-Guide-for-Plywood-Surface-Restoration

            Mastering Laminate Removal: A Comprehensive Guide for Plywood Surface Restoration

            Looking to remove laminate from plywood? This comprehensive step-by-step guide offers invaluable insights, tips, and tricks to help you navigate the process effortlessly. Unlock the secrets to a successful removal and restore your plywood’s natural beauty.

            Guide-to-Removing-Laminate-from-Plywood

            Introduction to laminate and its uses on plywood

            Laminate is a versatile material widely used to enhance the appearance and durability of plywood. It is a composite material made by layering multiple thin sheets of paper or fabric, impregnated with resins, and then bonded together under high pressure and heat. The resulting laminate is incredibly durable, resistant to scratches, moisture, and impact. It is commonly used in various applications on plywood, such as kitchen cabinets, countertops, furniture, and flooring. Laminate comes in a wide range of colors, patterns, and textures, allowing for endless design possibilities. Its affordability, ease of installation, and low maintenance requirements make it a popular choice for both residential and commercial projects.

            What is laminate?

            Laminate is a synthetic material composed of layers of paper or fabric impregnated with resins and fused together under high heat and pressure. The top layer is typically a clear protective layer that provides durability and resistance to scratches, stains, and moisture. Beneath the top layer, there is a decorative layer that can mimic the appearance of various materials, such as wood, stone, or metal. The core layer is made of compressed fiberboard or particleboard, which provides stability and strength. Laminate is commonly used as a surfacing material for countertops, cabinets, furniture, flooring, and wall panels due to its affordability, versatility, and durability.

            Why is laminate used on plywood?

            Why-is-laminate-used-on-plywood

            Laminate is a dynamic addition to plywood, serving multiple purposes and providing unique advantages. Its utilization of plywood surfaces encompasses both functional and aesthetic benefits. Primarily, laminate acts as a safeguard, shielding plywood from scratches, moisture, and impact, thereby prolonging its lifespan. This proves particularly valuable in high-traffic areas like kitchens or countertops. Moreover, laminate offers an array of distinctive designs, ranging from authentic wood grains to captivating stone patterns, enabling creative expression and customization. Its cost-effective nature renders the replication of natural materials viable, making it an appealing option for budget-conscious projects. Furthermore, the low maintenance and effortless cleaning requirements of laminate ensure convenience and long-lasting beauty in residential and commercial applications alike.

            Common applications of laminate on plywood

            Laminate applied on plywood finds widespread use in various applications due to its versatility and practicality. Some common applications include:

            • Kitchen Cabinets: Laminate-coated plywood is a popular choice for kitchen cabinets, providing a durable and moisture-resistant surface that withstands daily use and spills.
            • Countertops: Laminate is frequently used as a surfacing material for countertops, offering an extensive range of colors and patterns to complement different design styles while providing a resilient and easy-to-clean surface.
            • Furniture: Plywood furniture pieces, such as tables, shelves, and bookcases, often incorporate laminate for added durability and aesthetic appeal. It allows for diverse design options, including sleek modern finishes or wood grain textures.
            • Flooring: Laminate flooring on plywood is a cost-effective alternative to hardwood flooring. It replicates the appearance of wood or stone and provides a durable, scratch-resistant surface that is easy to maintain.
            • Wall Panels: Laminate-covered plywood panels are utilized for wall cladding in both residential and commercial settings. They offer a decorative element while providing protection and easy upkeep.
            • Retail Fixtures: Laminate-coated plywood is commonly used in retail environments for display fixtures, shelving units, and cash wraps, thanks to its durability and ability to withstand heavy use.
            • Exhibition Displays: Plywood laminated with vibrant and eye-catching finishes is often employed in exhibition booths and displays, allowing for customization and branding opportunities.

            The versatility of laminate on plywood enables its usage in various contexts, offering durability, aesthetic appeal, and cost-effectiveness across different applications.

            Understanding the reasons for laminate removal

            Understanding-the-reasons-for-laminate-removal

            Signs that indicate laminate removal is necessary

            There are several signs that indicate the need for laminate removal:

            • Damage: If the laminate is severely damaged, such as deep scratches, chipping, or peeling, it may be necessary to remove it. Damaged laminate not only affects the aesthetics but can also compromise the integrity of the underlying plywood.
            • Wear and Tear: Over time, laminate can show signs of wear and tear, such as fading, discoloration, or loss of gloss. If the appearance of the laminate has significantly deteriorated, removing and replacing it can restore the desired look.
            • Moisture or Water Damage: If moisture or water has penetrated the laminate and caused warping, swelling, or mold growth on the plywood, it is crucial to remove the laminate to address the underlying moisture issue and prevent further damage.
            • Loose or Lifted Edges: Laminate that has edges lifting or coming loose indicates poor adhesion. This can lead to further delamination and compromise the integrity of the surface. Removing and reapplying the laminate ensures a secure and seamless finish.
            • Outdated or Mismatched Style: If the laminate design or color is outdated or no longer matches the desired aesthetic, removal becomes necessary to update the space and achieve a cohesive look.
            • Structural Changes: During renovation or remodeling projects, when structural changes are being made to the underlying plywood, laminate removal may be necessary to accommodate the alterations and ensure a proper fit.

            It’s important to assess the extent of the issues and consult with professionals to determine if laminate removal is the appropriate course of action in each specific situation.

            Reasons for removing laminate from plywood

            There are several reasons why one might need to remove laminate from plywood:

            • Damage: If the laminate has been damaged, such as by deep scratches, cracks, or burns, it may be necessary to remove it. Damaged laminate can detract from the appearance and functionality of the surface.
            • Wear and Tear: Over time, laminate can show signs of wear and tear, including fading, discoloration, or loss of its protective finish. Removing the old laminate allows for the installation of new, fresh laminate to restore the surface’s original look.
            • Upgrading or Changing Style: When the existing laminate no longer aligns with the desired aesthetic or if you wish to update the style of the surface, removing the current laminate is necessary before installing a new laminate that better suits your preferences.
            • Adhesion Issues: If the laminate is coming loose or has poor adhesion to the plywood, it can lead to further delamination or create an uneven surface. Removing the laminate allows for proper repairs and the reapplication of a new layer.
            • Structural Modifications: During remodeling or renovations, structural changes may require the removal of existing laminate. This allows for adjustments to the plywood, such as cutting or resizing, to accommodate the modifications before reinstalling the laminate or choosing a different surface treatment.
            • Water or Moisture Damage: If water or moisture has penetrated the laminate and caused swelling, warping, or mold growth on the plywood, it is crucial to remove the laminate to address the underlying moisture issue and prevent further damage to the substrate.

            Removing laminate from plywood requires careful consideration and proper techniques to avoid damaging the plywood surface. Consulting with professionals or researching appropriate removal methods is recommended to ensure a successful process.

            Benefits of removing laminate

            Removing laminate from plywood can offer several benefits, including:

            • Restoration of the Plywood Surface: Removing the laminate allows you to restore the original appearance and condition of the plywood. It gives you a clean slate to work with, enabling you to address any underlying issues or damage that may have been hidden beneath the laminate.
            • Flexibility in Surface Treatment: Once the laminate is removed, you have the freedom to choose a different surface treatment for the plywood. This opens up a range of possibilities, such as staining, painting, or applying a new type of laminate or veneer that better suits your desired aesthetic or functional requirements.
            • Repair and Maintenance: Removing the laminate provides an opportunity to inspect the plywood for any damage, such as water or moisture issues, rot, or structural problems. You can address these issues before applying a new surface treatment, ensuring the long-term durability and integrity of the plywood.
            • Customization: Removing the existing laminate allows you to personalize the plywood surface according to your specific preferences and design goals. Whether you want to create a unique finish, showcase the natural beauty of the wood, or experiment with different textures and patterns, removing the laminate gives you the flexibility to customize the surface to your liking.
            • Cost Savings: In some cases, removing the laminate can be a cost-effective option compared to replacing the entire plywood panel. Instead of investing in entirely new materials, you can work with the existing plywood by removing the old laminate and applying a new surface treatment, achieving a refreshed look without significant expenses.

            It’s important to consider the condition of the plywood and consult with professionals or research appropriate removal methods to ensure a successful and safe process.

            Tools and materials needed for laminate removal

            Tools-and-materials-needed-for-laminate-removal

            Essential tools for the removal process

            When it comes to removing laminate from plywood, several essential tools can make the process more efficient and effective. Here are some tools commonly used:

            • Heat Gun or Hair Dryer: Applying heat helps loosen the adhesive bonding the laminate to the plywood. A heat gun or hair dryer can be used to gently warm the laminate surface, making it easier to peel off.
            • Putty Knife or Scraper: A putty knife or scraper is essential for carefully lifting and scraping off the laminate from the plywood. It helps in separating the laminate from the adhesive layer and allows for controlled removal.
            • Utility Knife or Razor Blade: A utility knife or razor blade is useful for cutting through the edges and seams of the laminate. It helps in creating initial access points for easier removal and can also be used to trim the laminate as needed.
            • Pry Bar or Crowbar: A pry bar or crowbar can assist in removing larger sections of laminate that may be firmly adhered to the plywood. It provides leverage to pry up the laminate and separate it from the surface.
            • Adhesive Remover: Depending on the type of adhesive used, an adhesive remover may be necessary to dissolve and remove any residual adhesive from the plywood after the laminate is peeled off. Follow the instructions provided with the adhesive remover for safe and effective use.
            • Safety Equipment: It is important to prioritize safety during the removal process. Wear safety goggles, gloves, and a dust mask to protect yourself from any potential debris, dust, or chemical residue.

            Remember to exercise caution while using these tools and to work slowly and carefully to avoid damaging the plywood surface. If unsure about the removal process, consulting with professionals or seeking guidance from experienced individuals can be beneficial.

            Safety equipment required

            During the removal of laminate from plywood, it’s crucial to prioritize safety and protect yourself from potential hazards. The following safety equipment is recommended:

            • Safety Goggles: Safety goggles protect your eyes from flying debris, wood chips, or adhesive particles that may be released during the removal process. They shield your eyes and help prevent injuries.
            • Gloves: Wear sturdy work gloves to safeguard your hands from cuts, scrapes, or any sharp edges while handling tools or removing the laminate. They provide grip and protect your skin from potential hazards.
            • Dust Mask or Respirator: When working with laminate removal, dust, and particles can become airborne. Wearing a dust mask or respirator helps filter out harmful particles, reducing the risk of inhaling dust, adhesive residue, or other contaminants.
            • Protective Clothing: It’s advisable to wear long-sleeved shirts and long pants to protect your skin from scratches, cuts, or potential exposure to chemicals. Avoid loose clothing that can get caught in tools or machinery.
            • Knee Pads: If you’re working on your knees during the removal process, consider using knee pads to provide cushioning and protect your knees from strain or injury.
            • Hearing Protection: If you’re using power tools, such as a heat gun or electric saw, the noise level can be loud and potentially damaging to your hearing.

            It’s important to use the appropriate safety equipment based on the specific tools and processes involved in the laminate removal. Always follow the manufacturer’s instructions for the tools and equipment used and prioritize safety throughout the entire process.

            Additional materials that can facilitate the process

            In addition to the essential tools, several additional materials can facilitate the process of removing laminate from plywood. These materials can make the removal process more efficient and help protect the surrounding areas:

            • Drop Cloths or Plastic Sheets: Lay down drop cloths or plastic sheets to protect the floor or surrounding surfaces from debris, adhesive residue, or any accidental damage during the removal process. This makes cleanup easier and prevents damage to other surfaces.
            • Adhesive Solvent or Remover: Depending on the type of adhesive used to attach the laminate, an adhesive solvent or remover may be necessary. Apply the solvent to the adhesive residue left on the plywood after removing the laminate. Follow the manufacturer’s instructions for safe and effective use.
            • Plastic or Metal Scrapers: Plastic or metal scrapers can be used in conjunction with the adhesive solvent to help remove any remaining adhesive residue from the plywood. They allow for controlled scraping without damaging the plywood surface.
            • Sandpaper or Sanding Block: After removing the laminate and adhesive residue, sandpaper or a sanding block can be used to smoothen the plywood surface and remove any remaining traces of adhesive or imperfections. Choose an appropriate grit for the desired finish.
            • Cleaning Supplies: Have cleaning supplies ready to clean the plywood surface after the laminate removal process. This can include a bucket, mild soap or cleaning solution, sponges or rags, and water for wiping down and preparing the plywood for any further treatment or refinishing.

            These additional materials help ensure a smooth and efficient removal process while minimizing potential damage and simplifying the cleanup afterward. Always follow safety guidelines and manufacturer instructions when using any materials or products.

            Step-by-step guide to removing laminate from plywood

            Step-by-step-guide-to-removing-laminate-from-plywood

            Preparing the workspace and ensuring safety

            Preparing the workspace and ensuring safety is an important aspect of any project, including the removal of laminate from plywood. Here are the steps to prepare the workspace and maintain a safe environment:

            • Clear the area: Remove any furniture, objects, or obstacles from the workspace to create a clear and spacious area for the laminate removal process. This prevents accidents and allows for easier movement during the project.
            • Ventilation: Ensure the workspace is well-ventilated by opening windows or using fans. Proper ventilation helps dissipate any fumes or odors that may arise from the adhesive or cleaning products used during the removal process.
            • Protect surrounding surfaces: Cover the floor, furniture, or any nearby surfaces with drop cloths, plastic sheets, or protective materials. This protects them from debris, adhesive splatters, or accidental damage during the removal process.
            • Secure the workpiece: If possible, secure the plywood securely to a workbench or a stable surface. This ensures stability and minimizes the risk of movement or accidents while working.
            • Wear appropriate safety gear: Put on the necessary safety gear, including safety goggles to protect your eyes from debris, gloves to shield your hands, a dust mask or respirator to filter out airborne particles, and any other protective equipment recommended for the specific task.
            • Organize tools and materials: Have all the required tools and materials within reach and well-organized. This saves time and reduces the risk of accidents caused by searching for tools or tripping over clutter.
            • Follow safety guidelines: Familiarize yourself with the safety guidelines provided by the tool manufacturers and adhere to them throughout the project. Pay attention to handling hot tools, sharp objects, and potentially hazardous materials.
            • Work in a well-lit environment: Ensure proper lighting in the workspace to have clear visibility of the area and minimize the risk of accidents due to poor visibility.
            • Have a first aid kit: Keep a first aid kit readily available in case of any minor injuries that may occur during the removal process.

            By following these steps and prioritizing safety, you can create a workspace that promotes a safe and efficient laminate removal process. Remember to exercise caution, work at a comfortable pace, and seek professional assistance if needed.

            Assessing the condition of the laminate and plywood.

            Before starting any project involving laminate and plywood, it is important to assess their condition to ensure the best results. Proper evaluation helps determine whether materials are fit for use or if they need to be repaired or replaced. Here are some steps for assessing the condition of laminate and plywood:

            • Inspect for damage: Examine the laminate and plywood carefully for any visible signs of damage such as cracks, chips, or warping. These issues can affect the overall integrity and appearance of the material.
            • Check for water damage: Moisture can cause laminate and plywood to swell or mold and rot. Watch for any signs of water damage, such as discoloration, soft spots, or a musty smell. It is important to address water damage before moving forward with any project.
            • Evaluate Adhesion: Examine the bond between the laminate and the plywood. If you see any peeling, bubbling, or loose edges, this indicates poor adhesion. This can affect the durability and life of the material.
            • Consider wear: Assess wear on the laminate surface. Scratches, stains, or fading may require refinishing or replacement depending on the severity.

            By thoroughly assessing the condition of the laminate and plywood, you can make an informed decision about their usefulness and whether any repairs or replacements are necessary.

            Techniques for removing laminate

            When it comes to removing laminate, there are several techniques you can use depending on the type of laminate and the surface it is glued to. Here are some of the commonly used techniques for removing laminate:

            • Heat and Peel Method: This method involves using heat to soften the adhesive and then peeling off the laminate. You can use a heat gun or a clothes iron on a low heat setting to apply heat to the surface of the laminate. Once the adhesive has softened, use a putty knife or scraper to carefully lift and peel away the laminate.
            • Score and Peel Method: For thicker laminates or laminates that are difficult to remove, scoring the surface can help. Use a utility knife or laminate scoring tool to make shallow cuts or scores on the laminate surface. This will allow the adhesive to release more easily when you begin to peel it away.
            • Solvent or adhesive remover methods: If the adhesive used to join the laminate is particularly stubborn, you can try using a solvent or adhesive remover. Apply solvent or adhesive remover to the edges or bottom of the laminate and let it sit for a while to soften the adhesive. Then, use a putty knife or scraper to lift and remove the laminate.
            • Steam Method: Steam can also be effective in loosening the adhesive and making the removal process easier. You can use a handheld steamer or steam iron to direct the steam onto the surface of the laminate. After steaming, gently peel off the laminate using a putty knife or scraper.

            Remember to work slowly and carefully when removing the laminate so as not to damage the underlying surface. Always wear protective gloves and goggles, and consider using a mask or working in a well-ventilated area, especially if using solvents or adhesive removers.

            Heat-based methods (using a heat gun or iron)

            Heat Gun Method:
            • Set the heat gun to the medium heat setting and plug it in.
            • Holding the heat gun a few inches from the surface of the laminate, move it in a circular motion to evenly distribute the heat.
            • Heat a small section of the laminate for about 30 seconds or until the adhesive softens.
            • Use a putty knife or scraper to lift the edge of the hot laminate.
            • Slowly peel back the laminate, applying heat as needed.
            • Repeat this process in small sections until all of the laminate is removed.
            Iron Method
            • Set the iron to a low or medium heat setting without steam.
            • To protect the laminate, place a cloth or aluminum foil over it.
            • Press the hot iron onto the fabric/foil, moving it in a circular motion for about 30 seconds to heat the laminate and soften the adhesive.
            • Use a putty knife or scraper to lift one edge of the laminate.
            • Slowly put the laminate back in, taking the heat as needed.
            • Repeat this process in small sections until all of the laminate is removed.

            Solvent-based Methods for Removing Laminate:

            Adhesive Remover Method:
            • Apply adhesive remover or solvent to the edges or underside of the laminate.
            • Use a putty knife or scraper to gently lift and peel away the laminate.
            • Apply more adhesive remover as needed and continue peeling until all of the laminate is removed.
            • Wipe the surface with a clean cloth to remove any residue.

            Mechanical Methods for Removing Laminate:

            Chisel Method:
            • Use a chisel to carefully separate the laminate from the surface underneath.
            • Insert the chisel between the laminate and the substrate and gently tap it with a hammer.
            • Slowly work your way along the edges, lifting and separating the laminate from the surface.
            • Once the laminate is loosened, continue peeling it off by hand or using a scraper.
            Saw Method:
            • Make shallow cuts or grooves in the surface of the laminate using a saw (eg, circular saw, jigsaw).
            • Use a chisel or putty knife to remove the sections of laminate between the cuts.

            Remember to take proper safety precautions when working with solvents or mechanical equipment, such as wearing protective gloves, goggles, and a mask. Work methodically and carefully to avoid any damage to the surface or yourself during the removal process.

            Tips for minimizing damage to the plywood surface.

            When removing laminate from plywood, it is important to minimize damage to the plywood surface in order to maintain its integrity and ensure a smooth transition to the next phase of your project. Here are some tips to help you minimize the damage:

            • Use gentle and controlled force. Apply moderate pressure when lifting the laminate or removing the adhesive. Avoid using excessive force, as this may cause gouges or indentations in the plywood.
            • Start at the edges. Begin removing the laminate from the edges, rather than the center. This approach allows you to work slowly and minimizes the risk of accidentally damaging the plywood surface.
            • Work in smaller sections: Break the laminate into manageable sections and focus on removing one section at a time. This approach helps maintain control and prevents the plywood from becoming overly exposed or weak.
            • Work in smaller sections: Break the laminate into manageable sections and focus on removing one section at a time. This approach helps maintain control and prevents the plywood from becoming overly exposed or weak.
            • Apply heat or solvent sparingly: Heat and solvent can soften the adhesive and make the removal process easier. However, excessive heat or the use of a solvent can damage the surface of the plywood. Use these methods sparingly and with caution, following the manufacturer’s directions or recommendations.
            • Use sharp and appropriate tools: Make sure your tools, such as a putty knife or scraper, are sharp and fit for the job. Dull or improper tools can cause more damage or leave residue on the surface of the plywood.
            • Take breaks when needed. If you encounter resistance or are finding it difficult to remove the laminate without damaging it, take a break to reevaluate your approach. Rushing the process can lead to unintended consequences.
            • Clean the surface afterward: Once the laminate is removed, clean the plywood surface using a mild cleaner and water. This step removes any remaining adhesive residue and prepares the surface for further treatment or refinishing.

            Remember, patience and caution are key to minimizing losses. Take your time, work methodically, and make plywood surface protection a priority during the laminate removal process.

            Dealing with stubborn or difficult laminate:

            Dealing with stubborn or tough laminates can present challenges during the removal process. Here are some strategies, troubleshooting tips, and alternative approaches to help you overcome these difficulties:

            Strategies for handling strongly adhered laminate:

            • Increase heat application: Apply more heat, using a heat gun or iron, to soften the adhesive. The heat helps loosen the bond between the laminate and plywood, making it easier to remove.
            • Use a putty knife or scraper. Work the edge of a putty knife or scraper under the laminate and gently pry it up. Applying controlled force and leverage with a tool can help loosen the laminate.
            • Tap lightly with a mallet. If the laminate is particularly stubborn, tap a putty knife or scraper with a rubber mallet without damaging the plywood surface.

            Troubleshooting common challenges during the removal process:

            • Leftover Residue: If adhesive residue remains on the plywood after removing the laminate, apply an adhesive remover or solvent to dissolve the residue. Follow the manufacturer’s directions and use a putty knife or scraper to gently scrape it away.
            • Damaged plywood surface: If the plywood is damaged during the removal process, assess the severity of the damage. Minor scratches or dents can often be fixed with wood filler or sanding. For extensive damage, consider replacing the affected sections of plywood.

            Alternative approaches for removing stubborn laminate:

            • Mechanical methods: If the adhesive proves exceptionally resistant, consider using mechanical methods. This may involve using a power sander with coarse-grit sandpaper to sand off the layer of laminate and adhesive. Be careful, however, not to sand too deeply into the plywood.
            • Professional Help: For extremely stubborn or challenging cases, seeking professional help from a contractor or specialist in laminate removal may be a viable option. They have the experience, specialized equipment, and techniques to handle difficult situations effectively.

            Cleaning and preparing the plywood after laminate removal:

            Cleaning and preparing the plywood after laminate removal is essential to ensuring a smooth and pristine surface for your next project. Here are the steps to follow, including the removal of residual adhesive or glue, sanding, and precautions to prevent damage:

            Removing residual adhesive or glue:

            Apply an adhesive remover or solvent specifically designed for the type of adhesive used. Follow the manufacturer’s directions for application and take your time.

            Use a putty knife or scraper to gently scrape away the softened adhesive. Work carefully to avoid scratching or scuffing the surface of the plywood.

            Wipe away the removed adhesive using a cloth or sponge dampened with water or a mild cleaner. Make sure all residues are thoroughly removed.

            Sanding and smoothing the plywood surface:

            • Inspect the plywood surface for any remaining rough patches, adhesive residue, or imperfections.
            • Use sandpaper or a power sander with medium to fine grit (eg, 120 to 220) to sand the surface of the plywood. Sand in the direction of the grain of the wood to avoid creating scratches.
            • Focus on smoothing out any irregularities or rough areas. Start with a coarser grit sandpaper and gradually switch to a finer grit for a smoother finish.
            • After sanding, wipe the surface of the plywood with a clean cloth or vacuum it to remove any dust or debris.

            Precautions to prevent damage to the plywood during cleaning:

            • Avoid using excessive moisture during cleaning to avoid water damage or warping of the plywood. Use a damp cloth or sponge instead of soaking the plywood surface.
            • Be careful when scraping off the adhesive or sanding to avoid accidentally scratching or scuffing the plywood.
            • Use a light touch and let the tools and sandpaper do the work. Apply even pressure and avoid applying excessive force.

            By following these steps and taking the necessary precautions, you can effectively clean and prepare the plywood surface after removing the laminate. This will provide a clean canvas for your next project and help ensure a professional and polished result.

            Repairing or refinishing the plywood:

            Repairing or refinishing plywood after removing the laminate can enhance its appearance and durability. Here are the steps for assessing the condition of the plywood, filling gaps or holes, and applying a new finish or protective coating:

            Assessing the condition of the plywood:

            • Inspect the plywood for any visible damage, such as scratches, dents, or gouges. Assess the overall quality and stability of the plywood.
            • Determine whether any repairs or additional preparations are needed based on the extent of the damage.

            Filling gaps or holes in the plywood surface:

            • If there are small gaps or holes in the plywood, use wood filler or putty that matches the color of the plywood.
            • Apply wood filler with a putty knife, filling gaps or holes evenly. Smooth the surface using a putty knife or the edge of a sanding block.
            • Allow the wood filler to dry completely according to the manufacturer’s directions.
            • Lightly sand the filled areas to ensure a flush and smooth surface with the surrounding plywood.

            Applying a new finish or protective coating:

            • Select an appropriate finish or protective coating depending on your desired look and the plywood’s intended use (e.g., paint, stain, varnish, or polyurethane).
            • Before applying the finish, make sure the plywood surface is clean and free of any dust or debris.
            • Follow the manufacturer’s instructions for the chosen finish or protective coating, including proper application techniques and drying times.
            • Apply thin, even coats, allowing each coat to dry completely before applying the next one.
            • Sand lightly between coats if necessary, using a finer-grit sandpaper, to achieve a smooth and even finish.
            • Once the final coat is applied and completely dry, inspect the plywood for any touch-ups or additional finishing touches.

            By assessing the plywood’s condition, addressing any gaps or holes, and applying a new finish or protective coating, you can restore the plywood’s appearance and protect it for long-term use. Always follow the product instructions and work in a well-ventilated area when applying finishes or protective coatings.

            In conclusion, this comprehensive guide has provided valuable insight into various aspects of interior design, highlighting the expertise and services provided by DPOD Studio, a respected interior design company based in Ahmedabad. Throughout the article, we have discussed key points related to interior design, stressing the importance of professional guidance and expertise while transforming spaces.

            We covered a range of topics including space planning, color schemes, furniture selection, lighting, and accessories. By following these principles, DPOD Studio ensures that each project is thoughtfully designed to reflect a client’s unique style and preferences while optimizing functionality and aesthetics.

            We encourage our readers to share their experiences or ask any other questions they may have. At DPOD Studio, we value open communication and believe in building strong relationships with our clients. We are here to address any queries or concerns you may have and guide you throughout your interior design journey.

            To further explore the world of interior design, we recommend viewing our website and portfolio, which showcase our past projects and demonstrate our commitment to excellence. In addition, there are many online resources, design magazines, and books available that can provide valuable insight and inspiration into the world of interior design.

            dpod Studio takes pride in providing exceptional interior design solutions that transform spaces into stunning, functional, and personalized environments. With our expertise and attention to detail, we aim to exceed our client’s expectations and create spaces that truly reflect their vision and style.

            So whether you are looking to revamp your home, office, or any other space, consider DPOD Studio as your trusted partner in interior design. Contact us today to discuss your project and let our team of talented designers bring your vision to life. Together, we can create places that inspire and leave a lasting impression.

            What_Influences_3BHK_Interior_Design_Cost

            Latest 2023 ᐅ Affordable 3 BHK interior design cost in Ahmedabad

            Discover the definitive guide to 3 BHK interior design costs in Ahmedabad. Explore detailed room-wise, scope of work. Find inspiration from real 3 BHK projects across various budgets, helping you create a unique and stunning interior design.

            Embark on your 3 BHK interior design costs journey with confidence! Finding the perfect designer can be daunting whether it’s a new home or a renovation project. But fear not, discover expert guidance on determining your budget and making the most of your investment for a stunning transformation that exceeds your expectations.

            Embark on a transparent interior design journey with dpod studio. Our comprehensive guide on 3 BHK internal design costs provides city-wise, room-wise, and service-wise breakdowns to help you plan your budget effectively. Explore real 3 BHK interior design costs homes across various budgets, gaining exclusive inspiration that empowers you to make informed decisions for your dream space. Trust dpod studio to create a unique and tailored design experience.

            What Influences 3BHK Interior Design Cost?

            What_Influences_3BHK_Interior_Design_Cost

            Crack the code to determine the cost of designing your 3BHK apartment. Identify the crucial factors that impact pricing, empowering you to make informed decisions about your interior design project.

            • Location: When it comes to interior design costs, cities like Ahmedabad command higher prices due to soaring real estate rates and increased expenses for materials and services. On the other hand, smaller towns like Nadiad offer comparatively lower costs. Factor in these location-based variations while budgeting for your 3BHK interior design project.
            • Size: Designing a larger 3BHK entails a higher cost. The scale and scope of the project, along with the need for more materials, furnishings, and intricate detailing, contribute to the overall expenses. Consider the size of your 3 BHK interior design costs while planning your interior design budget accordingly.
            • Valuation: In some instances, the interior design cost can be directly correlated to the property’s cost per square foot. Therefore, if your apartment comes with a higher price tag, it is likely that the interior design cost will also be higher. Keep this in mind when budgeting for your project.
            • Design Scope: The scope of your interior design project significantly influences the overall cost. Whether you’re seeking designs for your entire home or focusing on specific areas like the kitchen, the extent of work required will impact the final expenses. Consider the scope of your project to accurately estimate the cost of achieving your desired interior design goals.
            • Renovation vs New Property: Renovating a property often incurs higher interior design costs compared to designing a new property. Extensive civil changes and repair work can increase expenses significantly. Consider the scope of renovation and potential repairs when estimating the interior design cost to ensure accurate budgeting for your project.
            • Materials: The choice of materials and finishes for cabinets, furniture, and wardrobes has a significant impact on your 3BHK interior design cost. Opting for high-quality or luxurious materials can increase expenses, while more budget-friendly options can help reduce costs. Consider your preferences and budget when making material and finish selections for an optimal balance between aesthetics and cost.

            Room-Wise Breakdown: 3BHK Interior Design Packages

            Embarking on a new home design or renovation project? Unlock the essential knowledge of 3 BHK interior design costs with dpod studio. We’re committed to guiding you through the entire interior design journey, ensuring you have a comprehensive understanding of the costs involved from start to finish. Trust us to make your interior dreams a reality.

            Embark on a design journey that suits your taste, be it standard, premium, or luxurious. Explore the room-wise 3 BHK interior design costs, enabling you to plan and budget accordingly. From living spaces to bedrooms and kitchens, discover the possibilities and create a captivating home that reflects your desired style.

            RoomCost for
            Mandatory-only
            3BHK Design*
            Cost for
            premium
            3BHK Interior*
            Cost for
            deluxe
            3BHK Interior*
            Kitchen₹3,16,000 – ₹4,00,000₹3,63,000 – ₹4,00,000₹5,99,000 – ₹6,20,000
            Living Room₹2,71,190 – ₹3,19,604₹3,56,362 – ₹4,18,618₹4,44,599 – ₹5,19,459
            Dining Room₹1,200,42 – ₹1,25,307₹1,57,132 – ₹1,63,128₹1,91,040 – ₹1,98,404
            Bedroom 1₹2,72,438 – ₹2,82,220₹3,28,887 – ₹3,39,711₹4,72,031 – ₹4,85,439
            Bedroom 2₹2,72,438 – ₹2,82,220₹3,28,887 – ₹3,39,711₹4,72,031 – ₹4,85,439
            Bedroom 3₹2,72,438 – ₹2,82,220₹3,28,887 – ₹3,39,711₹4,72,031 – ₹4,85,439
            Bathroom₹71,752 – ₹89,976₹86,313 – ₹88,914₹92,339 – ₹92,513
            *Discover your personalized interior design journey with us. Please note that the costs mentioned above serve as a reference point and may vary based on factors such as your location, the scope of work, and the size of your home. Connect with our experienced designer today for a complimentary quotation tailored to your specific needs.

            Scope Details of Your 3BHK Interior Design Package

            Uncover the visual possibilities of your 3 BHK interior design costs based on your specific requirements and the scope of work involved. We provide you with a comprehensive breakdown, allowing you to envision the stunning outcome tailored to your needs. Discover the art of transforming your space with our detailed design breakdown.

            Explore cost breakdowns for 3 BHK interior design costs in both renovation and new home projects, providing insights for effective budget planning. Uncover the possibilities for your dream space:

            3BHK Interior Design Renovation Cost Breakup

            Scope of workCost Breakup*
            Detailing of
            the entire house and
            removal of existing furniture
            ₹40,000/ to ₹50,000/-
            Tiling work for
            floor and skirting work
            (cost may vary on cost of tiles)
            ₹1,80,000/- to ₹2,50,000/-
            Electrical Work₹2,00,000/- to ₹2,50,000/-
            Single bathroom renovation
            (tiles and sanitary fixtures)
            ₹1,80,000/- to ₹3,00,000/-
            False Ceiling₹80,000/- to ₹1,40,000/-
            Painting₹107,000/- to ₹1,37,000/-
            Window₹1,18,000/- to ₹2,24,000/-
            Furniture₹6,00,000/- to ₹12,00,00/-
            Curtains₹1,10,000/- to ₹1,96,000/-

            3bhk interior design cost of a new house

            Scope of workCost Breakup*
            False ceiling₹80,000/- to ₹1,40,000/-
            Painting₹95,000/- to ₹1,25,000/-
            Electrical Work₹75,000/- to ₹90,000/-
            Furniture₹6,00,000/- to ₹12,00,00/-
            Curtains₹1,10,000/- to ₹1,96,000/-
            *Discover the perfect interior design solution for your unique needs. Please note that the prices mentioned above are for reference only and may vary depending on factors such as location, scope of work, and home size. Connect with our designer today for a free quotation tailored to your specific requirements. Let’s bring your vision to life!

            How much do you need to budget for 3BHK interior design labor cost?

            Embarking on a new home design or renovating your existing one? Don’t forget to consider the labor costs involved. Typically, these costs are encompassed within the overall 3BHK interior design cost, whether it’s a minor upgrade or a significant transformation. Plan your project accordingly to ensure a comprehensive budgeting approach.

            For a clearer understanding, let’s delve into the labor costs and the scope of work involved in your project. By examining these factors, we can provide you with a comprehensive overview of the tasks at hand and the associated costs. This will ensure transparency and help you make informed decisions about your 3 BHK interior design costs journey.

            ScopePriceGST
            Painting₹8 to ₹14 Per Sft18%
            False Ceiling₹20 to ₹25 Per Sft18%
            Carpentry₹200 Per Sft for Panelling work;
            ₹400 Per Sft for the Storage Work
            18%
            Total Labour
            Costs
            ₹400 to ₹600 Per Sft18%
            Please note that the costs provided are for reference purposes only. The exact costs for your 3BHK interior design project may vary based on factors such as your location, scope of work, and prevailing demand and supply dynamics. We recommend consulting with our team to obtain a customized quotation tailored to your specific requirements.

            How Can dpod studio Help You?

            • Experience the assurance of a meticulously crafted interior design plan, accompanied by stunning 3D renders. Our team will bring your vision to life, providing you with a clear visualization of your 3BHK space before the actual implementation. Embrace the confidence of a well-designed plan that aligns with your style and preferences.
            • Rest assured, we never compromise on the quality of workmanship or materials used in your 3BHK interior design project. Our commitment to excellence ensures that no corners are cut when it comes to delivering superior craftsmanship and utilizing top-notch materials. Trust us to create a space that not only looks exceptional but also stands the test of time.
            • Count on our highly trained labor force to handle the most intricate and challenging designs and renovations with expertise. Our skilled professionals are equipped to tackle even the trickiest aspects of your 3BHK interior design project, ensuring seamless execution and exceptional results. Rest assured, your vision will be brought to life with precision and finesse.

            If you aspire to create a home that exudes timeless beauty, look no further. Embark on your interior design journey by booking an online consultation with dpod studio today. Our expert team is eager to understand your vision and transform your space into a reflection of your unique style and taste. Let’s begin the transformation together.

            Disclaimer: Please note that all information provided in this publication is accurate as of the time of publication. Costs, budgets, materials, finishes, and products mentioned, particularly those from the dpod studio catalog, are subject to change based on current market rates. For precise details regarding pricing and availability, we recommend speaking with our designer who will provide you with the most up-to-date information. Your satisfaction is our priority, and we are here to assist you every step of the way.

              FAQs

              1. Where to find top interior designers in Ahmedabad?

              You can find Ahmedabad’s top interior designers at dpod studio, Step into a world of limitless possibilities with our interior design expertise. With over 2000 successful projects under our belt and a specialization in Ahmadabad, we proudly present a diverse collection of 2000+ one-of-a-kind designs to transform your space.

              2. How much does a 3 BHK Interior Design cost in Ahmedabad?

              Embark on an extraordinary journey of interior design in Ahmedabad! Our team brings your dream 3BHK to life with prices ranging from ₹12 Lacs to ₹25 Lacs, tailored to your specific requirements, size, location, and project complexity. Let’s create something remarkable together!

              From_Ordinary_to_Extraordinary_Budget_Friendly_2BHK_Interior_Design_Costs

              Latest 2023 ᐅ From Ordinary to Extraordinary: Budget-Friendly 2BHK Interior Design Costs

              Unlocking the Secrets: 2BHK Interior Design Cost Factors and Inspiring dpod studio Homes for Budget-Friendly Interior Designs in Ahmadabad.

              Unlock the potential of your 2BHK apartment with an exhilarating interior design journey. Embrace the chance to showcase your unique style through a careful selection of colors and furniture pieces. Yet, beware of overspending without strategic planning and budgeting. Our comprehensive article outlines the crucial factors affecting the cost of 2BHK interior design and provides invaluable tips for estimating expenses. Discover how to stay within your financial limits while crafting a stunning and personalized haven. With our guidance, you can express your individuality and create an enchanting home without breaking the bank.

              What Affects the 2BHK Interior Design Cost?

              Discovering the perfect price for your 2BHK interior design journey can be as unique as your home itself. While no fixed figures exist, understanding the key elements at play empowers you to gauge the final cost. As a rule of thumb, allocating 10 to 15% of your property’s value is a good starting point. However, bear in mind that customization and specific needs may increase the budget. Delve into the intricacies of 2BHK interior design expenses and unlock the secrets to shaping your ideal space within your financial means.

              From_Ordinary_to_Extraordinary_Budget_Friendly_2BHK_Interior_Design_Costs

              #1: Size

              • Expansive Ventures, Elevated Expenses: The Cost of Interior Design Increases as the Coverage Area Widens, Taking into Account the Need for Additional Materials, Furnishings, and Detailed Planning to Transform a Larger Space.

              #2: Design scope

              • Comprehensive Transformations: Inclusive End-to-End Interiors, Encompassing Civil Work, Electricals, Plumbing, and More, Entail Higher Costs due to the Extensive Scope and Integrated Nature of the Design Process.
              • Simplified Scope, Reduced Costs: Focusing on Wardrobes, Kitchen, and Storage in 2BHK Interior Design Leads to Lower Expenses, Streamlining the Budget for a More Targeted and Cost-Efficient Design Approach.

              #3: Renovation vs New Property

              • Renovation Realities: Generally, Interior Design Costs for Renovated Homes Surpass Those of New Ones, Assuming Other Factors Remain Constant, Attributed to the Additional Efforts and Modifications Required to Transform an Existing Space into a New Vision.
              • Renovation Revelations: Demolition, Civil Changes, Plumbing Fixes, Electrical Updates, and Flooring Impact the Costs
              • Water problems: Plumbing leaks and water leaks add to costs, requiring bathroom renovations in older homes

              #4: Materials

              • Finishing Touches Matter: The Choice of Shutters and Carcass Materials Influences 2BHK Interior Design Costs
              • Acrylic: Pricier but Easy to Maintain
              • Laminate: Budget-Friendly and Durable
              • Membrane: Seamlessly Stylish With Maintenance Considerations

              #5: Designer’s fees

              • Transparent Pricing: dpod studio 2BHK Interior Design incorporates designer fees without separate charges, ensuring complete transparency. Our commitment to honesty means no hidden costs, empowering you to plan your budget confidently and enjoy a seamless design experience.
              • Clear Contrast: Market Rates are Ambiguous, Fluctuating Up to 45% from Initial Quote to Final Cost. Varied Approaches to Calculating Interior Design Expenses by Designers Can Cause Confusion and Misinterpretation, Highlighting the Importance of dpod studio Transparent and Consistent Pricing Model.

              #6: Locality

              • Urban Influence: Interior Design Costs for a 2BHK Flat Vary Based on City and Locality Factors. Regional dynamics, cost of living, availability of resources, and market demand contribute to the overall pricing structure. Understanding the geographical impact enables informed budgeting and tailored design solutions for each specific location.
              • Luxury Locale, Elevated Costs: Interior Design Expenses for a 2BHK in an Upscale Locality Reflect Higher Price Points. Factors such as prime real estate value, premium materials, and affluent aesthetics influence the overall cost. A tailored approach ensures a lavish and sophisticated design that aligns with the exclusivity of the surroundings.
              • Location Disparity: Variation of 5% to 15% in Product, Service, Raw Material, and Labor Costs Based on Different Geographic Areas. Factors like market dynamics, availability, transportation, and regional economies contribute to these variations. Recognizing the location-specific price differentials assists in accurate cost estimation and budget planning for successful interior design endeavors.

              #7: Design Preferences

              • Design Style and Complexity Drive Costs: The Choice of Interior Design Style and Level of Complexity Directly Impact the Overall Cost of 2BHK Interior Design, Tailoring the Price to Match Your Unique Vision.
              • Wooden Elegance: Embracing the Scandinavian Style with its Abundance of Wood in Interiors can Incur Higher Costs compared to Simpler Design Styles, Reflecting the Premium Quality and Craftsmanship Involved.

              How to Calculate Your 2BHK Interior Design Budget? Considering these essential cost factors

              How_to_Calculate_Your_2BHK_Interior_Design_Budget

              Unleash your unique interior vision! The cost per sq. ft. for your dream design is influenced by various factors. Check out the table below for key components to consider when calculating, but remember, the final price is tailored to your individual needs. Let your creativity thrive!

              FactorsCost Range*Notes
              Furniture₹1200 to ₹2500 per sq. ft.Unleash your creativity! To achieve a budget-friendly design, consider laminate options for the kitchen, wardrobe, paneling, and storage units. Let your unique style shine through without breaking the bank.
              FurnishingsCurtains – ₹30,000 to ₹70,000
              Sofa – Starting from ₹30,000 to ₹1,00,000
              Flooring₹175 to ₹450 per sq. ft.For wooden laminate,
              vinyl and SPC flooring
              Ceiling₹175 to ₹300 per sq. ft.Ignite your imagination with a gypsum false ceiling adorned with electrical work and light fixtures. The cost depends on the design, but incorporating laminate or wooden elements can elevate it by 20% to 40%. Craft a captivating ceiling that captures your unique style.
              Painting₹75 to ₹115 per sq. ft.The carpet area of the property
              Civil WorkBasic Civil Work – ₹50,000 to ₹1,10,000For wooden laminate,
              vinyl, and SPC flooring

              Unlock your dream 2BHK design! Please note that the prices mentioned above are exclusive of 18% GST and are estimates. Your total charges may vary based on factors like city, labor costs, materials, finishes, design intricacy, and home size. Let your personalized design journey unfold!

              Embrace the magic of design! For 600 sq. ft. to 800 sq. ft. 2BHK, here’s an estimated cost breakdown considering all design components. Let your imagination flourish within this canvas of possibilities.

              LayoutSq. Ft. RangeTotal Interior Cost (Approx)*
              2BHK600 sq. ft. to 800 sq. ft.₹700,000 – ₹15,00,000
              Please note that the interior design costs provided are for reference purposes only. The final costs may vary based on your specific requirements, home size, and location. Contact our designer today for a complimentary quote and embark on your design journey.

              Estimating 2BHK design cost with furniture finishes estimates

              Estimating_2BHK_design_cost_with_furniture_finishes_estimates

              Unlock the allure of your 2BHK interior design cost by considering furniture finishes. Discover budget-friendly options in the table below to find the perfect finish that complements your vision.

              FinishesCost Range*Scope
              SF Laminate₹1600 to ₹2000 per sheetIndulge in the elegance of alluring matte laminates, ranging from captivating solid colors to mesmerizing wooden finishes. Elevate your space with these versatile design elements, adding a touch of sophistication to your 2BHK interior.
              Glossy Laminate₹1800 to ₹3000 per sheetEmbrace the allure of glossy laminates, MR laminates, and MR+tuff, along with high gloss laminates. Elevate your design with their stunning finish options.
              acrylic laminate₹6000 to ₹9000 per sheetExplore the cost variations based on thickness (up to 2mm) and finish nature (like anti-scratch) to create your desired look.
              Veneer₹4000 to ₹14,500 per sheetDiscover the cost-efficient allure of engineered veneer, surpassing the expense of natural veneer. Dive into the captivating world of smoked veneer, where luxury meets premium pricing.
              Duco₹150 to ₹300 per sq. ft.Immerse yourself in the versatility of Duco finishes, offering captivating solid colors. For a touch of shimmer, indulge in metallic colors at an additional cost. Let your style shine through!
              PU₹250 to ₹600 per sq. ft.Discover the budget-friendly charm of clear PU finishes, offering a cost-effective option compared to solid and metallic PU alternatives. Let your design shine without breaking the bank.
              *Note that the mentioned prices are estimates and exclude 18% GST. Actual charges can vary based on city, labor, materials, design, and home size. Let’s create your unique space together!

              How Can dpod studio Help You?

              • With a track record of success, we’ve crafted exceptional designs for over 2K homes. Join our satisfied clients and let us transform your space into something extraordinary.
              • Experience the cutting-edge of design with Durability cabinets, Anti Bubble, and Aqua Bloc technologies. Our personalized 3D visuals bring your 2BHK home to life, ensuring perfection in every detail.
              • Experience peace of mind with 146 rigorous quality checks and a flat 10-year warranty*. Our 2BHK interior designs combine stunning aesthetics with long-lasting durability, ensuring your satisfaction for years to come.

              Unlock the benefits of our warranty* for select finishes on modular products. Visit https://thedpod.com/ for a comprehensive understanding of the warranty coverage and enjoy worry-free satisfaction.

              Transform your dream 2BHK home into reality with dpod studio. Book an online consultation now and embark on your design journey. Let’s create something extraordinary together!

              Curious about our customer experiences? Dive into dpod studio reviews for a firsthand glimpse into the satisfaction our clients have found working with us. Explore the details and be inspired!

              Disclaimer: Please be aware that the contents of this story were accurate at the time of publication. Costs, budgets, materials, finishes, and dpod studio catalogue products mentioned may have changed due to market fluctuations. Additionally, the showcased designs are subject to availability and may vary based on the year they were created. For up-to-date pricing and availability information, kindly consult with our designer.

                FAQs

                What factors should I consider before arriving at a 2BHK interior design cost?

                When calculating your interior design cost, factors like property size, valuation, age, materials, designer fees, locality, and design preferences play a vital role. Customize your budget and create a space that perfectly reflects your style.

                What is the cost of hiring an interior designer for a 2BHK space?

                Unlock your personalized interior design journey! The cost of hiring an interior designer is unique to each individual and can differ based on location and project scope. Let our experts tailor a design experience that fits your budget and vision.

                What is the cost of Interior Design for a 2 BHK Flat in Ahmedabad?

                Unveil the customized cost for your project! Factors such as flat size, property age, and more will influence the final expenses. Let us curate a design plan tailored to your specific needs and bring your vision to life.

                Modern_Living_Room_Interi_or_Design_That_Are_Budget_Friendly

                Latest 2023 ᐅ Modern Living Room Interior Design That Is Budget-Friendly

                Modern_Living_Room_Interior_Design_That_Are_Budget_Friendly

                Living room Interior Design should always have an aesthetic appeal. After all, it is that one space in the house where we welcome guests, spend quality time with family, or simply relax with the art of doing nothing!

                This blog brings you a gist of inspirational living room interior design ideas on a budget. From classic themes to contemporary designs, we have covered it all.

                So, without too much blabbering, let’s explore the collection of living room interior ideas.

                1. Modern Living Room Interior With Chandelier

                The most classic way to light up your living room is with chandeliers. Elegant chandeliers beautify your living space like no other. It is that one big element of the room that will make up for the allure you want. Besides fascinating chandeliers, you can opt for a gallery wall, or library ladder, or fill up the wall with artwork to spell the most of your personality. To elevate it further, you can use removable wallpapers or upholster the walls. Go for marble flooring with specific area rugs to make it look luxe and inviting!

                2. Modern Living Room With Strip Lighting

                LED strip lighting is one of the fanciest living room interior designs to go all out. A living room with strip lighting is a melange of both creativity and elegance. This modern theme for strip lighting in the living room interior design can be integrated into the TV background wall, ceiling, and around the furnishings. Apart from statement lighting, you can jazz up the space by arranging ottoman, cheerful pillows, modern art, and casual materials. It is the best interior for a house with a simple partition design for the living room and dining hall.

                3. Modern Living Room With L-Shaped Sofa

                L-shaped sofas are an ideal choice for every living room. This is a perfect way to provide a seamless finish to your living room interiors giving a more relaxed and cognitive experience. Most importantly, this theme is functional and space-efficient without taking away the aesthetic feel. When in doubt about interiors, go for an L-shaped sofa in the far corner of an Indian middle-class living room facing the TV unit. Choose the best layout, shape, fabric, and color of the sofa that adds to your wall. If you have a large living space, you can arrange the soft in the center for it to be the focal point of the living space. You can also place side tables, rugs, lighting fixtures, and artistic pieces to make it a cool and cozy ambiance overall.

                3. Modern Living Room With Wall-Molding

                One of the trendiest living room interiors is the wall POP molding design. From celebrities to affluents, you must have seen it in many houses. This style consists of contemporary wall panels to give a sense of elegance and class. The creative molding designs including wall trim, wainscoting, and dramatic ceiling cornice give your living a timeless charm without making it overwhelming. The best part about this Living room Interior Design is that it conceals gaps, cracks, and other imperfections. This molding design with a hall wall color combination for the living room makes it feel safe and exciting.

                4. Modern Living Room With Creative Paint & Art

                A brand new coat of paint on the wall followed by some artwork is a perfect way to revamp your living room. Plus, paint allows you to have great freedom of choice in terms of reflecting your personality and interior theme. From loud popping colors to muted warm tones in different shades, and architectural features, the paint offers everything to be creative in designing your living room space. The modern two-color combination of living rooms is trending.

                How Can We Help You?

                Designing an interior on your own can be a daunting task. This is where interior design professionals make the process simple, exciting, and quick.

                Ready to spruce up your living room interior with some elementary aesthetics? Dopod Studio is here to create dream homes. From the living room, and dining room, to bedrooms to kitchen interior design we have it all.

                Write to us about your thoughts and requirements on living room designs and one of our interior design consultants will reach out to you with the best.