Interior-design-cost-or-4bhk-in-Ahmedabad

Best 2023 Interior design cost for 4bhk in Ahmedabad

Discover the Interior design cost for 4bhk in Ahmedabad. Our expert designers provide tailored solutions to enhance your living space considering your budget. Take a look at pricing, trends, and trends to create a stylish and functional home. Get to know about the ideas. Contact us today. Get a personalized quote and turn your 4BHK into a dream paradise.

Interior-design-cost-for-4bhk-in-Ahmedabad

Embarking on the journey of designing a spacious abode can often lead to a feeling of bewilderment. The task of designing an awe-inspiring interior for your 4BHK abode involves many aspects including considering the costs involved in the 4BHK flat interior design process. This is mainly because of the specific requirements that come with 4BHK apartment or villa designs, which makes them different from contemporary villa designs. However, fear not! We present to you an in-depth exploration that is within reach to effortlessly calculate the expenses associated with your dream Villa House Design or 4BHK Flat Interior Design project.

Unveiling the Aesthetic Divide: Exploring Contrasts in Design Costs between a Luxurious 4BHK Flat and a Cozy 4-Room Small Villa

Are you worried about the disparities between the cost of designing a beautiful villa and a lavish 4BHK flat? Let’s get into the interesting realm of financial comparisons. In India, the average cost of building a 4BHK flat design usually ranges from ₹1,200 to ₹1,700 per sq. ft. In contrast, when stepping into the realm of 4BHK house designs, the minimum expenditure increases to ₹1,500 per sq. ft. As a result, it becomes clear that the financial outlay for the design of villas leans towards the higher end of the spectrum.

How Does a 4BHK Flat Interior Design Cut Down Costs?

How-Does-a-4BHK-Flat-Interior-Design-Cut-Down-Costs

Want to know about the cost-based benefits that await you when you choose to invest in 4BHK Flat Design? Let us look at some of the attractive benefits:

  • One of the exceptional advantages of choosing a 4BHK flat design is the pre-defined demarcation of spaces including bedrooms, kitchens, bathrooms, and others. This strategic layout not only enhances functionality but also eliminates the need of hiring an architect to create a customized 4BHK house plan. By taking advantage of these designated locations, you can save a lot on expenses, while ensuring a budget-friendly approach to your dream home.
  • When you choose a 4BHK flat, you can avail the basic facilities provided by the construction company or builder. These essential fixtures and fittings are seamlessly incorporated into your home, with the associated cost already included in the final amount. This inclusive feature ensures that you can optimize your spending without requiring additional outlay on these basics. Embrace the convenience and financial ease of a 4BHK flat, where the construction company takes care of the necessary installations, allowing you to focus on transforming your space into a personal haven.
  • Customize your new house to align with your preferences and enjoy long-term cost savings. From flooring to plumbing and electrical points, personalization empowers you to make informed decisions, improving quality and efficiency. By strategically planning these elements, you can optimize energy consumption, lower utility bills, and reduce future maintenance costs. Embrace the opportunity to create a space that reflects your style while reaping the benefits of reduced expenditure.
  • Customize your kitchen and cupboards with a few construction companies/builders, and save on cost while adding personal flair. Choose materials, layouts, and finishes to suit your vision, avoiding the need for outside contractors. Take advantage of this opportunity to build a suitable home without breaking the bank.

Why can the cost of 4-room villa interior design be high?

Why-can-the-cost-of-4-room-villa-interior-design-be-high

Owning an independent house is a dream of many individuals. As you embark on this exciting journey, it is imperative to delve deeper into the cost-based factors that require careful consideration. Let us take a look at the financial aspects that warrant your attention, paving the way for an informed and budget-conscious decision.

  • To truly unleash your vision and design the perfect home, 4BHK house plans customized by an architect are essential. This gives you complete freedom to shape your living space as per your choice. However, it is important to consider the associated costs, as architects typically charge fees ranging from ₹60,000 to ₹2,00,000 for preparing these meticulous plans. This investment ensures that your dream home becomes a tangible reality, carefully designed to suit your specific needs and aspirations.
  • Embarking on the ambitious journey of designing a 4BHK home completely on your own brings with it an added responsibility – the financial burden of sourcing construction materials. As the visionary behind every aspect of your project, you must consider the necessary materials needed and allocate funds for the construction process. From cement and bricks to flooring materials and fixtures, these expenses are an important component of making your dream home a reality. By diligently taking material costs into account, you ensure smooth progress toward turning your dreams into a tangible reality, reflecting your personal taste and style.
  • In your careful planning for 4BHK home design, it is imperative to consider various expenses associated with electrical work, plumbing, water pipes, and additional civil work. These important components play an important role in ensuring the functionality and comfort of your future home. Therefore, it is essential to allocate funds accordingly for the professional services, materials, and labor required to perform these tasks efficiently. With these expenses in mind, you can proceed with your project with financial prudence, guaranteeing a complete and harmonious living space that meets and exceeds your expectations.
  • As you embark on the construction journey of your dream 4BHK home, it is important to note that all the expenses related to the construction of the walls and pillars of the rooms are within your purview. This includes the cost of materials, labor, and any special services required to erect strong and visually appealing walls and pillars throughout your home. By taking on this responsibility, you ensure the integrity and aesthetic appeal of your living spaces, tailoring them to your unique preferences. Seize the opportunity to design a structurally sound and visually stunning home, with the cost of building the room’s walls and pillars in your capable hands.

Unraveling the Secrets of Bespoke Luxury: Decoding the Price Tag of Transforming Your 4BHK with an Interior Designer

Decoding-the-Price-Tag-of-Transforming-Your-4BHK-with-an-Interior-Designer

When it comes to determining the cost of hiring an interior designer, the answer can vary from professional to professional. However, there are essential factors to consider when calculating expenses. Let us explore some of the key aspects that contribute to the overall cost estimate:

  • The cost of interior design varies between designers. Design services alone usually range from ₹10 to ₹100 per square foot. Incorporating additional elements such as carpentry, furniture and civil work can increase the cost by ₹2,000 to ₹3,000 per sq ft. It is important to discuss your budget and requirements with your designer for a transparent and informed financial arrangement. Early communication enables effective budget planning, ensures harmonious collaboration and ensures the realization of your design vision.
  • Designers may charge a percentage of the total cost of the home, usually anywhere from 5% to 20%. This approach considers the overall project expenditure. It is important to discuss fee structures with your designer to find the best arrangement. Clarify your budget and expectations to strike a balance between design excellence and financial feasibility. Remember, designers may have different billing approaches, so open dialogue ensures a cohesive design journey.
  • In addition to service fees, designers can apply markups to project products. This markup represents a premium fee to cover the sourcing and coordination efforts. The percentage of product markup can vary, typically from 10% to 30% or more. Open discussion about markup ensures clarity on costs and helps align expectations and budget. Effective communication with your designer is essential to a balanced and mutually beneficial design experience.

Interior designers in India use a variety of charging methods, such as percentage-based fees, per square foot interior design cost, commission-based fees, or a combination thereof, depending on their preferences and project requirements. To understand the full scope and associated costs of hiring an interior designer, we recommend researching fee structures and pricing considerations. Equipping yourself with this knowledge helps in making informed decisions and finding a designer that aligns with your vision and budget, ensuring a productive and satisfying partnership.

    Factors Affecting The Cost Of 4BHK Interior Design

    On undertaking a 4BHK interior design project, the estimated cost is usually around ₹36,00,000. However, it is essential to note that this figure can fluctuate depending on a number of critical factors, including the size of the venue, the complexity of the design, the choice of materials and finishes, the scope of work involved, the extent of customization involved, Furniture selection and furnishings, electrical and plumbing requirements, hiring of additional professionals, and geographic location. Considering these factors will help you obtain a more accurate cost estimate tailored to your project needs.

    1. Location

    Factors-Affecting-The-Cost-Of-4BHK-Interior-Design

    The cost of 4BHK interior design can be greatly influenced by the location of your property. Expect to spend more for a 4BHK flat interior design located at a prime location of the city as compared to one located on the outskirts. The same principle applies to 4BHK home designs as well. Geographical location plays a significant role in determining overall cost, which emphasizes the importance of considering location-specific factors when estimating the expenses involved in your project.

    2. 4bhk house plan size

    4bhk-house-plan-size

    In the area of ​​4BHK house designs, it is a matter of simple maths – the bigger the area, the higher the cost. A spacious 4BHK layout requires more raw material and labour, thereby increasing the overall expenditure. It is important to note that the size directly impacts the cost of 4bhk house designs.

    3. Structural Changes in 4 BHK House Design

    Let’s imagine a scenario where you acquire an under construction 4bhk flat design located in the bustling center of the city. The layout appears ideal, but one requirement is missing—the desire for an open kitchen. However, at this stage of construction, with the walls already erected, modifying the structure to accommodate an open kitchen incurs additional costs. The builder can make the requested changes, but at a cost. This example highlights how a structural change can affect the overall cost of a project, emphasizing the importance of considering such factors when making design decisions.

    When it comes to structural changes to interior design, a variety of modifications can be made, from knocking down walls to replacing units or implementing carpentry changes during a home renovation. Typically, the average cost of such changes falls between ₹80 to ₹100 per change. However, it is important to note that the actual cost varies depending on the specific needs and characteristics of the location. If the wall involves significant civil work or complex modifications, the cost is likely to increase accordingly.

    4. Electrical work for 4bhk flat design and villa design

    Electrical-work-for-4bhk-flat-design-and-villa-design

    When it comes to electrical wiring in India, the average cost is around ₹250 per square foot. However, this cost can vary depending on a number of factors, including the number of electrical points required and the extent of renovation required, especially in the case of older homes. These factors are important to consider because they can contribute to an increase in the overall cost of electrical wiring over the course of your project.

    5. wall and floor treatment

    wall-and-floor-treatment

    When it comes to wall treatments, there are various options available, including stone cladding, wallpaper installation, painting and panelling. The cost of these treatments fluctuates depending on factors such as the total area to be covered and the prevailing market rates. Keeping in mind the current market standards, here is a brief overview of their estimated costs:

    Wall treatmentCost per sq. ft.
    Stone cladding₹50 to ₹700
    Wallpaper₹2,000 to ₹20,000
    Painting₹12 to ₹80
    Panelling₹500 to ₹1800
    In India, floor treatments play an important role in interior design and can make a notable impact on your budget. Tiling is a common choice, and the cost includes not only the initial installation but also ongoing maintenance. The type of flooring material you choose can greatly affect overall expenses. From lavish options like marble to more cost-effective options like stone, you have the flexibility to adjust this aspect according to your budgetary considerations. By carefully evaluating your preferences and exploring different flooring options, you can strike a balance between aesthetics, durability and financial feasibility.

    6. Modular vs custom carpentry

    With all the selections made and the interior design of your flat or villa nearing completion, it is now time to turn your attention to the carpentry work. An important decision before you will be whether to choose a modular design or opt for customized carpentry. If you choose to have your carpentry customized, it’s important to be prepared for the associated costs. While personalized carpentry can bring a unique touch and meet your specific needs, it often requires an additional financial investment. Balancing your budget and design preferences will be essential when evaluating the best approach for your project.

    Modular designs offer a cost-effective solution when it comes to furniture for your interiors. These furniture pieces are manufactured using predetermined units and are assembled on-site, resulting in lower costs than custom designs. However, the quality of the end result also depends on the expertise of the carpenter you choose to hire. While contractors typically charge less than interior designers, their services may come with limitations in terms of material and finish options.

    At dpodstudio, we take a different approach. We utilize mechanized, precision manufacturing techniques to create impeccable interiors that meet your exact specifications. With us, you’ll have access to a wide range of finishes and materials, giving you more options to bring your vision to life. By combining affordability with superior craftsmanship and a wide selection of options, we strive to give you the best of both worlds.

    7. Finishes and Materials Used in 4BHK Home Design

    While considering the cost estimate for 4BHK flat interior design, it is necessary to account for the expenses associated with materials and finishes. This aspect plays a vital role in shaping the overall aesthetic and quality of your carpentry work, which ultimately influences the final look of the interior design of your flat or villa. With so many materials and finishes available on the market, it is important to understand the options and their associated costs. To provide you a starting point, here is a summary of popular materials and finishes for storage cabinets and furniture, along with approximate costs. This will help you make an informed decision and plan your budget accordingly.

    MaterialsCost per square ft.
    Plywood₹70 to ₹160
    MDF₹30 to ₹200
    Blockboards₹90 to ₹140
    Particle Board₹30 to ₹70
    FinishEstimated cost per sq. ft.
    Laminate₹60 to ₹200 (or higher)
    Veneer₹150 to ₹350 (or higher)
    Membrane₹120 to ₹500
    Acrylic₹120 to ₹460 (or higher)
    While the previously mentioned materials and finishes serve as a foundation for kitchen cabinets and storage units, there are additional options to be explored for kitchen countertops, polishes, and floors, which can further affect your overall budget. These elements contribute to the aesthetics, functionality, and durability of your home. From luxurious countertop materials to premium flooring options, the choices you make in these areas can affect the overall cost of your project. It is important to carefully consider these factors and strike a balance between your design preferences and budgetary constraints in order to create a harmonious and cost-effective living space.

    8. Purpose of the 4BHK Interior Design

    Purpose-of-the-4BHK-Interior-Design

    Every homeowner has his or her own distinct preferences when it comes to the interior design of their flat or villa. While the design should suit your needs and lifestyle, there are some general considerations that many homeowners prioritize. These include making the most of space, creating a functional layout, incorporating adequate storage solutions, ensuring proper lighting and ventilation, choosing appropriate color schemes, and integrating aesthetic elements that reflect personal style. By understanding your specific preferences and working closely with a professional designer, you can bring your vision to life and create a personalized living space that truly enhances your daily living experience.

    • Space Optimization and Storage: Indians have a penchant for storage, and homeowners often prefer adequate storage solutions in their modern villas or flat designs. Designers need to give careful consideration to incorporating enough storage spaces to accommodate the homeowners’ belongings, thereby ensuring a functional and organized living environment.
    • Luxury interiors: For some homeowners, creating a luxurious interior is a priority in their design aspirations. This pursuit of opulence often involves the use of high-end materials and premium products, increasing the overall cost of an interior project. By prioritizing luxury, homeowners can enhance the aesthetic appeal and create a truly opulent living space that reflects their refined taste and style.
    • Residence of family members: The design and layout of the interiors have been intricately crafted to accommodate the specific needs and requirements of the family living in the house. The number of family members plays an important role in determining the space required within the house. For example, a small family may find two bathrooms sufficient, while a large family may require an additional bathroom to ensure convenience and comfort for all. By considering family size and dynamics, interior designers can optimize the functionality and utility of living spaces, while promoting a harmonious and comfortable environment for all occupants.
    • Pet-friendly: Creating pet-friendly interiors is a great way to ensure the comfort and well-being of our beloved furry companions. Designing with pets in mind involves paying extra attention to certain details and considerations. For example, incorporating durable and pet-friendly materials that are resistant to scratches or stains can help maintain the aesthetics of the space. Designating designated areas for pet beds, feeding stations, and toy storage can add to organization and convenience. Additionally, ensuring proper ventilation, easy-to-clean surfaces, and strategic placement of furniture to accommodate pet movement and activities are important aspects of pet-friendly interior design. By adopting these ideas, we can create a harmonious living environment that meets the needs of both our human and animal family members.

    9. Themes or Styles in the 4BHK Home Design

    The choice of style for your flat or small villa design can have a significant impact on the overall cost. Different styles have different requirements and complexities, which can affect the budget. For example, choosing a Scandinavian or minimalist style often involves a focus on simple design and functionality, resulting in relatively low costs. On the other hand, a home with a colonial or vintage theme may require more custom carpentry and intricate furniture designs, which can increase the expense. Additionally, maintaining the authenticity of a vintage theme may involve using premium finishes such as membrane finishes, which are more expensive than laminates. Considering these factors can help you make an informed decision about the style of your home while managing your budget effectively.


    Room-by-Room Cost Details of 4BHK Home Design

    To effectively plan the interior design of a 4BHK flat or a small villa, it is beneficial to consider a basic cost breakup for each room. Although these essentials are important, you can always incorporate additional luxury elements depending on your budget and personal preferences. By understanding the basic needs and customizing them to suit your desired comfort and style, you can create a well-balanced and personalized living space that meets your needs.

    1. A simple foyer for 4BHK interior design

    2024 Interior designer in Ahmedabad

    While designing the foyer of your 4BHK flat or small villa, it is essential to consider the inclusion of a shoe cabinet. The cost of a shoe cabinet will depend on factors such as the material, the finish, and the labor involved. Additionally, the size of the cabinet will also affect the price. For example, a single-door shoe cabinet can range from around ₹7,000 to ₹30,000 for a custom design. By choosing the right shoe cabinet to suit your budget and design preferences, you can create an organized and functional entryway for your home.

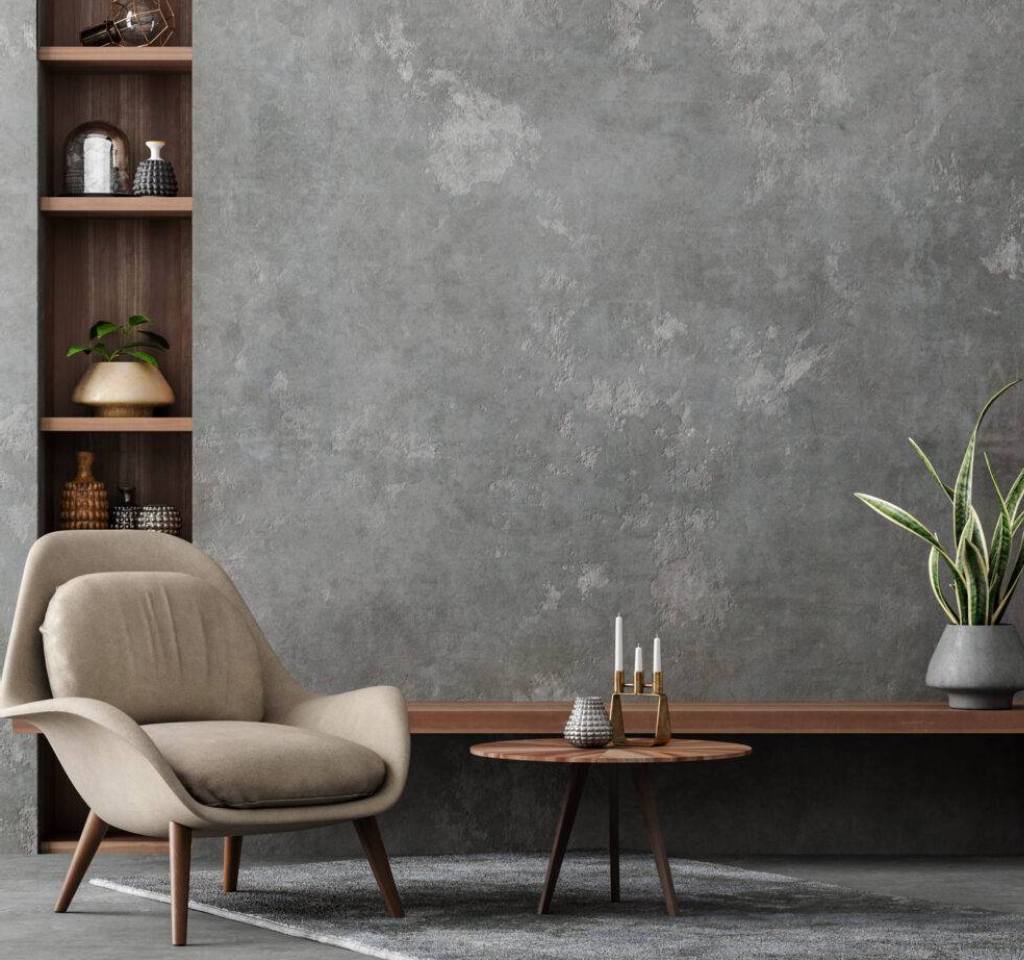
    2. Beautiful Living Room and 4BHK Flat Interior Design for Villa

    Elegant-Living-Room-for-Villa-and-4BHK-Flat-Interior-Design

    When it comes to designing the living room of your 4BHK flat or small villa, there are several essential elements to consider. These include a comfortable sofa, a functional coffee table, and a stylish TV unit. Many homeowners also opt for wall treatments to enhance the overall aesthetics of the space. On average, the cost of a living room design can vary greatly, from around ₹3,00,000 to ₹10,00,000. Of course, you can customize the design and include additional elements based on your budget and personal preferences. By carefully selecting the right furniture, accessories, and decor, you can create a beautiful and inviting living room that reflects your unique style.

    3. Simple or luxurious dining space in 4BHK home design

    Simple-or-luxurious-dining-space-in-4BHK-home-design

    When it comes to designing the dining area of ​​your 4BHK flat or small villa, the possibilities are endless. This can range from a simple dining table setup to a fully decorated space with wall furnishings, treatments, and special lighting. Dining area budgets can vary greatly and cannot be accurately estimated without discussing your specific needs and design vision with your designer. By collaborating closely with your designer and sharing your preferences, you can create a dining area that’s a perfect fit for your style, needs, and budget.

    4. kitchen cost estimate of 4bhk house design

    kitchen-cost-estimate-of-4bhk- house-design

    When it comes to the cost of designing a kitchen for your 4BHK flat or small villa, there are several factors to consider. The choice of countertop material, finish, cabinet material, and backsplash can significantly affect the overall cost. Additionally, the size of the kitchen and your personal preferences play a role in determining expenses. It is advised to discuss your specific requirements and design preferences with your designer to get a more accurate estimate of kitchen cost that suits your project.

    5. A luxury master bedroom for your village or 4bhk flat design

    A-luxury-master-bedroom-for-your-village-or-4bhk-flat-design

    Personalization and comfort are key considerations when it comes to designing the master bedroom in your 4BHK flat or small villa. With essential elements such as a bed and wardrobe, the cost of a master bedroom can vary based on personal preferences. Beds can be customized or bought from shops, with prices varying accordingly. Wardrobe in India typically ranges between ₹20,000 to ₹80,000 depending on factors such as size, design, and material. It is advised to explore the various options and consult your designer to find the best option that suits your budget and desired aesthetics.

    6. Unique kid’s room

    Unique- kid's-room

    Designing the kid’s room in your 4BHK flat or small villa involves considering their growing needs and preferences. It’s important to create a space that allows for play and flexibility. Many homeowners choose vibrant and eye-catching colors to encourage creativity. Along with essential elements such as wardrobe storage, a study unit, and a bed, the cost of a kid’s room design can vary depending on factors such as the quality of materials, customization, and additional decor items. Striking a balance between functionality, safety, and budget is recommended to create a joyful space that will grow with your child.

    7. A minimalist guest bedroom

    A-minimalist-guest-bedroom

    Guest bedrooms in Indian homes often prioritize simplicity and versatility to accommodate visitors of different age groups. It is common for these places to adopt a minimalist approach. Essential elements such as comfortable beds and functional wardrobes are usually chosen to ensure ease of use and accessibility.

    While the total cost of a guest bedroom design can vary depending on factors such as the quality of the materials and any additional features or amenities, it is important to strike a balance between functionality and cost-effectiveness in order to create a welcoming and comfortable space for your guests. It is recommended.

    8. A Balcony

    A-Balcony

    The design of the balcony may vary depending on its size and intended purpose. For those looking for a quiet place to enjoy some respite, a small and comfortable seating arrangement will suffice. However, if you envision using the balcony to host dinner parties or set up a bar, additional interior work may be necessary to turn it into a functional and attractive space. Balcony design costs can fluctuate depending on the extent of modification and material choice, so it’s important to discuss your specific needs with your designer to ensure a tailored and budget-friendly solution.

    9. Pooja room cost estimate

    Pooja-room-cost-estimate

    Incorporating a puja room into your 4BHK house plan can be budget-friendly. Pooja rooms in India can generally be built within a reasonable cost range, starting from less than a lakh. Depending on your preferences, you have the flexibility to design a minimalist puja room or add intricate latticework to enhance its aesthetic appeal. With careful planning and consultation with your designer, you can create a calming and spiritual space that suits your budgetary constraints.


    The cost difference between a new home and a renovation

    When discussing new home costs, it’s important to consider the potential variations when it comes to renovation projects. Resale value plays an important role in determining whether investing in interiors will increase the value of your property. If the answer is negative and the interior refurbishing will not significantly increase the resale value, then undertaking an extensive interior renovation may not be a viable option. Evaluating the potential return on investment and consulting real estate experts can help you make an informed decision about the feasibility of the interior renovation of your home.

    Renovating an existing home can be challenging, especially if you already live in it. Civil work cost can also be an important factor to consider. However, if your home is worth the effort, opting for renovation can provide a cost-effective way of enjoying a fresh flat or villa design. With the ability to customize the design, this can be a more cost-effective option than buying a new property.

    We hope this guide has provided you with the required information to estimate the cost of your 4BHK. If you are interested in finding out the budget for 3BHK, we at dpod studio have compiled specific interior design cost information for 3BHK apartments. To gain further confidence in our services, you can browse our portfolio of previous interior projects showcasing our expertise and creativity. If you have any inquiries or need assistance with your interior requirements, please do not hesitate to contact us. We look forward to cooperating with you!


    In conclusion, as you embark on your journey to create a beautiful as well as functional living space, we hope that the information provided by dpod studio, a reputed interior design company in Ahmedabad, helps you in understanding the various factors involved in a design and Has been helpful in understanding the costs. 4BHK Flat or Small Villa. From assessing the location and size of the property to considering structural changes, electrical wiring, wall treatments, and furniture options, every aspect plays an important role in shaping your dream home.

    At dpod studio, we understand the importance of personalized and thoughtful designs that suit your preferences and lifestyle. Our team of experienced designers is dedicated to bringing your vision to life while considering your budgetary constraints. We take pride in offering tailored solutions, whether you prefer modular furniture or customized carpentry work, ensuring that every detail is carefully planned and executed.

    With a focus on providing exceptional client satisfaction, dpod studio invites you to explore our portfolio of past interior projects showcasing our expertise and creativity. We value our customers’ feedback and encourage you to share their experiences, as we believe their testimonials speak volumes about the quality and professionalism of our services.

    dpod studio is here to guide you every step of the way as you embark on your interior design journey. Our team is committed to providing innovative and functional designs that transform your living space into a true reflection of your personality and style. Contact us today to discuss your interior design needs and let us create a space that exceeds your expectations.

      Ultimate-Guide-to-Room-Interior-Design-for-Bedrooms-Creating-Your-Dream-Sanctuary

      2023 Ultimate Guide to Room Interior Design for Bedrooms: Creating Your Dream Sanctuary

      Discover the ultimate guide to room interior design for bedrooms, and learn how to create your dream sanctuary with expert tips and inspiration.

      Ultimate-Guide-to-Room-Interior-Design-for-Bedrooms-Creating-Your-Dream-Sanctuary

      Design for Bedrooms Layout and Space Optimization

      When it comes to bedroom layout and space optimization, there are several important factors to consider. Here are some tips and ideas to help you make the most of your bedroom:

      • Assess Your Needs: Before planning the layout, consider how you will use the bedroom. Consider the furniture you’ll need, storage needs, and any specific activities you’ll be doing, such as reading or working.
      • Bed placement: The bed is usually the most significant piece of furniture in the bedroom, so start by deciding where to place it. Ideally, place it against a solid wall away from doors and windows to create a cozy and relaxing environment.
      • Functional Furniture Arrangement: Arrange your furniture to optimize functionality and flow within the room. For convenience, place nightstands or bedside tables on either side of the bed. If you have enough space, add a small desk or vanity for added functionality.
      • Use Vertical Space: Maximize your storage options by using vertical space. Install shelves or wall-mounted cabinets to keep items off the floor and create a sense of openness. Make use of the space under the bed by using storage containers or choosing a bed frame with built-in drawers.
      • Multi-Purpose Furniture: Consider using multi-functional furniture pieces to save space. For example, choose a bed frame with a headboard that includes storage shelves or a built-in desk. A folding desk can double as a workspace during the day and fold away when not in use.
      • Lighting Choices: Proper lighting can enhance the ambiance and functionality of the bedroom. Use a combination of ambient, task and accent lighting to create a layered effect. Use wall sconces or pendant lights instead of table lamps to free up space on the surface.
      • Mirror placement: Mirrors can make a small room appear larger by reflecting light and creating the illusion of depth. Place a full-length mirror on one wall or consider a mirrored closet door to add visual space.
      • Closet Organization: Keep your closet tidy to maximize storage efficiency. Use hanging organizers, shoe racks, and drawer dividers to optimize space. Consider removing unnecessary items or using under-bed storage for out-of-season clothing.
      • Window treatments: Choose window treatments that allow maximum natural light to enter the room. Choose light and airy curtains or blinds that can be easily opened during the day. This helps create an open and spacious feel.
      • Declutter and Simplify: Lastly, declutter your bedroom and keep only the essentials. A clutter-free space instantly feels more open and peaceful. Evaluate your belongings regularly and donate or discard items you no longer need or use.

      Remember, every bedroom is unique, so adapt these tips to suit your specific space and personal preferences. Experiment with different layouts and furniture arrangements until you find one that maximizes functionality and creates a harmonious environment in your bedroom.

      Designing a bedroom layout that maximizes space utilization

      Designing a bedroom layout that maximizes space utilization is essential, especially in small bedrooms. Here are some tips to help you optimize your bedroom space:

      • Assess your needs: Before planning the layout, assess how you use your bedroom and identify your specific needs. Consider factors such as sleeping, getting dressed, storage, and any additional activities you want to accommodate in the space.
      • Scale your furniture: Choose the right size of furniture that suits the dimensions of your room. Avoid oversized or bulky pieces that can make the space feel cramped. Choose compact furniture with clean lines.
      • Bed Placement: The bed is usually the focal point of the bedroom. Place it against a wall to free up space in the center of the room. To maximize functionality consider a bed frame with built-in storage options such as drawers or shelves.
      • Use vertical space: Use vertical space in your bedroom. Install tall bookshelves, floor-to-ceiling closets, or wall-mounted cabinets to take advantage of the height. Use these storage solutions to keep items off the floor and maximize storage potential.
      • Multifunctional Furniture: Incorporate multifunctional furniture pieces that serve dual purposes. For example, choose nightstands with drawers or shelves, or a desk that can also serve as a vanity. This allows you to make the most of limited space.
      • Consider wall-mounted solutions: To save floor space, consider wall-mounted options for storage and decor. Install floating shelves, wall-mounted lights, or hanging organizers to keep items within reach while keeping the floor clear.
      • Use mirrors strategically: Mirrors create the illusion of space and reflect light, making a room seem larger. Install a large mirror on one wall or use mirrored closet doors to enhance the feeling of openness.
      • Optimize Closet Space: Organize your closet effectively to maximize storage potential. Use space-saving hangers, hanging organizers, and closet dividers to make use of every inch. Consider adding additional shelves or drawers to make the most of the available space.
      • Streamline Technology: Minimize the presence of technology in the bedroom to create a more serene and spacious environment. Hide cords and cables, and opt for a wall-mounted TV or compact entertainment unit to save floor space.
      • Create a functional layout: Consider the flow and movement within the room. Make sure you have enough room to navigate comfortably. Arrange furniture in a way that allows easy access to essential areas such as the bed, closet, and any work or seating areas.
      • Keep it organized: Clean your bedroom regularly and keep surfaces clear of unnecessary items. Implement storage solutions such as bins, baskets, and drawer dividers to maintain an organized space.

      Remember, optimizing space use in a bedroom requires thoughtful planning and strategic furniture placement. Adapt these tips to suit your specific needs and the dimensions of your room. By making efficient use of the available space, you can create a functional and comfortable bedroom.

      Small bedroom design tips and tricks

      • When it comes to designing a small bedroom, it’s important to maximize the available space and create the illusion of openness. Here are some tips and tricks to help you make the most of your small bedroom:
      • Optimize the layout: Consider the most efficient layout for your bedroom. Place the bed against the longest wall to create a sense of depth and free up floor space. Avoid closing windows and doors to maintain an open feel.
      • Use light colors: Light colors, such as white, cream, and pastels, can make a small space appear larger and brighter. Choose a light color scheme for your walls, bedding, and furniture to create an airy atmosphere.
      • Use vertical space: Take advantage of vertical space in your bedroom by incorporating floor-to-ceiling shelves or tall storage units like wardrobes. This allows you to maximize storage while minimizing your footprint.
      • Mirrors: Mirrors can create the illusion of more space by reflecting light and giving the impression of depth. Consider placing a large mirror in front of a window to maximize the effect.
      • Clever Storage Solutions: Check out creative storage solutions to keep your small bedroom organized. Use under-bed storage containers, wall-mounted shelves, hanging organizers, and hooks to maximize storage without taking up valuable floor space.
      • Reduce visual clutter: Keep your bedroom clutter-free by reducing the number of decorative items and opting for a clean and uncluttered design. Use baskets or bins to stash items that would otherwise contribute to a cluttered look.
      • Use lighting strategically: Adequate lighting can make a small space feel more open and inviting. Opt for a combination of ambient, task, and accent lighting to create a well-lit and comfortable environment. Consider using wall sconces or pendant lights to free up bedside table space.
      • Keep window treatments minimal: To maximize natural light and maintain openness, choose window treatments that are lightweight and minimal. Translucent curtains or blinds that can be fully opened during the day are ideal.
      • Go for vertical decor. Decorate your walls with vertical elements to draw the eye upward and create the illusion of height. Use tall artwork, vertical stripes, or a floor-to-ceiling wall mural to add visual interest.
      • Embrace vertical decor: Decorate your walls with vertical elements to draw the eye upward and create the illusion of height. Use tall artwork, vertical stripes, or a floor-to-ceiling wall mural to add visual interest.

      Remember, the key is to keep things simple, organized, and clutter-free. By applying these tips, you can turn your small bedroom into a functional and visually appealing space.

      Creative storage solutions for bedrooms

      When it comes to bedroom storage solutions, creativity can go a long way in maximizing space and keeping your belongings organized. Here are some creative storage ideas for bedrooms:

      • Use under-the-bed storage: Invest in storage containers or drawers that fit under your bed. This often-under-utilized space can be perfect for storing extra linens, off-season clothing, shoes, or even books.
      • Install a Wall-Mounted Pegboard: A pegboard can be a versatile and customizable storage solution. Install it on a wall and use hooks and pegs to hang and organize items like jewelry, hats, scarves, or even small shelves to display decorative pieces.
      • Use the space behind the door: Attach hooks or an over-the-door organizer to the back of your bedroom door. This can be a great place to hang coats, bags, belts, or other accessories.
      • Use vertical wall space: Install floating shelves or wall-mounted cabinets to store books, decorative items, or folded clothing. Vertical wall space is often overlooked but can provide ample storage without taking up valuable floor space.
      • Select a storage ottoman or bench: Choose a storage ottoman or bench for the foot of your bed. These pieces of furniture not only provide seating but also hidden storage space for extra blankets, pillows or clothing.
      • Hang a clothes rod: If you have limited space, consider installing a clothes rod on an empty wall. Hang your frequently worn or favorite clothing on the rod for easy access and a visually appealing display.
      • Use baskets, bins, and containers: Incorporate decorative baskets, bins, or containers on shelves or inside closets to corral smaller items and reduce clutter. Label them for easy identification and access.
      • Install a bookshelf headboard: If you have a small bedroom and limited space for a bedside table, opt for a bookshelf headboard. It provides storage for books, a lamp, an alarm clock, or other items you like to have close at hand.
      • Build a vanity or desk with storage: If you need a vanity or desk in your bedroom, choose one with built-in drawers or shelves to neatly store makeup, office supplies, or other essentials.
      • Consider a wall-mounted folding desk: For those with limited space, a wall-mounted folding desk can provide a functional workspace without taking up valuable floor space.

      Remember, creativity and customization are key when it comes to storage solutions. Assess the layout of your bedroom and your specific storage needs to find the best solution that works for you.

      Color Schemes and Themes for Bedroom Interiors

      Color-Schemes-and-Themes-for-Bedroom-Interiors

      Choosing the right color scheme for your bedroom is important as it sets the tone and ambiance of the space. Additionally, exploring different bedroom themes can help you create a cohesive and visually appealing design. Here are some tips for selecting color schemes, researching themes, and incorporating colors to evoke specific moods in your bedroom:

      Choosing the right color palette for your bedroom

      • Consider your preferences. Start by considering the colors you personally like and find comfort in. Your bedroom should be a place that reflects your taste and makes you feel comfortable.
      • Think about ambiance: Different colors create different feelings and can affect the atmosphere of a room. For a calm and serene atmosphere, choose soft and muted colors such as pastels, neutrals, or cool blues and greens. For a more energetic and vibrant feel, consider warm and bold colors like red, orange or yellow.
      • Evaluate natural light: Take into account the amount of natural light your bedroom receives. If it’s a well-lit room, you can experiment with darker or bolder colors. In rooms with limited natural light, light colors can help make the space feel more open and airy.
      • Create a harmonious color scheme: Choose a primary color and then complement or similar colors to create a harmonious palette. Consider using the 60-30-10 rule, where 60% is the dominant color, 30% is the secondary color, and 10% is the accent color.

      Exploring different bedroom themes and their impact on the overall design

      • Minimalist: A minimalist theme focuses on simplicity, clean lines, and a clutter-free environment. Stick to a neutral color palette with white, beige, or gray as the primary colors. Keep furniture and decor to a minimum, emphasizing functionality and simplicity.
      • Scandinavian: Scandinavian design embraces natural elements, light colors, and a relaxing atmosphere. Use a combination of white, gray and light wood tones. Incorporate natural textures and add pops of color through accessories or artwork.
      • Bohemian: Bohemian or boho style is characterized by vibrant colors, patterns, and an eclectic mix of textiles and accessories. Use a variety of warm and earthy colors such as terracotta, ochre, and navy blue. Try layering different patterns and textures for a rich and eclectic look.
      • Coastal: The coastal theme evokes a relaxed and beachy feel. Opt for a color palette inspired by the ocean, such as shades of blue, white, sandy beige and soft green. Incorporate natural materials like rattan or driftwood for furniture and decor.

      Incorporating Colors to Evoke Specific Moods in the Bedroom:

      • Calm and Relaxing: Choose soft and cool colors like pastel blues, greens and lavender. These colors can promote relaxation and create a calming atmosphere in your bedroom.
      • Cozy and warm: Warm colors such as earthy brown, deep red, or warm gray can create a cozy and inviting environment. Pair them with soft lighting and plush textures to enhance the cozy feel.
      • Energizing and Lively: If you want to have a vibrant and energizing atmosphere, choose vibrant colors like bright red, orange, or yellow. These colors can add a sense of energy and vibrancy to a space.
      • Balanced and Neutral: Neutral colors such as white, beige, and gray create a calm and balanced environment. They provide a versatile backdrop that allows you to add pops of color through accessories or artwork.

      Remember, the color choice and theme should suit your personal style and preferences. Experiment, get inspired, and choose colors and themes that make you feel comfortable and reflect the mood you want to create in your bedroom.

      Furniture Selection and Placement

      When it comes to the selection and placement of furniture in the bedroom, there are several important things to keep in mind. Here are some tips to help you choose the right pieces and arrange them in a functional and aesthetically pleasing way:

      Essential bedroom furniture pieces and their functions

      • Bed: The bed is the centerpiece of the bedroom and should be chosen to keep in mind the comfort and size. Consider available space and your personal preferences for bed size (eg, twin, full, queen, king). Select a mattress that provides adequate support and a bed frame or headboard that complements the overall style of the room.
      • Wardrobe/wardrobe: A wardrobe or closet is essential for keeping clothes and accessories. Consider the size of your wardrobe needs and choose a piece that offers ample storage space. If space is limited, consider a wardrobe with built-in storage solutions such as drawers or shelves.
      • Dresser/chest of drawers: A dresser or chest of drawers provides additional storage space for folded clothing, undergarments and accessories. Choose a size and style that complements the overall design of the room while meeting your storage needs.
      • Bedside Table/Nightstand: Bedside tables or nightstands are functional and decorative pieces that provide an essential surface for lamps, books, alarm clocks, and other nighttime items. Select tables that are proportionate to the height of your bed and provide ample storage with drawers or shelves.

      Tips for Selecting the Right Bed, Wardrobe, and Bedside Tables:

      • Consider the available space: Measure your bedroom to determine how much space you have for furniture. This will help you choose appropriately sized pieces that fit comfortably without overcrowding the room.
      • Assess Storage Needs: Assess your storage needs for clothing, accessories and other items. Choose a wardrobe and dresser with ample storage capacity to keep your bedroom organized and clutter-free.
      • Style and Aesthetics: Choose furniture pieces that match the overall style and theme of your bedroom. Consider materials, finishes and design details that complement your desired aesthetic.
      • Quality and Durability: Invest in well-made furniture that is built to last. Look for sturdy construction, quality materials, and fine craftsmanship to ensure durability and longevity.

      Arranging Furniture to Create a Functional and Aesthetically Pleasing Bedroom:

      • Start with the bed: Place the bed in a central and visually appealing position, usually against the longest wall or opposite the door. Make sure there is enough space on either side for bedside tables or nightstands.
      • Balance and symmetry: Aim for symmetry and balance when arranging furniture. Place matching bedside tables or nightstands on either side of the bed to create a cohesive and visually pleasing look.
      • Create functional areas: If space allows, consider creating specific functional areas within the room. For example, place a dresser or chest of drawers near a closet to create a dressing area. Integrate a seating area with a comfortable chair and small table for relaxation or reading.
      • Allow movement: Leave enough space between furniture pieces for easy movement and access. Make sure there is a clear path around the bed and other furniture, so you can move freely within the room.
      • Consider natural light and views: Arrange furniture to take advantage of natural light and any desirable views from windows. Place a seating area or reading nook near windows to enjoy outdoor views and maximize natural light.
      • Consider traffic flow: Arrange the furniture in a way that allows a smooth flow of traffic within the room. Make sure doors, windows, and closets are easily accessible without obstruction.

      Remember, personal preference and the specific layout of your bedroom should guide your furniture selection and placement decisions. Experiment with different arrangements to find the configuration that best suits your needs and creates a comfortable and visually pleasing bedroom environment.

      Lighting and Ambiance

      Proper lighting is essential to create a comfortable and attractive ambiance in the bedroom. It not only serves functional purposes like providing adequate lighting for various activities but also plays a vital role in setting the mood and ambiance. Here’s a breakdown of the importance of proper lighting, the different types of light fixtures, and tips for creating a comfortable and relaxing atmosphere in your bedroom:

      Importance of Proper Lighting in the Bedroom:

      • Task Lighting: Proper lighting allows you to perform specific tasks like reading, getting dressed or working on a laptop more comfortably and efficiently.
      • Ambient Lighting: This sets the overall mood and provides a general level of illumination throughout the room, creating a welcoming atmosphere.
      • Accent Lighting: By highlighting specific areas or items, accent lighting adds depth and visual interest to a bedroom, enhancing its aesthetic appeal.

      Different Types of Lighting Fixtures and Their Role in Creating Ambiance:

      • Ceiling or overhead lighting: Ceiling-mounted fixtures such as chandeliers, pendant lights, or recessed lighting provide general ambient lighting and distribute weight evenly throughout the room.
      • Wall Sconces: Wall-mounted sconces are both functional and decorative. They can provide focused task lighting for reading or add a soft glow to walls, creating a relaxing atmosphere.
      • Table or bedside lamp: Bedside lamps are essential for task lighting, allowing you to read or do other activities in bed. They also add warmth and an intimate atmosphere to the room.
      • Floor Lamp: Floor lamps can serve as both ambient and task lighting. They provide a soft and diffused light that contributes to a comfortable and relaxed atmosphere.
      • Dimmer Switch: Installing dimmer switches allows you to adjust the brightness of your lighting fixtures, allowing you to create different moods and levels of illumination according to your preferences and activities.

      Creating a Cozy and Relaxing Atmosphere with Lighting Choices:

      • Soft and warm color temperature: Choose light bulbs with a warm color temperature (around 2700K to 3000K) as they emit a soft and inviting glow that promotes relaxation and comfort.
      • Layered Lighting: Combine different types of lighting fixtures to create a layered lighting scheme. Use a combination of ambient, task and accent lighting to provide flexibility and control over a room’s ambiance.
      • Indirect Lighting: Incorporate indirect or diffused lighting options such as wall sconces, uplights or string lights to create a soft and soothing glow. These types of light fixtures can help to reduce harsh shadows and create a warm and inviting atmosphere.
      • Lighting Control: Use dimmers or smart lighting systems to adjust light intensity according to your needs and mood. Diminishing brightness in the evening may signal your body to relax and prepare for sleep.
      • Consider bedside reading lights. If you enjoy reading before bed, opt for adjustable reading lights or lamps that can be easily adjusted for optimal lighting.
      • Lighting for relaxation: Incorporate lighting elements that promote relaxation, such as candles, Himalayan salt lamps, or LED light strips with warm colors. These can create a soothing and calming environment.

      Remember, lighting choices should align with your personal preferences and the desired ambiance you want to create in your bedroom. Experiment with different combinations and levels of lighting to find what works best for you in terms of comfort, functionality and relaxation.

      Window Treatments and Curtains

      Window treatments and curtains play an important role in increasing privacy, controlling natural light, and adding style to your bedroom. Here are some tips for choosing window treatments, curtains, blinds, or shades to incorporate into your bedroom design, and to strike a balance between aesthetics and functionality:

      Choosing window treatments that enhance privacy and light control

      • Privacy Considerations: Consider the amount of privacy you desire in your bedroom. If privacy is a top priority, choose window treatments that provide maximum coverage, such as blackout curtains, cellular shades, or blinds with privacy slats.
      • Lighting Control: Determine how much natural light you want in your bedroom. Sheer curtains or light-filtering shades allow soft, diffused light to enter the room while maintaining some privacy. If you prefer a darker sleeping environment, consider blackout curtains or room-darkening shades that block out most of the light.
      • Dual-Purpose Options: Some window treatments offer a combination of privacy and light control. For example, top-down/bottom-up shades allow you to adjust the position of the shade to let in light from above while maintaining privacy from below.

      Incorporating Curtains, Blinds, or Shades into Bedroom Design:

      • Curtain Style: Choose a curtain style that matches the aesthetic of your bedroom. Flowing, floor-length curtains can add a touch of elegance and luxury, while shorter curtains can create a more casual and relaxed vibe. Consider fabrics, patterns and colors that complement your overall bedroom design.
      • Layering Options: Layering curtains with blinds or shades can provide both style and functionality. Sheer curtains paired with blinds allow diffused light to enter while maintaining privacy, and heavy drapes can be added for added insulation or light control.
      • Blinds and Shades: Blinds and shades come in a variety of styles, materials, and opacity levels. Consider roller blinds, Roman shades or Venetian blinds that match the style of your bedroom and provide the desired level of light control and privacy.

      Balancing Aesthetics and Functionality with Window Coverings:

      • Consider the overall style of the room: Choose window treatments that complement the overall aesthetic of your bedroom. Choose colors, patterns and textures that complement your existing decor and contribute to the desired ambiance.
      • Choice of fabric Pay attention to the fabric of the curtain or shade. Lighter fabrics create an airy and flowy look, while heavier materials add a feeling of warmth and comfort. Consider how the texture and drape of the fabric will enhance the visual appeal of the room.
      • Functionality: Make sure your window coverings are easy to use and maintain. Consider the practicality of the window treatments chosen, especially if you’ll be opening and closing them daily. Motorized options can provide convenience and control at the touch of a button.
      • Proper Measurement and Installation: Take accurate measurements of your windows to ensure the proper fit of your chosen window treatments. Improperly sized or poorly installed window coverings can detract from the overall look and functionality.

      Remember, window treatments not only serve practical purposes but also contribute to the overall aesthetics of your bedroom. Take your time to explore the different options, consider your privacy and light control needs, and choose window coverings that enhance both the functionality and visual appeal of your space.

      Textures, Fabrics, and Accessories

      Incorporating texture, fabrics and accessories is a great way to add depth, warmth and personality to your bedroom. Here are some tips for incorporating textures and fabrics, choosing bedding, pillows and throws, and choosing accessories to complement the overall design:

      Incorporating Textures and Fabrics to Add Depth and Warmth:

      • Layering Textiles: Layering different textures and fabrics adds visual interest and warmth to a bedroom. Consider using a blend of materials such as linen, velvet, faux fur, wool, or knits. Incorporate these textures through bedding, curtains, rugs, or upholstered furniture.
      • Wall Treatments: Explore wall treatments such as textured wallpaper, wood paneling, or fabric wall hangings to create a tactile and comfortable environment. These elements can add depth and provide a unique backdrop for your bedroom.
      • Window treatments: Choose drapes or curtains made from a textured fabric such as linen, silk, or jacquard to introduce dimension and visual richness to the space. Textured window treatments can soften the look of a room and enhance its overall ambiance.

      Selecting Bedding, Pillows, and Throws to Enhance Comfort and Style:

      • Bedding Materials: Choose high-quality bedding materials that are both comfortable and visually appealing. Cotton, linen and bamboo fabrics are popular choices for bedding because of their breathability and softness. Consider thread count and choose bedding that best suits your personal preferences.
      • Colors and patterns: Select bedding in colors and patterns that complement the overall color scheme and style of your bedroom. Solid-colored bedding can provide a clean and minimalist look, while patterns and prints can add visual interest and a touch of personality.
      • Pillows and Throws: Use decorative pillows and throws to add texture, pops of color, and comfort to your bedding. Experiment with different sizes, shapes, and textures to create visual interest and achieve the desired level of comfort.

      Choosing Accessories to Complement the Design:

      • Rugs: Incorporate rugs to anchor the space and add warmth underfoot. Choose rugs with different textures and pile heights to create a comfortable and inviting environment. Consider the size and placement of the rug to make sure it complements the furniture arrangement.
      • Artwork: Select artwork that reflects your personal taste and complements the overall design of the bedroom. Consider the size, style and color palette of the artwork to create a focal point and add visual interest to the walls.
      • Mirrors: Use mirrors strategically to increase the sense of space and light in the bedroom. Mirrors can reflect natural light, visually expand the room and serve as decorative elements. Consider the frame style and placement of the mirror to complement the overall design.
      • Decorative items: Choose decorative items such as vases, candles or figurines that align with the overall style of your bedroom. These little touches can add personality and create a cohesive look.

      When incorporating textures, fabrics, and accessories, it is important to strike a balance between comfort and style. Experiment with different combinations, layering techniques, and placements to achieve a harmonious and visually appealing bedroom that reflects your personal style and provides a comfortable and inviting environment.

      Comprehensive-Guide-for-Plywood-Surface-Restoration

      Mastering Laminate Removal: A Comprehensive Guide for Plywood Surface Restoration

      Looking to remove laminate from plywood? This comprehensive step-by-step guide offers invaluable insights, tips, and tricks to help you navigate the process effortlessly. Unlock the secrets to a successful removal and restore your plywood’s natural beauty.

      Guide-to-Removing-Laminate-from-Plywood

      Introduction to laminate and its uses on plywood

      Laminate is a versatile material widely used to enhance the appearance and durability of plywood. It is a composite material made by layering multiple thin sheets of paper or fabric, impregnated with resins, and then bonded together under high pressure and heat. The resulting laminate is incredibly durable, resistant to scratches, moisture, and impact. It is commonly used in various applications on plywood, such as kitchen cabinets, countertops, furniture, and flooring. Laminate comes in a wide range of colors, patterns, and textures, allowing for endless design possibilities. Its affordability, ease of installation, and low maintenance requirements make it a popular choice for both residential and commercial projects.

      What is laminate?

      Laminate is a synthetic material composed of layers of paper or fabric impregnated with resins and fused together under high heat and pressure. The top layer is typically a clear protective layer that provides durability and resistance to scratches, stains, and moisture. Beneath the top layer, there is a decorative layer that can mimic the appearance of various materials, such as wood, stone, or metal. The core layer is made of compressed fiberboard or particleboard, which provides stability and strength. Laminate is commonly used as a surfacing material for countertops, cabinets, furniture, flooring, and wall panels due to its affordability, versatility, and durability.

      Why is laminate used on plywood?

      Why-is-laminate-used-on-plywood

      Laminate is a dynamic addition to plywood, serving multiple purposes and providing unique advantages. Its utilization of plywood surfaces encompasses both functional and aesthetic benefits. Primarily, laminate acts as a safeguard, shielding plywood from scratches, moisture, and impact, thereby prolonging its lifespan. This proves particularly valuable in high-traffic areas like kitchens or countertops. Moreover, laminate offers an array of distinctive designs, ranging from authentic wood grains to captivating stone patterns, enabling creative expression and customization. Its cost-effective nature renders the replication of natural materials viable, making it an appealing option for budget-conscious projects. Furthermore, the low maintenance and effortless cleaning requirements of laminate ensure convenience and long-lasting beauty in residential and commercial applications alike.

      Common applications of laminate on plywood

      Laminate applied on plywood finds widespread use in various applications due to its versatility and practicality. Some common applications include:

      • Kitchen Cabinets: Laminate-coated plywood is a popular choice for kitchen cabinets, providing a durable and moisture-resistant surface that withstands daily use and spills.
      • Countertops: Laminate is frequently used as a surfacing material for countertops, offering an extensive range of colors and patterns to complement different design styles while providing a resilient and easy-to-clean surface.
      • Furniture: Plywood furniture pieces, such as tables, shelves, and bookcases, often incorporate laminate for added durability and aesthetic appeal. It allows for diverse design options, including sleek modern finishes or wood grain textures.
      • Flooring: Laminate flooring on plywood is a cost-effective alternative to hardwood flooring. It replicates the appearance of wood or stone and provides a durable, scratch-resistant surface that is easy to maintain.
      • Wall Panels: Laminate-covered plywood panels are utilized for wall cladding in both residential and commercial settings. They offer a decorative element while providing protection and easy upkeep.
      • Retail Fixtures: Laminate-coated plywood is commonly used in retail environments for display fixtures, shelving units, and cash wraps, thanks to its durability and ability to withstand heavy use.
      • Exhibition Displays: Plywood laminated with vibrant and eye-catching finishes is often employed in exhibition booths and displays, allowing for customization and branding opportunities.

      The versatility of laminate on plywood enables its usage in various contexts, offering durability, aesthetic appeal, and cost-effectiveness across different applications.

      Understanding the reasons for laminate removal

      Understanding-the-reasons-for-laminate-removal

      Signs that indicate laminate removal is necessary

      There are several signs that indicate the need for laminate removal:

      • Damage: If the laminate is severely damaged, such as deep scratches, chipping, or peeling, it may be necessary to remove it. Damaged laminate not only affects the aesthetics but can also compromise the integrity of the underlying plywood.
      • Wear and Tear: Over time, laminate can show signs of wear and tear, such as fading, discoloration, or loss of gloss. If the appearance of the laminate has significantly deteriorated, removing and replacing it can restore the desired look.
      • Moisture or Water Damage: If moisture or water has penetrated the laminate and caused warping, swelling, or mold growth on the plywood, it is crucial to remove the laminate to address the underlying moisture issue and prevent further damage.
      • Loose or Lifted Edges: Laminate that has edges lifting or coming loose indicates poor adhesion. This can lead to further delamination and compromise the integrity of the surface. Removing and reapplying the laminate ensures a secure and seamless finish.
      • Outdated or Mismatched Style: If the laminate design or color is outdated or no longer matches the desired aesthetic, removal becomes necessary to update the space and achieve a cohesive look.
      • Structural Changes: During renovation or remodeling projects, when structural changes are being made to the underlying plywood, laminate removal may be necessary to accommodate the alterations and ensure a proper fit.

      It’s important to assess the extent of the issues and consult with professionals to determine if laminate removal is the appropriate course of action in each specific situation.

      Reasons for removing laminate from plywood

      There are several reasons why one might need to remove laminate from plywood:

      • Damage: If the laminate has been damaged, such as by deep scratches, cracks, or burns, it may be necessary to remove it. Damaged laminate can detract from the appearance and functionality of the surface.
      • Wear and Tear: Over time, laminate can show signs of wear and tear, including fading, discoloration, or loss of its protective finish. Removing the old laminate allows for the installation of new, fresh laminate to restore the surface’s original look.
      • Upgrading or Changing Style: When the existing laminate no longer aligns with the desired aesthetic or if you wish to update the style of the surface, removing the current laminate is necessary before installing a new laminate that better suits your preferences.
      • Adhesion Issues: If the laminate is coming loose or has poor adhesion to the plywood, it can lead to further delamination or create an uneven surface. Removing the laminate allows for proper repairs and the reapplication of a new layer.
      • Structural Modifications: During remodeling or renovations, structural changes may require the removal of existing laminate. This allows for adjustments to the plywood, such as cutting or resizing, to accommodate the modifications before reinstalling the laminate or choosing a different surface treatment.
      • Water or Moisture Damage: If water or moisture has penetrated the laminate and caused swelling, warping, or mold growth on the plywood, it is crucial to remove the laminate to address the underlying moisture issue and prevent further damage to the substrate.

      Removing laminate from plywood requires careful consideration and proper techniques to avoid damaging the plywood surface. Consulting with professionals or researching appropriate removal methods is recommended to ensure a successful process.

      Benefits of removing laminate

      Removing laminate from plywood can offer several benefits, including:

      • Restoration of the Plywood Surface: Removing the laminate allows you to restore the original appearance and condition of the plywood. It gives you a clean slate to work with, enabling you to address any underlying issues or damage that may have been hidden beneath the laminate.
      • Flexibility in Surface Treatment: Once the laminate is removed, you have the freedom to choose a different surface treatment for the plywood. This opens up a range of possibilities, such as staining, painting, or applying a new type of laminate or veneer that better suits your desired aesthetic or functional requirements.
      • Repair and Maintenance: Removing the laminate provides an opportunity to inspect the plywood for any damage, such as water or moisture issues, rot, or structural problems. You can address these issues before applying a new surface treatment, ensuring the long-term durability and integrity of the plywood.
      • Customization: Removing the existing laminate allows you to personalize the plywood surface according to your specific preferences and design goals. Whether you want to create a unique finish, showcase the natural beauty of the wood, or experiment with different textures and patterns, removing the laminate gives you the flexibility to customize the surface to your liking.
      • Cost Savings: In some cases, removing the laminate can be a cost-effective option compared to replacing the entire plywood panel. Instead of investing in entirely new materials, you can work with the existing plywood by removing the old laminate and applying a new surface treatment, achieving a refreshed look without significant expenses.

      It’s important to consider the condition of the plywood and consult with professionals or research appropriate removal methods to ensure a successful and safe process.

      Tools and materials needed for laminate removal

      Tools-and-materials-needed-for-laminate-removal

      Essential tools for the removal process

      When it comes to removing laminate from plywood, several essential tools can make the process more efficient and effective. Here are some tools commonly used:

      • Heat Gun or Hair Dryer: Applying heat helps loosen the adhesive bonding the laminate to the plywood. A heat gun or hair dryer can be used to gently warm the laminate surface, making it easier to peel off.
      • Putty Knife or Scraper: A putty knife or scraper is essential for carefully lifting and scraping off the laminate from the plywood. It helps in separating the laminate from the adhesive layer and allows for controlled removal.
      • Utility Knife or Razor Blade: A utility knife or razor blade is useful for cutting through the edges and seams of the laminate. It helps in creating initial access points for easier removal and can also be used to trim the laminate as needed.
      • Pry Bar or Crowbar: A pry bar or crowbar can assist in removing larger sections of laminate that may be firmly adhered to the plywood. It provides leverage to pry up the laminate and separate it from the surface.
      • Adhesive Remover: Depending on the type of adhesive used, an adhesive remover may be necessary to dissolve and remove any residual adhesive from the plywood after the laminate is peeled off. Follow the instructions provided with the adhesive remover for safe and effective use.
      • Safety Equipment: It is important to prioritize safety during the removal process. Wear safety goggles, gloves, and a dust mask to protect yourself from any potential debris, dust, or chemical residue.

      Remember to exercise caution while using these tools and to work slowly and carefully to avoid damaging the plywood surface. If unsure about the removal process, consulting with professionals or seeking guidance from experienced individuals can be beneficial.

      Safety equipment required

      During the removal of laminate from plywood, it’s crucial to prioritize safety and protect yourself from potential hazards. The following safety equipment is recommended:

      • Safety Goggles: Safety goggles protect your eyes from flying debris, wood chips, or adhesive particles that may be released during the removal process. They shield your eyes and help prevent injuries.
      • Gloves: Wear sturdy work gloves to safeguard your hands from cuts, scrapes, or any sharp edges while handling tools or removing the laminate. They provide grip and protect your skin from potential hazards.
      • Dust Mask or Respirator: When working with laminate removal, dust, and particles can become airborne. Wearing a dust mask or respirator helps filter out harmful particles, reducing the risk of inhaling dust, adhesive residue, or other contaminants.
      • Protective Clothing: It’s advisable to wear long-sleeved shirts and long pants to protect your skin from scratches, cuts, or potential exposure to chemicals. Avoid loose clothing that can get caught in tools or machinery.
      • Knee Pads: If you’re working on your knees during the removal process, consider using knee pads to provide cushioning and protect your knees from strain or injury.
      • Hearing Protection: If you’re using power tools, such as a heat gun or electric saw, the noise level can be loud and potentially damaging to your hearing.

      It’s important to use the appropriate safety equipment based on the specific tools and processes involved in the laminate removal. Always follow the manufacturer’s instructions for the tools and equipment used and prioritize safety throughout the entire process.

      Additional materials that can facilitate the process

      In addition to the essential tools, several additional materials can facilitate the process of removing laminate from plywood. These materials can make the removal process more efficient and help protect the surrounding areas:

      • Drop Cloths or Plastic Sheets: Lay down drop cloths or plastic sheets to protect the floor or surrounding surfaces from debris, adhesive residue, or any accidental damage during the removal process. This makes cleanup easier and prevents damage to other surfaces.
      • Adhesive Solvent or Remover: Depending on the type of adhesive used to attach the laminate, an adhesive solvent or remover may be necessary. Apply the solvent to the adhesive residue left on the plywood after removing the laminate. Follow the manufacturer’s instructions for safe and effective use.
      • Plastic or Metal Scrapers: Plastic or metal scrapers can be used in conjunction with the adhesive solvent to help remove any remaining adhesive residue from the plywood. They allow for controlled scraping without damaging the plywood surface.
      • Sandpaper or Sanding Block: After removing the laminate and adhesive residue, sandpaper or a sanding block can be used to smoothen the plywood surface and remove any remaining traces of adhesive or imperfections. Choose an appropriate grit for the desired finish.
      • Cleaning Supplies: Have cleaning supplies ready to clean the plywood surface after the laminate removal process. This can include a bucket, mild soap or cleaning solution, sponges or rags, and water for wiping down and preparing the plywood for any further treatment or refinishing.

      These additional materials help ensure a smooth and efficient removal process while minimizing potential damage and simplifying the cleanup afterward. Always follow safety guidelines and manufacturer instructions when using any materials or products.

      Step-by-step guide to removing laminate from plywood

      Step-by-step-guide-to-removing-laminate-from-plywood

      Preparing the workspace and ensuring safety

      Preparing the workspace and ensuring safety is an important aspect of any project, including the removal of laminate from plywood. Here are the steps to prepare the workspace and maintain a safe environment:

      • Clear the area: Remove any furniture, objects, or obstacles from the workspace to create a clear and spacious area for the laminate removal process. This prevents accidents and allows for easier movement during the project.
      • Ventilation: Ensure the workspace is well-ventilated by opening windows or using fans. Proper ventilation helps dissipate any fumes or odors that may arise from the adhesive or cleaning products used during the removal process.
      • Protect surrounding surfaces: Cover the floor, furniture, or any nearby surfaces with drop cloths, plastic sheets, or protective materials. This protects them from debris, adhesive splatters, or accidental damage during the removal process.
      • Secure the workpiece: If possible, secure the plywood securely to a workbench or a stable surface. This ensures stability and minimizes the risk of movement or accidents while working.
      • Wear appropriate safety gear: Put on the necessary safety gear, including safety goggles to protect your eyes from debris, gloves to shield your hands, a dust mask or respirator to filter out airborne particles, and any other protective equipment recommended for the specific task.
      • Organize tools and materials: Have all the required tools and materials within reach and well-organized. This saves time and reduces the risk of accidents caused by searching for tools or tripping over clutter.
      • Follow safety guidelines: Familiarize yourself with the safety guidelines provided by the tool manufacturers and adhere to them throughout the project. Pay attention to handling hot tools, sharp objects, and potentially hazardous materials.
      • Work in a well-lit environment: Ensure proper lighting in the workspace to have clear visibility of the area and minimize the risk of accidents due to poor visibility.
      • Have a first aid kit: Keep a first aid kit readily available in case of any minor injuries that may occur during the removal process.

      By following these steps and prioritizing safety, you can create a workspace that promotes a safe and efficient laminate removal process. Remember to exercise caution, work at a comfortable pace, and seek professional assistance if needed.

      Assessing the condition of the laminate and plywood.

      Before starting any project involving laminate and plywood, it is important to assess their condition to ensure the best results. Proper evaluation helps determine whether materials are fit for use or if they need to be repaired or replaced. Here are some steps for assessing the condition of laminate and plywood:

      • Inspect for damage: Examine the laminate and plywood carefully for any visible signs of damage such as cracks, chips, or warping. These issues can affect the overall integrity and appearance of the material.
      • Check for water damage: Moisture can cause laminate and plywood to swell or mold and rot. Watch for any signs of water damage, such as discoloration, soft spots, or a musty smell. It is important to address water damage before moving forward with any project.
      • Evaluate Adhesion: Examine the bond between the laminate and the plywood. If you see any peeling, bubbling, or loose edges, this indicates poor adhesion. This can affect the durability and life of the material.
      • Consider wear: Assess wear on the laminate surface. Scratches, stains, or fading may require refinishing or replacement depending on the severity.

      By thoroughly assessing the condition of the laminate and plywood, you can make an informed decision about their usefulness and whether any repairs or replacements are necessary.

      Techniques for removing laminate

      When it comes to removing laminate, there are several techniques you can use depending on the type of laminate and the surface it is glued to. Here are some of the commonly used techniques for removing laminate:

      • Heat and Peel Method: This method involves using heat to soften the adhesive and then peeling off the laminate. You can use a heat gun or a clothes iron on a low heat setting to apply heat to the surface of the laminate. Once the adhesive has softened, use a putty knife or scraper to carefully lift and peel away the laminate.
      • Score and Peel Method: For thicker laminates or laminates that are difficult to remove, scoring the surface can help. Use a utility knife or laminate scoring tool to make shallow cuts or scores on the laminate surface. This will allow the adhesive to release more easily when you begin to peel it away.
      • Solvent or adhesive remover methods: If the adhesive used to join the laminate is particularly stubborn, you can try using a solvent or adhesive remover. Apply solvent or adhesive remover to the edges or bottom of the laminate and let it sit for a while to soften the adhesive. Then, use a putty knife or scraper to lift and remove the laminate.
      • Steam Method: Steam can also be effective in loosening the adhesive and making the removal process easier. You can use a handheld steamer or steam iron to direct the steam onto the surface of the laminate. After steaming, gently peel off the laminate using a putty knife or scraper.

      Remember to work slowly and carefully when removing the laminate so as not to damage the underlying surface. Always wear protective gloves and goggles, and consider using a mask or working in a well-ventilated area, especially if using solvents or adhesive removers.

      Heat-based methods (using a heat gun or iron)

      Heat Gun Method:
      • Set the heat gun to the medium heat setting and plug it in.
      • Holding the heat gun a few inches from the surface of the laminate, move it in a circular motion to evenly distribute the heat.
      • Heat a small section of the laminate for about 30 seconds or until the adhesive softens.
      • Use a putty knife or scraper to lift the edge of the hot laminate.
      • Slowly peel back the laminate, applying heat as needed.
      • Repeat this process in small sections until all of the laminate is removed.
      Iron Method
      • Set the iron to a low or medium heat setting without steam.
      • To protect the laminate, place a cloth or aluminum foil over it.
      • Press the hot iron onto the fabric/foil, moving it in a circular motion for about 30 seconds to heat the laminate and soften the adhesive.
      • Use a putty knife or scraper to lift one edge of the laminate.
      • Slowly put the laminate back in, taking the heat as needed.
      • Repeat this process in small sections until all of the laminate is removed.

      Solvent-based Methods for Removing Laminate:

      Adhesive Remover Method:
      • Apply adhesive remover or solvent to the edges or underside of the laminate.
      • Use a putty knife or scraper to gently lift and peel away the laminate.
      • Apply more adhesive remover as needed and continue peeling until all of the laminate is removed.
      • Wipe the surface with a clean cloth to remove any residue.

      Mechanical Methods for Removing Laminate:

      Chisel Method:
      • Use a chisel to carefully separate the laminate from the surface underneath.
      • Insert the chisel between the laminate and the substrate and gently tap it with a hammer.
      • Slowly work your way along the edges, lifting and separating the laminate from the surface.
      • Once the laminate is loosened, continue peeling it off by hand or using a scraper.
      Saw Method:
      • Make shallow cuts or grooves in the surface of the laminate using a saw (eg, circular saw, jigsaw).
      • Use a chisel or putty knife to remove the sections of laminate between the cuts.

      Remember to take proper safety precautions when working with solvents or mechanical equipment, such as wearing protective gloves, goggles, and a mask. Work methodically and carefully to avoid any damage to the surface or yourself during the removal process.

      Tips for minimizing damage to the plywood surface.

      When removing laminate from plywood, it is important to minimize damage to the plywood surface in order to maintain its integrity and ensure a smooth transition to the next phase of your project. Here are some tips to help you minimize the damage:

      • Use gentle and controlled force. Apply moderate pressure when lifting the laminate or removing the adhesive. Avoid using excessive force, as this may cause gouges or indentations in the plywood.
      • Start at the edges. Begin removing the laminate from the edges, rather than the center. This approach allows you to work slowly and minimizes the risk of accidentally damaging the plywood surface.
      • Work in smaller sections: Break the laminate into manageable sections and focus on removing one section at a time. This approach helps maintain control and prevents the plywood from becoming overly exposed or weak.
      • Work in smaller sections: Break the laminate into manageable sections and focus on removing one section at a time. This approach helps maintain control and prevents the plywood from becoming overly exposed or weak.
      • Apply heat or solvent sparingly: Heat and solvent can soften the adhesive and make the removal process easier. However, excessive heat or the use of a solvent can damage the surface of the plywood. Use these methods sparingly and with caution, following the manufacturer’s directions or recommendations.
      • Use sharp and appropriate tools: Make sure your tools, such as a putty knife or scraper, are sharp and fit for the job. Dull or improper tools can cause more damage or leave residue on the surface of the plywood.
      • Take breaks when needed. If you encounter resistance or are finding it difficult to remove the laminate without damaging it, take a break to reevaluate your approach. Rushing the process can lead to unintended consequences.
      • Clean the surface afterward: Once the laminate is removed, clean the plywood surface using a mild cleaner and water. This step removes any remaining adhesive residue and prepares the surface for further treatment or refinishing.

      Remember, patience and caution are key to minimizing losses. Take your time, work methodically, and make plywood surface protection a priority during the laminate removal process.

      Dealing with stubborn or difficult laminate:

      Dealing with stubborn or tough laminates can present challenges during the removal process. Here are some strategies, troubleshooting tips, and alternative approaches to help you overcome these difficulties:

      Strategies for handling strongly adhered laminate:

      • Increase heat application: Apply more heat, using a heat gun or iron, to soften the adhesive. The heat helps loosen the bond between the laminate and plywood, making it easier to remove.
      • Use a putty knife or scraper. Work the edge of a putty knife or scraper under the laminate and gently pry it up. Applying controlled force and leverage with a tool can help loosen the laminate.
      • Tap lightly with a mallet. If the laminate is particularly stubborn, tap a putty knife or scraper with a rubber mallet without damaging the plywood surface.

      Troubleshooting common challenges during the removal process:

      • Leftover Residue: If adhesive residue remains on the plywood after removing the laminate, apply an adhesive remover or solvent to dissolve the residue. Follow the manufacturer’s directions and use a putty knife or scraper to gently scrape it away.
      • Damaged plywood surface: If the plywood is damaged during the removal process, assess the severity of the damage. Minor scratches or dents can often be fixed with wood filler or sanding. For extensive damage, consider replacing the affected sections of plywood.

      Alternative approaches for removing stubborn laminate:

      • Mechanical methods: If the adhesive proves exceptionally resistant, consider using mechanical methods. This may involve using a power sander with coarse-grit sandpaper to sand off the layer of laminate and adhesive. Be careful, however, not to sand too deeply into the plywood.
      • Professional Help: For extremely stubborn or challenging cases, seeking professional help from a contractor or specialist in laminate removal may be a viable option. They have the experience, specialized equipment, and techniques to handle difficult situations effectively.

      Cleaning and preparing the plywood after laminate removal:

      Cleaning and preparing the plywood after laminate removal is essential to ensuring a smooth and pristine surface for your next project. Here are the steps to follow, including the removal of residual adhesive or glue, sanding, and precautions to prevent damage:

      Removing residual adhesive or glue:

      Apply an adhesive remover or solvent specifically designed for the type of adhesive used. Follow the manufacturer’s directions for application and take your time.

      Use a putty knife or scraper to gently scrape away the softened adhesive. Work carefully to avoid scratching or scuffing the surface of the plywood.

      Wipe away the removed adhesive using a cloth or sponge dampened with water or a mild cleaner. Make sure all residues are thoroughly removed.

      Sanding and smoothing the plywood surface:

      • Inspect the plywood surface for any remaining rough patches, adhesive residue, or imperfections.
      • Use sandpaper or a power sander with medium to fine grit (eg, 120 to 220) to sand the surface of the plywood. Sand in the direction of the grain of the wood to avoid creating scratches.
      • Focus on smoothing out any irregularities or rough areas. Start with a coarser grit sandpaper and gradually switch to a finer grit for a smoother finish.
      • After sanding, wipe the surface of the plywood with a clean cloth or vacuum it to remove any dust or debris.

      Precautions to prevent damage to the plywood during cleaning:

      • Avoid using excessive moisture during cleaning to avoid water damage or warping of the plywood. Use a damp cloth or sponge instead of soaking the plywood surface.
      • Be careful when scraping off the adhesive or sanding to avoid accidentally scratching or scuffing the plywood.
      • Use a light touch and let the tools and sandpaper do the work. Apply even pressure and avoid applying excessive force.

      By following these steps and taking the necessary precautions, you can effectively clean and prepare the plywood surface after removing the laminate. This will provide a clean canvas for your next project and help ensure a professional and polished result.

      Repairing or refinishing the plywood:

      Repairing or refinishing plywood after removing the laminate can enhance its appearance and durability. Here are the steps for assessing the condition of the plywood, filling gaps or holes, and applying a new finish or protective coating:

      Assessing the condition of the plywood:

      • Inspect the plywood for any visible damage, such as scratches, dents, or gouges. Assess the overall quality and stability of the plywood.
      • Determine whether any repairs or additional preparations are needed based on the extent of the damage.

      Filling gaps or holes in the plywood surface:

      • If there are small gaps or holes in the plywood, use wood filler or putty that matches the color of the plywood.
      • Apply wood filler with a putty knife, filling gaps or holes evenly. Smooth the surface using a putty knife or the edge of a sanding block.
      • Allow the wood filler to dry completely according to the manufacturer’s directions.
      • Lightly sand the filled areas to ensure a flush and smooth surface with the surrounding plywood.

      Applying a new finish or protective coating:

      • Select an appropriate finish or protective coating depending on your desired look and the plywood’s intended use (e.g., paint, stain, varnish, or polyurethane).
      • Before applying the finish, make sure the plywood surface is clean and free of any dust or debris.
      • Follow the manufacturer’s instructions for the chosen finish or protective coating, including proper application techniques and drying times.
      • Apply thin, even coats, allowing each coat to dry completely before applying the next one.
      • Sand lightly between coats if necessary, using a finer-grit sandpaper, to achieve a smooth and even finish.
      • Once the final coat is applied and completely dry, inspect the plywood for any touch-ups or additional finishing touches.

      By assessing the plywood’s condition, addressing any gaps or holes, and applying a new finish or protective coating, you can restore the plywood’s appearance and protect it for long-term use. Always follow the product instructions and work in a well-ventilated area when applying finishes or protective coatings.

      In conclusion, this comprehensive guide has provided valuable insight into various aspects of interior design, highlighting the expertise and services provided by DPOD Studio, a respected interior design company based in Ahmedabad. Throughout the article, we have discussed key points related to interior design, stressing the importance of professional guidance and expertise while transforming spaces.

      We covered a range of topics including space planning, color schemes, furniture selection, lighting, and accessories. By following these principles, DPOD Studio ensures that each project is thoughtfully designed to reflect a client’s unique style and preferences while optimizing functionality and aesthetics.

      We encourage our readers to share their experiences or ask any other questions they may have. At DPOD Studio, we value open communication and believe in building strong relationships with our clients. We are here to address any queries or concerns you may have and guide you throughout your interior design journey.

      To further explore the world of interior design, we recommend viewing our website and portfolio, which showcase our past projects and demonstrate our commitment to excellence. In addition, there are many online resources, design magazines, and books available that can provide valuable insight and inspiration into the world of interior design.

      dpod Studio takes pride in providing exceptional interior design solutions that transform spaces into stunning, functional, and personalized environments. With our expertise and attention to detail, we aim to exceed our client’s expectations and create spaces that truly reflect their vision and style.

      So whether you are looking to revamp your home, office, or any other space, consider DPOD Studio as your trusted partner in interior design. Contact us today to discuss your project and let our team of talented designers bring your vision to life. Together, we can create places that inspire and leave a lasting impression.

      Transforming-Your-Pooja-Space-Elegant-Designs-Blending-Plywood-and-Frosted-Glass

      Best 8 Plywood Wooden Mandir Design for Home

      Discover elegant plywood wooden mandir designs for your home, blending traditional aesthetics with modern style. Create a sacred space with intricate craftsmanship and durable plywood construction. Elevate your spiritual ambiance effortlessly.

      Embrace the beauty of wooden mandir designs without compromising on easy maintenance. Explore the charm of plywood-based pooja room designs, offering a perfect blend of convenience and traditional aesthetics. With the freedom to customize the design, these plywood mandirs add a touch of Desi flair to your sacred space. Let’s embark on a journey to discover these delightful designs together!

      1. Transforming Your Pooja Space: Elegant Designs Blending Plywood and Frosted Glass

      Transforming-Your-Pooja-Space-Elegant-Designs-Blending-Plywood-and-Frosted-Glass

      Elevate your home’s atmosphere with our custom plywood pooja room design. Featuring frosted glass shutters and a backlit ‘om’ incantation, this mandir adds a touch of drama to prayer.

      2. Elevate Your Space with a Stylish Wall-Mounted Wooden Mandir Design

      Elevate-Your-Space-with-a-Stylish-Wall-Mounted-Plywood-Mandir-Design

      Discover the perfect blend of functionality and style with our unique wall-mounted plywood pooja room designs. Custom-made to cater to your specific needs, these designs feature intricate jaali patterns and clever storage solutions. Ideal for compact homes, these plywood pooja rooms seamlessly integrate into your space, offering both convenience and elegance.

      3. Enhance Your Pooja Room Doors: Exquisite Plywood Panelling with CNC-Cut Designs

      Wooden Mandir Design

      Experience a divine touch with our distinctive plywood-framed CNC-cut doors. These intricately designed doors offer a tantalizing glimpse of the sacred beyond, captivating passers-by with their allure. For added elegance, extend the plywood panel seamlessly to the ceiling and opposite wall, effortlessly delineating spaces while maximizing functionality. Embrace this unique combination of artistic craftsmanship and space-saving innovation.

      4. Embrace Serenity: Aesthetic Plywood Mandir Design with Jaali Doors

      Embrace-Serenity-Aesthetic-Plywood-Mandir-Design-with-Jaali-Doors

      Embrace Vastu wisdom with our specially crafted plywood mandir design. Designed to uphold the sanctity of your place of prayer, this unit features doors that maintain the spiritual ambiance of the space. Additionally, enjoy the convenience of ample storage space to neatly organize all your pooja essentials. Experience a harmonious blend of sacred tradition and practical functionality with this unique plywood mandir design.

      5. Simplicity and Spirituality: Unveiling the Beauty of a Plywood Pooja Unit

      Simplicity-and-Spirituality-Unveiling-the-Beauty-of-a-Plywood-Pooja-Unit

      Discover the perfect solution for limited space with our traditional classic plywood pooja unit. Crafted with a plywood frame and back panel, this design seamlessly blends timeless aesthetics with space-saving functionality. The addition of a sleek glass slab allows for a stylish arrangement of your beloved idols, creating a harmonious and elegant focal point in your home. Embrace the beauty of simplicity and maximize your space with this unique plywood pooja unit.

      6. Harmonious Vastu Vibes: Choosing the Perfect Wall Colour for Your Plywood Pooja Unit

      Harmonious-Vastu-Vibes-Choosing-the-Perfect-Wall-Colour-for-Your-Plywood-Pooja-Unit

      Elevate the charm of your simple and traditional mandir with a touch of vibrancy. Enhance the auspiciousness of your pooja room by incorporating a Vastu-approved color scheme. Draw inspiration from this captivating design featuring a plywood back panel, gentle lighting, and generous storage space. To infuse a lively ambiance, accentuate the room with a captivating yellow accent wall. Immerse yourself in the divine energy and create a harmonious atmosphere in your pooja room with this unique combination of elements.

      7. Efficient Serenity: Maximizing Storage in Your Plywood Mandir Design

      Efficient-Serenity-Maximizing-Storage-in-Your-Plywood-Mandir-Design

      Experience the perfect blend of tradition and practicality with our classic pooja unit, designed to fulfill all your storage needs. Embrace the elegance of the jaali doors, adding a touch of traditional charm to your space. With a simple yet efficient design, this unit offers an abundance of drawers, ensuring you never run out of space for your pooja essentials and collection of lamps for the gods. Discover the convenience of organized storage while maintaining the sacred ambiance of your pooja room with this unique and functional unit.

      8. Geometric Elegance: Stylish Plywood Pooja with Partitioned Designs

      2024 Interior designer in Ahmedabad

      Transform your entryway into a cozy haven with the addition of a plywood partition, creating the perfect space for our exquisite pooja room designs in plywood. Adorned with a beautiful jaali panel and thoughtfully designed plywood drawers, this prayer nook exudes elegance and functionality. Delight in the tranquility of your sacred space as you immerse yourself in prayer and meditation. Embrace the unique charm and warmth of these specially crafted plywood pooja room designs, tailored to enhance your spiritual journey.

      9. Simplicity in Devotion: Minimalist Plywood Mandir Design Adorned with Bells

      Simplicity-in-Devotion-Minimalist-Plywood-Mandir-Design-Adorned-with-Bells-749x1024

      Indulge in the versatility and adaptability of our remarkable pooja unit, designed to seamlessly fit into any space, be it a compact apartment or a spacious home. This thoughtfully crafted mandir unit boasts a sleek plywood bench, providing a serene and dedicated space for your idols to reside. The surrounding overhanging bells add a touch of charm and spirituality to the ambiance, creating an atmosphere of tranquility and devotion.

      Whether you reside in a cozy urban apartment or a sprawling house, this pooja unit effortlessly adapts to your surroundings, harmonizing with your interior decor while preserving the sanctity of the sacred space. The use of plywood not only ensures durability but also adds an element of natural warmth and elegance to the design.

      In a compact apartment, this versatile mandir unit becomes the focal point of a serene nook, infusing the space with divine energy and serenity. The sleek plywood bench provides a designated area for your idols, allowing you to engage in prayer and meditation without compromising on space.

      In a larger home, this mandir unit creates an exquisite centerpiece, accentuating the beauty of the room while offering a dedicated space for spiritual practice. The overhanging bells not only serve as sacred ornaments but also produce soothing sounds, further enhancing the tranquil atmosphere of the space.

      Furthermore, the simplicity of the design allows for seamless integration with various interior styles. Whether your home boasts a contemporary aesthetic or leans towards a more traditional ambiance, this pooja unit effortlessly adapts and complements your existing decor.

      Immerse yourself in the divine energy of this versatile and adaptable mandir unit. Embrace the convenience of a compact design that fits harmoniously into any space, creating a sacred haven for prayer and reflection. Allow the sleek plywood bench and the resonating sound of overhanging bells to elevate your spiritual journey, irrespective of the size of your home. With this multifaceted mandir unit, you can experience the beauty of devotion and sanctity, no matter where you reside.

      In conclusion, our versatile and adaptable pooja unit, crafted by Dpod Studio, perfectly complements any living space, whether it’s a compact apartment or a spacious home. With its sleek plywood bench for idol placement and charming overhanging bells, this mandir unit enhances the spiritual ambiance of any room.

      At Dpod Studio, we understand the importance of designing functional and aesthetically pleasing interiors. Our pooja unit showcases our commitment to creating versatile solutions that seamlessly blend into any home, preserving the sanctity of the sacred space while adding a touch of elegance and warmth through the use of plywood.

      Whether you reside in a cozy urban apartment or a larger dwelling, our pooja unit’s adaptability ensures it becomes the centerpiece of a serene nook or an exquisite focal point. Its simple yet versatile design effortlessly integrates with various interior styles, reflecting our expertise in creating harmonious spaces.

      We take pride in our craftsmanship and attention to detail, ensuring that our pooja unit not only meets your storage needs but also enriches your spiritual journey. By choosing Dpod Studio, you can trust that you are investing in a high-quality interior design solution that combines functionality, aesthetics, and the timeless essence of devotion.

      Create a tranquil haven within your home with our exceptional pooja unit, designed to evoke a sense of serenity and elevate your spiritual practices. Let Dpod Studio transform your living space into a sanctuary where your idols find their rightful place, nurturing your devotion and connection to the divine.

      Choose Dpod Studio for your interior design needs in Ahmedabad and experience the beauty, craftsmanship, and versatility of our exquisite pooja unit. Embark on a journey of spiritual enlightenment and embrace the perfect blend of functionality and aesthetics in your home.

        Narrow-Pooja-Mandir-Designs-with-Storage-Solutions-for-Small-Residences

        10 Inspiring Small Pooja Room Designs to Enhance Your Home’s Beauty

        Discover the perfect solution for worshipping in your small home. Explore a range of small pooja room designs, including freestanding and wall-mounted options, designed to complement various living room styles. Overcome space limitations while embracing spirituality with these versatile and stylish designs.

        Discovering the perfect dedicated small pooja room designs for your home can be a daunting task. With limited space, accommodating storage, furniture, and a place of worship can feel overwhelming. However, fear not! We’ve assembled an exclusive collection of 25+ modern pooja room designs that seamlessly blend into your living room. Whether it’s utilizing a column, a wall segment, or a cozy corner, these designs cater to your home’s unique layout. Embracing the fusion of tradition and contemporary style, each design harmonizes functionality and aesthetics. Let these exquisite mandirs inspire you to create a divine sanctuary, adding serenity and spirituality to your living space.

        In accordance with the principles of Vastu, your living room emerges as the ideal abode for a small pooja room. Positioned in a common area, it ensures easy accessibility for all family members. Moreover, the living room bestows a generous expanse, surpassing that of other rooms, making it a seamless location to install a compact mandir. By embracing this harmonious arrangement, you can effortlessly infuse spiritual sanctity into your shared living space while capitalizing on the abundance of available rooms. Allow the tranquility of the pooja room to permeate the heart of your home, enriching the lives of all who dwell within its sacred confines.

        Embark on a captivating journey as we delve into a handpicked selection of the finest small pooja room designs for your cherished abode. Within the realm of these designs lies a tapestry of creativity and spirituality, waiting to transform your home into a haven of divine tranquility. Prepare to be enchanted by the intricate craftsmanship, the harmonious fusion of traditional and contemporary elements, and the seamless integration of spirituality into the very fabric of your living space. These carefully curated designs embody the essence of sacred sanctuaries, offering a glimpse into a realm where devotion and aesthetics intertwine, leaving an indelible mark on your home’s ambiance.

        1. Stunning Pooja Room Designs Incorporating Jaali Doors

        2024 Interior designer in Ahmedabad

        Elevate the allure of your small flat’s living room with a captivating wall-mounted modern mandir design. Adorned with exquisitely carved jaali doors, this design transcends ordinary aesthetics, becoming a captivating centerpiece of spiritual elegance. Immerse yourself in the intricate artistry that graces this mandir, evoking a sense of reverence and awe. Its seamless integration into your living room not only enhances the visual appeal but also creates a sacred space that resonates with tranquility. Let this exquisite mandir design become a testament to the seamless blend of spirituality and contemporary design, a testament to the divine beauty that enriches your humble abode.

        2. Stylish Multi-Level Pooja Corner Designs for Compact Apartments

        2024 Interior designer in Ahmedabad

        Unleash the untapped potential of an unused wall within your home and fashion a small elevation, dedicating it to your revered deities. This ingenious utilization of space not only grants your sacred idols a rightful abode but also exudes an enchanting temple-like ambiance. Envision a jaali design gracefully adorning the elevation, casting ethereal patterns of light and shadow, reminiscent of the intricate artistry found in grand temples. To further elevate the aesthetic, consider a CNC-carved back panel that epitomizes meticulous craftsmanship, infusing your space with a transcendent aura. Bask in the divine serenity and immerse yourself in a spiritual haven, curated within the heart of your home.

        3. Charming and Cozy Rustic Pooja Room Designs for Small Residences

        2024 Interior designer in Ahmedabad

        Embrace the captivating allure of tranquility with a meticulously crafted design that radiates serenity through its enchanting wooden finish and distinctive stone-cladded backdrop. This masterpiece not only harmonizes nature’s elements but also transforms any wall niche into an embodiment of beauty and functionality. Unlock the true potential of this unique architectural feature, allowing it to embrace its fullest expression. Let this design be a testament to your appreciation for aesthetic ingenuity, as it seamlessly weaves together organic textures and materials, creating an atmosphere that exudes timeless elegance and profound calmness. Embrace the opportunity to infuse your living space with an unparalleled sense of harmony and grace.

        4. Space-Saving Elegance: Wall-Mounted Wooden Pooja Mandir Designs for Compact Apartments

        2024 Interior designer in Ahmedabad

        Embrace the notion that pooja room designs for homes need not be confined to small spaces, as you explore the possibility of utilizing a grand wall-mounted unit adorned with shelves to house your sacred treasures. This ingenious solution not only allows for efficient storage of your pooja items but also creates a visually striking focal point within your living space. With this expansive unit, you can revel in the luxury of ample room to display cherished artifacts, statues, and scriptures, all while maintaining an organized and sacred ambiance. Let this larger-than-life design redefine your perception of a pooja room, transcending limitations and embracing the grandeur of devotion within the comfort of your own home.

        5. Simplicity at its Best: Minimalistic Pooja Room Ideas for Small Apartments

        2024 Interior designer in Ahmedabad

        Immerse your humble abode in an aura of buoyancy with a simple yet vibrant mandir design for your cherished home. Embrace the power of a bold and captivating color palette that elevates your pooja shelf to new heights, transforming it into a mesmerizing focal point within your living room. Witness how a splash of color breathes life into the sacred space, infusing it with an irresistible charm that captivates both residents and guests alike. Let this design be a radiant testament to your unique style, as it effortlessly harmonizes spirituality with the glamorous ambiance of your living room, creating a captivating and awe-inspiring atmosphere.

        6. Optimal Space Utilization: Narrow Pooja Mandir Designs with Storage Solutions for Small Residences

        Narrow-Pooja-Mandir-Designs-with-Storage-Solutions-for-Small-Residences

        Unlock the hidden potential of your small flat by fashioning a dedicated pooja room niche using a slender partition that gracefully delineates the space from your living room. This ingenious solution not only provides a sacred sanctuary but also adds an element of privacy and reverence to your home. Enhance the functionality of the niche by incorporating a chest of drawers, seamlessly storing and organizing essential pooja items. To elevate the aesthetic appeal, consider the transformative power of a false ceiling, enveloping the sacred space with a celestial ambiance. Let this thoughtfully curated design transcend the limitations of space, as it imbues your home with divine serenity and captivates all who enter with its enchanting allure.

        7. Elegant Pooja Corner Designs for Small Flats: Incorporating Jaali Partitions for a Simple and Serene Mandir

        Elegant-Pooja-Corner-Designs-for-Small-Flats-Incorporating-Jaali-Partitions-for-a-Simple-and-Serene-Mandir

        Indulge in the opulence of a small pooja room design that exudes sheer luxury through its magnificent gold jaali partition, enveloping your home in an air of regality. This captivating element not only elevates the aesthetic appeal but also ensures privacy and solitude during your sacred prayers. The allure of this design lies not only in its visual splendor but also in its affordability and simplicity of installation, allowing you to embrace a lavish ambiance without compromising convenience. Immerse yourself in the divine embrace of this meticulously crafted pooja room, where spirituality intertwines with grandeur, creating an experience that is both resplendent and intimate.

        8. Graceful Pooja Unit Designs: Enhancing the Aura with Wooden Back Panels

        Graceful-Pooja-Unit-Designs-Enhancing-the-Aura-with-Wooden-Back-Panels

        Unleash the captivating charm of your small pooja room design as it takes center stage, embellished with a resplendent golden decal that gracefully highlights the sacred space. This exquisite addition not only adds a touch of elegance but also serves as a visual focal point, drawing the attention and reverence of all who enter. Embrace the transformative power of this radiant embellishment, allowing it to elevate the ambiance of your pooja room while exuding a sense of divine grandeur. Let the golden decal become a shimmering testament to your devotion, illuminating the space with its celestial radiance, and creating an atmosphere that inspires reverence and serenity.

        9. Traditional Charm on Your Wall: Wall-Mounted Mandir Designs Adorned with Melodious Bells

        Traditional-Charm-on-Your-Wall-Wall-Mounted-Mandir-Designs-Adorned-with-Melodious-Bells

        Transcend the ordinary and make a bold statement with a mandir design that embraces delicate details, imparting an exquisite charm to your small flat. Step into a realm where the intricacies of design weave together, as a graceful grey jaali enclosure envelops the sacred space, adding a touch of sophistication and allure. Complementing this enchanting enclosure, small floating shelves create a harmonious balance, providing a platform to display sacred artifacts and enhancing the overall aesthetic appeal. Adding musical bells adds a delightful touch, infusing the design with a sense of spirituality and wholesomeness. Let this thoughtfully curated design redefine your perception of a small flat, transforming it into a haven of elegance and tranquility that captivates the senses and nourishes the soul.

        10. Flexible Devotion: Movable Mandir Designs for Compact Living Spaces

        Flexible-Devotion-Movable-Mandir-Designs-for-Compact-Living-Spaces

        Unlock the versatility of portable mandir designs, a boon for small spaces, as they seamlessly adapt to various occasions such as festivals and gatherings. These ingenious designs offer unparalleled convenience, allowing you to effortlessly rearrange and relocate the mandir according to your preference and comfort. Embrace the freedom to create a sacred space wherever it is needed, ensuring that your devotion remains unhindered by spatial limitations. Whether it’s a joyous celebration or a serene moment of solitude, these portable mandir designs effortlessly transform any corner into a sanctified oasis, embodying the essence of adaptability and spirituality. Embrace the flexibility and convenience of these designs as they accompany you on your journey of devotion, creating an ambiance that transcends physical boundaries and resonates with your spiritual essence.

        In conclusion, at DPOD Studio, a leading interior design company in Ahmedabad, we strive to offer unique and innovative solutions for pooja room designs that cater to the diverse needs and preferences of our clients. Our carefully curated collection showcases a range of designs, from small flats to spacious homes, highlighting the seamless integration of aesthetics, functionality, and spirituality. By incorporating elements such as gold jaali partitions, delicate details, portable designs, and more, we create pooja rooms that become focal points of elegance and serenity. Our team of skilled designers understands the importance of creating personalized spaces that reflect individuality while embracing the timeless traditions of devotion. Trust DPOD Studio to transform your living space into a harmonious sanctuary, where modern design and spirituality intertwine flawlessly.

        yellow-and-white-kitchen

        Best 2023 ᐅ Two colour combinations for Kitchen laminates

        Unveiling the Artistry: 10 Exquisite Two – colour Combinations for Kitchen Laminates in Your Modern Home

        When it comes to preserving the beauty and durability of your kitchen furniture units, kitchen laminates stand as unsung heroes. More than mere protectors, they express your interior décor theme, seamlessly blending style with functionality. Suppose you’re embarking on a kitchen project and crave a touch of uniqueness. In that case, we present a handpicked collection of 10 captivating two-colour combinations for kitchen laminates, designed exclusively for modern homes.

        Our curated selection of two-colour combinations exudes charm and sophistication, ensuring your kitchen becomes a testament to impeccable taste. From bold contrasts to harmonious hues, each combination has been carefully crafted to inspire creativity and elevate your kitchen’s aesthetic allure.

        But before you take the plunge into this world of design possibilities, equip yourself with essential tips that will empower you to make informed decisions. Armed with knowledge, you’ll navigate the realm of kitchen laminates with confidence and finesse, transforming your culinary space into a haven of individuality and style.

        Prepare to witness your kitchen transform into a breathtaking work of art. With our meticulously chosen two-colour combinations, you’ll embark on a design adventure that transcends the ordinary and unlocks the extraordinary. Let your kitchen become a testament to your distinctive taste and immerse yourself in the boundless potential of kitchen laminates in your modern home.

        2024 Interior designer in Ahmedabad

        A Symphony of Flavor and Design: Unveiling Mesmerizing Two-Colour Combinations for Kitchen Laminates

        The kitchen, a sacred space where culinary journeys begin and memories are forged, holds the power to delight our senses and nourish our souls. As discerning creators, we understand that crafting a kitchen goes beyond mere functionality; it’s an art form that intertwines beauty and practicality in perfect harmony.

        In our quest to ignite your creativity and infuse your kitchen with an atmosphere that inspires, we present an exclusive collection of two-colour combinations for kitchen laminates. Prepare to be captivated by the symphony of hues meticulously curated to create a stimulating ambiance that mirrors your unique culinary style.

        Embrace the fusion of colors, where each combination is a brushstroke on the canvas of your kitchen. From tantalizing contrasts to harmonious palettes, these two-colour combinations breathe life into your space, ensuring a culinary experience that is as visually enchanting as it is delectable.

        Let this treasure trove of inspiration guide you on a transformative journey, where your kitchen becomes an immersive work of art. These captivating two-colour combinations for kitchen laminates will elevate your culinary haven to new heights, ensuring every day in the heart of your home is an extraordinary symphony of flavor and design.

        2023 colour combinations for kitchen laminates

        1. Green and gold

        The Emerald Oasis: Elevating Your Kitchen’s Aura with a Lush Green Palette and Golden Accents

        2024 Interior designer in Ahmedabad

        Step into an oasis of tranquility where the captivating allure of sober green, reminiscent of lush emerald hues, intertwines harmoniously with the radiance of golden accents, breathing life into your kitchen. Immerse yourself in the art of color selection, ensuring the tiles you choose to possess the lightest tones, creating a mesmerizing interplay of shades.

        As you infuse your kitchen with the soothing essence of green, allow its verdant charm to transport you to a serene sanctuary. Like leaves dancing in the wind, this palette will envelop your space, evoking a sense of nature’s embrace and tranquility.

        To enhance the enchantment, adorn your kitchen with golden accents, reminiscent of rays of sunlight cascading through a lush canopy. These gleaming embellishments will infuse your space with a touch of opulence, adding an element of allure and sophistication.

        In your quest for the perfect tiles, seek those with the lightest tones, for they hold the secret to unlocking the true magic of this palette. These ethereal hues will bathe your kitchen in a soft, luminous glow, creating an atmosphere of openness and serenity.

        Let the synergy of colour, texture, and elegance transform your kitchen into a haven of refined taste and serenity. With the lush green palette and golden accents as your guide, witness your culinary haven evolve into an emerald oasis, where every moment is a celebration of beauty and harmony.

        2. Yellow and white

        yellow-and-white-kitchen

        Celestial Harmony: Embrace the Luminosity of the Sunshine Design with Light Yellow and Purest White

        Step into a realm of exquisite beauty known as the sunshine design, where the refreshing allure of light yellow intertwines with the purity of the purest white, creating a celestial masterpiece that transcends ordinary aesthetics. Prepare to immerse yourself in a unique ambiance that emanates radiance and inspires serenity.

        Allow the rejuvenating aura of light yellow to awaken your senses, infusing your space with a burst of energy and vibrant cheer. Like the gentle touch of sunshine, this hue envelops your kitchen, invoking feelings of warmth, happiness, and boundless creativity.

        In perfect harmony, the purest white complements the light yellow, elevating the celestial beauty of this colour combination to new heights. Its pristine elegance creates a sense of purity and serenity, transforming your kitchen into a sanctuary of tranquility and refined sophistication.

        This enchanting pairing, reminiscent of sunlit skies and the crisp purity of untouched landscapes, brings a touch of celestial magic to your surroundings. It whispers of dreams fulfilled and endless possibilities, inviting you to bask in its ethereal glow and embrace the extraordinary in the everyday.

        Experience the transcendent beauty of the sunshine design as it illuminates every corner of your kitchen, infusing it with a luminous charm that captivates the heart and uplifts the spirit. Let the harmonious blend of light yellow and purest white transport you to a realm of celestial harmony, where culinary creations become an art form and every moment becomes a celebration of life’s radiant beauty.

        3. Warm grey and white

        warm-grey-and-white-kitchen

        Unleash Unmatched Modernity: Light Grey and White Fuse in a Captivating Color Symphony

        Prepare to witness an extraordinary fusion that effortlessly outshines the vibrant pop colors of contemporary trends. The mesmerizing combination of light grey and white creates a visual spectacle that exudes unparalleled sophistication, setting a new standard for modern aesthetics.

        Step into a realm where elegance and modernity converge, as the subtle allure of light grey takes the spotlight. Its understated charm adds a touch of refinement to your space, while its versatile nature harmonizes flawlessly with various design styles, showcasing its versatility and timeless appeal.

        In perfect synergy, the purity of white emerges, illuminating the color palette with its pristine brilliance. Like a blank canvas, it allows the light grey to take center stage, while infusing the atmosphere with an invigorating sense of purity, serenity, and limitless possibilities.

        This extraordinary colour combinations transcends the ordinary, creating a visual masterpiece that captures attention and leaves a lasting impression. Its understated allure speaks volumes, proving that true sophistication lies not in bold and flashy hues, but in the artful harmony of subtle tones.

        Prepare to be enraptured as light grey and white intertwine, weaving an unparalleled symphony of modernity and elegance. Together, they redefine the boundaries of contemporary design, beckoning you to embrace their unique charm and unleash a new era of captivating aesthetics.

        4. Orange and blue

        orange-and-blue-kitchen

        Unleash Unconventional Modernity: Soft Blue Laminates and Pop Orange Elements for a Kitchen Transformation Like No Other

        Get ready to immerse your kitchen in a realm of unparalleled modernity as we explore the captivating world of pop elements. Brace yourself for the harmonious fusion of soft blue laminates and vibrant pop orange elements, an extraordinary combination that will revolutionize your culinary space.

        It’s time to break free from the ordinary and infuse your kitchen with a breath of fresh air. The soft blue laminates take the lead, enveloping your space in a tranquil ambiance that exudes calmness and serenity. This soothing hue becomes the foundation upon which a contemporary masterpiece will be built.

        But let’s not settle for the expected—let’s introduce the unexpected with bold and vibrant pop-orange elements. Like electrifying sparks of creativity, they inject a burst of energy and playfulness into your kitchen, transforming it into a dynamic haven of culinary inspiration. These eye-catching accents become focal points that ignite conversation and evoke a sense of wonder.

        The marriage of soft blue and pop orange transcends the ordinary, creating a symphony of colors that defies conventions and sets new standards of modern aesthetics. This daring combination reflects your unique personality and design sensibilities, making a statement that you embrace boldness and refuse to conform.

        As you embark on this transformative journey, let the soft blue laminates and pop orange elements guide you toward an extraordinary kitchen experience. Unleash your creativity, embrace the unconventional, and witness your culinary space evolve into a one-of-a-kind sanctuary that is a testament to your fearless approach to modern design.

        5. Sunny yellow and red

        Unveiling European Essence: Deep Red Signature Accents and Sunny Yellow Laminate for a Kitchen that Radiates Uniqueness

        Prepare to embark on a culinary journey that celebrates European elegance with a twist. Step into the realm of uncommon choices as deep red signature accents intertwine with the captivating charm of sunny yellow laminate, creating a kitchen space that exudes unmatched individuality.

        Indulge in the richness of deep red, carefully chosen to become the defining elements of your kitchen. Like strokes of passion and sophistication, these signature accents add depth and character, elevating your space to new heights of refinement. With their captivating presence, they become conversation starters, leaving a lasting impression on all who enter.

        But let’s not stop there—introduce the unexpected with the vibrant embrace of sunny yellow laminate. Like a burst of sunshine, this radiant hue envelops your kitchen, infusing it with a joyful and energetic atmosphere. It becomes the canvas upon which culinary creativity thrives, evoking feelings of warmth and cheerfulness that ignite your culinary inspiration.

        This unique combination of deep red and sunny yellow transcends the ordinary, offering a harmonious fusion of elegance and liveliness. It stands as a testament to your individuality, showcasing your bold approach to design and your penchant for unconventional choices. In your kitchen, European traditions merge with contemporary flair, resulting in a space that is uniquely yours.

        As you immerse yourself in this extraordinary European-inspired design, let the deep red signature accents and sunny yellow laminate ignite your imagination. Embrace the freedom to express your style, experiment with textures and finishes, and create a kitchen that is a true reflection of your distinctive taste—a space that radiates with European essence while celebrating the beauty of individuality.

        6. Black and red

        2024 Interior designer in Ahmedabad

        Unleash Your Kitchen’s Radiance: Red Laminate, Charcoal Black Cabinets, and a White Countertop Paint a Picture of Uniqueness

        Prepare to embark on a culinary adventure that defies expectations and embraces unparalleled uniqueness. Envision a kitchen that becomes a masterpiece of contrasts, where the captivating combination of red laminate, charcoal black cabinets, and a pristine white countertop creates a visual symphony that leaves a lasting impression.

        Let your imagination take flight as the red laminate dances across your kitchen, infusing it with a vibrant energy that commands attention. Like a bold stroke of creativity, this fiery hue becomes the focal point that sparks excitement and passion within your culinary domain. It becomes an expression of your bold personality and a testament to your daring design choices.

        Now, cast your gaze upon the charcoal black cabinets, standing tall as the backdrop to this vivid scene. Like the night sky adorned with stars, they exude an air of mystery and sophistication, adding depth and allure to your kitchen. These cabinets become the canvas upon which the vibrant red laminate takes center stage, creating a mesmerizing interplay of light and darkness.

        As your eyes wander, they land upon the pristine white countertop—a symbol of purity and elegance. Like a blank canvas, it offers a clean and timeless foundation for your culinary creations. It serves as a neutral oasis amidst the striking contrasts, allowing the red laminate and charcoal black cabinets to shine even brighter.

        Together, this exceptional trio of red, charcoal black, and white forms a harmonious composition that transcends the ordinary. It celebrates the beauty of individuality, where boldness meets refinement, and passion meets sophistication. Your kitchen becomes an artistic expression that reflects your unique style and captivates all who enter.

        Embrace the extraordinary in your culinary sanctuary as you bring this exceptional combination to life. Let the red laminate, charcoal black cabinets, and white countertop tell a story of audacity and elegance—a tale of a kitchen that radiates unmatched beauty and becomes a true reflection of your exceptional taste.

        7. Brown and beige

        Transcend Ordinary Boundaries: Brown, Beige, and a Splash of Fiery Red Unleash Uniqueness in Your Kitchen Space

        Prepare to embark on an extraordinary design journey that defies conventions and invites you to embrace the exceptional. Enter a realm where the combination of brown and beige kitchen laminates for cabinets and countertops becomes a canvas for timeless elegance, while a daring splash of fiery red in the background ignites a sense of uniqueness and daring creativity.

        Immerse yourself in the depth and richness of the brown and beige laminates as they intertwine, weaving a tapestry of sophistication and refinement throughout your culinary sanctuary. These warm and earthy tones create a comforting and inviting ambiance, setting the stage for culinary inspiration to flourish. The cabinets and countertops clad in these remarkable laminates become a testament to your exquisite taste and unwavering attention to detail.

        But let’s break free from the expected—let’s introduce a daring element that sets your kitchen apart. Imagine a splash of fiery red adorning the backdrop, like a blazing inferno of passion and energy. This audacious choice adds a captivating burst of vibrancy, infusing your space with a sense of adventure and excitement. Against the backdrop of brown and beige, the red becomes a focal point that commands attention and sparks conversation—a bold statement that showcases your fearless approach to design.

        The combination of brown and beige laminates, along with the audacious splash of fiery red, transcends the ordinary and invites you to embrace uniqueness and self-expression. It’s a celebration of your individuality, where sophistication meets boldness, and tradition intertwines with daring creativity.

        As you venture into this realm of extraordinary design choices, let the brown and beige laminates serve as a foundation for culinary magic to unfold. Allow the splash of fiery red to become an emblem of your passion and ignite your imagination. Together, they create a symphony of colors that transforms your kitchen into an unparalleled space—a true reflection of your distinctive style and unwavering commitment to pushing boundaries.

        Embrace the extraordinary and infuse your kitchen with a blend of timeless elegance, daring creativity, and audacious vibrancy. Let the combination of brown, beige, and fiery red become a testament to your remarkable taste and elevate your culinary space to new heights of individuality and unparalleled beauty.

        8. Beige and white

        Unveiling the Harmonious Blend: Embrace the Vastu Way with White and Beige Kitchen Laminates for an Enchanting Culinary Space

        Step into a world where design principles meet positive energy, and where the fusion of aesthetics and spirituality creates a truly enchanting kitchen. Delve into the wisdom of Vastu as we explore the remarkable two-colour combinations of white and beige kitchen laminates—a pairing that not only captivates the eye but also attracts positive energy and establishes a harmonious connection with the natural elements.

        Embrace the purity and serenity of white as it graces your kitchen space. This color symbolizes tranquility and openness, infusing your culinary haven with a sense of calm and clarity. As light dances upon the white laminates, a soothing ambiance permeates the air, inviting positive energy to flow freely and effortlessly.

        Complementing the purity of white, beige emerges as a warm and earthy tone that connects your kitchen with the natural elements. Like soft sand beneath your feet, the beige laminates ground the space, creating a sense of stability and balance. Its subtle hues evoke a feeling of comfort and harmony, bridging the gap between the material and spiritual realms.

        In the realm of Vastu, this exceptional combination of white and beige is regarded as not just visually appealing, but also spiritually uplifting. It aligns your kitchen with the principles of energy flow and invites positive vibrations to harmonize with your daily culinary activities. As you navigate through your kitchen, you’ll feel a deep connection to the natural elements, fostering a sense of peace and well-being.

        Immerse yourself in the tranquility and positive energy that emanates from the white and beige laminates. Allow this remarkable combination to envelop your kitchen, creating a sanctuary that nourishes your body, mind, and soul. Let the principles of Vastu guide you as you embrace the beauty of this two-color blend and experience the profound impact it can have on your culinary space.

        As you embark on this journey, let the white and beige laminates become more than just a design choice—they become conduits of positive energy and connections to the natural world. Embrace the transformative power of this Vastu-inspired combination and create a kitchen that is not only visually stunning but also a sanctuary of balance and harmony.

        9. Red and yellow

        Ignite the Culinary Playground: Embrace the Dynamic Duo of Radiant Yellow Cabinets and Fiery Red Surfaces for an Unforgettable Kitchen Experience

        Are you ready to turn your kitchen into a vibrant playground of culinary delight? Get ready to inject a dose of fun and excitement into your cooking haven by opting for the captivating combination of bright yellow cabinets and eye-catching red surfaces. Let the colors take center stage as they transform your kitchen into an unforgettable space that sparks joy and unleashes your inner creativity.

        Picture your cabinets adorned in a lively shade of bright yellow—a hue that radiates warmth, positivity, and endless possibilities. As sunlight streams through your kitchen windows, it illuminates the yellow laminates, creating a cheerful and energetic ambiance that sets the stage for culinary adventures. Each time you step into your kitchen, you’ll feel a surge of inspiration and enthusiasm, ready to embrace the joy of cooking and experimenting with flavors.

        Now, shift your attention to the horizontal surfaces, where fiery red laminates make a bold statement. This vibrant color choice adds a fiery touch that ignites your senses and infuses your culinary space with passionate energy. The red surfaces become a captivating focal point, fueling your creativity and pushing the boundaries of culinary exploration. From chopping ingredients to presenting your delectable creations, every moment becomes an opportunity to revel in the vibrancy of your kitchen.

        To balance the boldness of the yellow cabinets and red surfaces, opt for the lightest hues on your walls. Let them serve as a calming backdrop, allowing the dynamic duo to shine while maintaining a harmonious visual balance. The lighter tones create a sense of tranquility and ensure that your kitchen remains a space where your colorful creations can take center stage.

        Embrace the uniqueness and playfulness of your culinary playground as you unleash your creativity and bring the combination of bright yellow cabinets and fiery red surfaces to life. Let your kitchen become a reflection of your zest for life and your passion for all things culinary. Every time you enter your kitchen, you’ll be greeted by a burst of energy that fuels your culinary journey and invites you to create masterpieces that tantalize the taste buds and delight the senses.

        Embrace the dynamic duo of radiant yellow cabinets and fiery red surfaces, and let your kitchen become a haven of creativity, joy, and unforgettable moments. With every dish you prepare, you’ll infuse a dash of passion and a sprinkle of excitement, transforming your kitchen into a space that epitomizes your unique style and leaves a lasting impression on all who enter.

        10. Teal and white

        Unleash the Ocean’s Embrace: Immerse Your Kitchen in a Mesmerizing Fusion of Light Teal and Crisp White

        Prepare to embark on a journey to the depths of tranquility as you transform your kitchen into a captivating oasis inspired by the vastness of the ocean. Picture a space adorned with the mesmerizing combination of light teal and crisp white, where every element is meticulously chosen to evoke the serenity of coastal bliss. Let the vertical elements embrace the allure of teal laminate, while the horizontal surfaces radiate a pristine white charm, creating a truly unique and enchanting ambiance.

        Imagine the vertical elements cloaked in a delicate shade of light teal—a color that mirrors the captivating hues of tropical waters. As your eyes wander across the teal laminates, you’ll feel a gentle breeze whispering through your kitchen, transporting you to a seaside retreat. The teal invokes a sense of tranquility and relaxation, evoking images of sun-kissed beaches and endless horizons, infusing your culinary haven with a touch of coastal elegance.

        Complementing the vertical elements, the horizontal surfaces radiate a crisp white brilliance that mirrors the frothy waves cascading upon sandy shores. The white laminates exude purity and freshness, reflecting the purity of light and accentuating the airy atmosphere of your kitchen. This pristine canvas creates a harmonious contrast against the teal, allowing the oceanic hues to shine and inviting a sense of calm into your culinary sanctuary.

        Immerse yourself in the embrace of the ocean as you embrace the unparalleled fusion of light teal and crisp white in your kitchen. With each passing moment, you’ll be transported to a place where time slows down and worries dissipate, allowing your culinary creativity to flourish. Whether you’re sipping your morning coffee or indulging in a culinary masterpiece, your kitchen will become a sanctuary where the beauty of the ocean comes alive, nourishing your spirit and revitalizing your senses.

        So, surrender to the allure of the ocean’s embrace and let its timeless beauty wash over your kitchen. Embrace the captivating fusion of light teal and crisp white laminates, and watch as your culinary space transforms into an oasis of serenity and inspiration. Unleash the power of the ocean’s enchantment and awaken a sense of tranquility that will accompany you on every culinary adventure, making your kitchen an extraordinary haven where the boundaries of imagination are limitless.

        In conclusion, the captivating world of kitchen laminates offers an array of possibilities to elevate your culinary space to new heights. Through the unique combinations and color palettes explored in these articles, it becomes clear that the artistry of interior design knows no bounds. At dpod Studio, an esteemed interior design company based in Ahmedabad, we understand the power of laminates in transforming kitchens into extraordinary realms of beauty and functionality.

        From the harmonious blend of white and beige that harnesses positive energy to the dynamic duo of bright yellow and red that infuses playfulness into your culinary adventures, each article has demonstrated the immense potential of laminates in creating truly remarkable kitchens. With our unwavering passion for interior design and a commitment to excellence, dpod Studio is poised to bring your kitchen dreams to life.

        Our team of skilled designers is well-versed in curating unique colour combinations, optimizing space utilization, and incorporating laminates seamlessly into the overall design scheme. We take pride in understanding your individual style and crafting bespoke kitchen designs that resonate with your vision. With dpod Studio by your side, your kitchen will become a reflection of your personality and a testament to the artistry and innovation that defines our company.

        By choosing dpod Studio as your interior design partner, you can expect an unparalleled level of dedication and attention to detail. We believe that every kitchen is an opportunity to create a space that inspires and nourishes, where cherished memories are made and culinary masterpieces come to life. Our expertise in interior design, combined with our deep understanding of laminates, allows us to create kitchens that seamlessly blend aesthetics with functionality, ensuring a harmonious and immersive experience for you and your loved ones.

        So, take the first step towards transforming your kitchen into a realm of exquisite beauty and functionality. Contact dpod Studio today, and let our talented team of interior designers in Ahmedabad embark on a journey with you, creating a kitchen that surpasses your wildest dreams. Trust in our expertise, embrace our unique approach to design, and witness the magic that unfolds as dpod Studio brings your vision to life, one laminate at a time.

          Charcoal-Gray-With-Blue-for-Living-Room-Colour-Combination

          Latest 2023 ᐅ Modern Two colour combination for Living Room

          Infuse your living room with a touch of modernity using captivating two-color combinations. Step into a realm of design excellence as you explore our curated image gallery, showcasing innovative blends of hues that redefine contemporary elegance and elevate your living space to new heights.

          Unlock the secrets of home color selection with expert experimentation. Embrace the transformative power of two-color combinations in your living room, where the game of design takes on a new dimension. Carefully curated to reflect your taste and personality, these harmonious blends redefine the art of color selection.

          Unveil the essence of your personality through your home color selection. Say goodbye to dreary monochromes and embrace vibrant two-color combinations for your living room. Whether your style is contemporary, traditional, or ultra-modern, our curated list of mesmerizing paint ideas and furnishings will elevate your space to extraordinary heights. Discover the perfect two-color combinations that complement every living area and redefine your living room’s allure.

          Ignite a symphony of visual delight in your living space with captivating colour combinations. Elevate your living room to new heights using our curated wall-paint colour ideas that breathe life into every corner. Prepare to be mesmerized as your space transforms into an enchanting realm of style and creativity.

          Modern Two colour Combinations for Living Room

          Indulge in the epitome of modern elegance with our handpicked selection of 22 captivating two-color combinations for your living room. Elevate the glamour quotient of your space as these stunning blends redefine contemporary style, ensuring a genuinely mesmerizing ambiance that leaves a lasting impression.

          1. Classic Black & White Colour Combination for Living Room

          Classic-and-Black-White-Colour-Combination-for-Living-Room

          Immerse yourself in the timeless allure of the classic black and white colour combination for your living room. With an air of sophistication and grace, this iconic pairing transcends trends, offering a truly captivating space that stands the test of time.

          Embrace the power of contrast as black and white converge to create a visually stunning environment. Opt for a predominantly white backdrop, allowing natural light to dance across the room, while black accents punctuate the space with bold elegance. This interplay of light and dark creates a captivating sense of depth and drama.

          Consider sleek black furniture against a white canvas to add a touch of modernity. Let the clean lines and minimalist aesthetic shine, creating a harmonious balance between simplicity and impact. Enhance the monochromatic theme with subtle pops of color through carefully selected accessories or artwork, infusing your space with a personalized touch.

          If you crave a more daring approach, reverse the roles, and envelope your living room in black. Let white take on the part of accent color, breathing life into the darkness. Explore the artistry of pattern and texture, with monochromatic rugs, bold geometric prints, or luxurious textiles, showcasing the boldness of black while maintaining a sense of sophistication.

          Illuminate the space with strategic lighting, harnessing the interplay between light and shadow. Incorporate statement lighting fixtures that enhance the black-and-white aesthetic, casting a warm glow upon your meticulously curated living room.

          Ultimately, the classic black-and-white colour combination transcends trends and personalizes your living space with a timeless touch. Embrace the yin and yang of design, and watch as your living room becomes a haven of elegance and style. Let this iconic pairing captivate your senses, creating an environment that stands as a testament to your unique taste and design sensibilities.

          2. Charcoal Gray With Blue for Living Room Colour Combination

          2024 Interior designer in Ahmedabad

          Embark on a captivating journey of serenity and sophistication with the enchanting blend of charcoal gray and blue, transforming your living room into a haven of style and tranquility. Let the deep, velvety embrace of charcoal gray set the stage, while the soothing allure of blue adds a refreshing energy that captivates the senses.

          Go beyond trends and embrace the versatility of charcoal gray as it effortlessly complements a range of design styles, from contemporary to classic. Its timeless elegance creates a backdrop that invites your creativity to flourish, allowing you to curate a living room that reflects your unique taste and personality.

          Introduce the calming allure of blue as the perfect companion to charcoal gray, exploring a spectrum of shades to evoke the desired mood. Dive into the depths of a navy blue, exuding sophistication and drama, or let the gentle touch of a soft aqua wash over your space, creating a serene ambiance. The infusion of blue breathes life into the room, adding a captivating dimension that invites relaxation and tranquility.

          Balance is key when incorporating this exquisite colour combination. Let charcoal gray take the lead, grounding the space with its elegance, and strategically place pops of blue throughout. An accent chair in a striking shade of blue becomes a focal point that invites lounging, while blue throw pillows, drapes, or artwork add subtle yet impactful touches that tie the palette together.

          For those seeking to make a bold statement, allow blue to claim the spotlight while charcoal gray provides a striking contrast. Immerse your walls in a captivating shade of blue, capturing the essence of calmness and serenity. Embrace charcoal gray furniture and decor accents, such as a sleek sofa or an artfully patterned rug, to add depth and sophistication to the room, creating a dynamic interplay between the two hues.

          Seize the opportunity to showcase patterns and textures that enhance the charcoal gray and blue palette. Experiment with bold geometric designs, intricate prints, or abstract motifs in upholstery, rugs, or wallpaper, infusing your living room with personality and visual intrigue. Metallic accents in silver or gold add a touch of opulence and refinement, elevating the overall aesthetic to new heights.

          Create an ambiance that accentuates the beauty of the charcoal gray and blue colour combination with artful lighting. Allow natural light to filter through sheer curtains, casting a soft glow that enhances the richness of the hues. Complement with carefully placed fixtures, such as pendant lights or table lamps, that provide warm and inviting illumination, highlighting the allure of the space.

          3. Grey & Orange Colour Combination for Living Room

          Grey-&-Orange-Colour-Combination-for-Living-Room

          Unleash the captivating allure of the grey and orange colour combination in your living room, creating a space that radiates both sophistication and zest. This extraordinary pairing merges the cool serenity of grey with the vibrant energy of orange, resulting in a unique and invigorating ambiance that transcends the ordinary.

          Grey takes center stage as the foundational hue, showcasing its timeless elegance and versatility. Its neutral and calming presence sets the perfect backdrop, allowing other elements to shine. Whether you prefer a light dove grey or a deep charcoal shade, grey serves as a canvas for creativity and complements a variety of design styles.

          Introduce orange as the spirited accent colour that breathes life into your living room. With its warm and invigorating nature, orange injects a burst of energy and enthusiasm. From fiery tangerine to subtle terracotta, the range of orange hues offers endless possibilities. Choose shades that resonate with your style and personality, infusing the room with vibrancy.

          To strike the perfect balance, let grey dominate while strategically placing pops of orange throughout the space. Opt for statement pieces like an orange accent chair or a bold orange area rug, creating focal points that demand attention. Enhance the cohesion with orange cushions, drapes, or art pieces that seamlessly tie the colour scheme together.

          For a bold and adventurous approach, let orange take the lead and allow grey to play a supporting role. Paint the walls in a daring shade of orange, amplifying the room’s energy and making a powerful design statement. Balance the intensity with touches of grey in furniture and accessories, adding depth and grounding the space.

          Explore patterns and textures to elevate the grey and orange combination. Introduce playful geometric prints or abstract designs in upholstery, curtains, or wallpaper, creating visual interest and a captivating focal point. Experiment with textured materials like woven textiles or velvet to add dimension and tactile appeal.

          Lighting plays a pivotal role in enhancing the unique qualities of this colour pairing. Utilize both natural and artificial lighting to accentuate the interplay between grey and orange. Optimize natural light with sheer curtains that allow a soft glow to permeate the room. Complement with carefully placed fixtures, such as pendant lights or floor lamps, to create a warm and inviting atmosphere.

          4. Forest Green and Cream – Living Room Colour Combination

          Forest-Green-and-Cream-Living-Room-Colour-Combination

          Step into a world of timeless elegance and natural serenity with the captivating fusion of forest green and cream in your living room. This enchanting colour combination weaves a tapestry of sophistication and tranquility, creating a truly unique and captivating space that beckons relaxation and style.

          Let forest green be the anchor, infusing your living room with rich and deep hues inspired by the lushness of nature. This verdant shade brings a sense of harmony and balance, symbolizing growth and renewal. Whether your design preferences lean towards contemporary chic or rustic charm, forest green provides a versatile backdrop that exudes a touch of enchantment.

          Embrace cream as the companion, adding a touch of understated elegance to the colour palette. Cream, with its soft and warm undertones, creates a gentle contrast to the deep forest green. It evokes a sense of tranquility and serenity, enveloping the room in a soothing embrace. Cream acts as a calming neutral that harmonizes the richness of forest green, creating a space that exudes refinement and comfort.

          Strike a delicate balance by allowing forest green to take center stage while incorporating cream as a complementary accent. Showcase the grandeur of forest green through statement furniture pieces, such as a plush green sofa or a sleek green coffee table. Infuse cream into the space through creamy throw pillows, delicate curtains, or a sumptuous cream-colored rug, creating a harmonious interplay between the two shades.

          For those seeking a more subtle and ethereal ambiance, let cream dominate the scene while forest green emerges as a captivating accent. Paint the walls in a creamy hue, evoking a sense of airiness and lightness. Enhance the tranquility with cream upholstery and drapery, while introducing forest green through botanical prints, leafy accents, or nature-inspired artwork, infusing the room with a refreshing touch of vibrancy.

          Unleash your creativity by incorporating textures and patterns that elevate the forest green and cream palette. Experiment with woven elements, such as rattan chairs or seagrass baskets, to introduce a tactile and organic feel. Integrate patterned textiles adorned with botanical motifs or geometric designs that breathe life into the space, adding depth and visual interest.

          Illumination plays a vital role in enhancing the unique ambiance of this colour combination. Embrace the gentle glow of warm lighting to accentuate the beauty of forest green and cream. Utilize ambient lighting through soft overhead fixtures, complemented by the warmth of table lamps or sconces strategically placed to create a serene and inviting atmosphere.

          5. Colour Combination for Living Room – Light Green and Teal

          2024 Interior designer in Ahmedabad

          Transport yourself to a world of natural beauty and modern elegance with the captivating fusion of light green and teal in your living room. This unique and invigorating colour combination breathes life into your space, creating a harmonious blend of tranquility and vibrancy that is truly captivating.

          Light green takes center stage, infusing your living room with a refreshing and rejuvenating aura inspired by the soothing essence of nature. From soft mint to subtle sage, light green exudes a delicate and airy vibe, bringing a sense of serenity and balance to the room. This subtle hue creates a serene backdrop that sets the stage for a peaceful and relaxing living space.

          Enhance the allure of light green by introducing the dynamic energy of teal. Teal, with its deep and mesmerizing tones, adds a touch of sophistication and intrigue to the colour palette. Its fusion of blue and green creates a captivating depth and a modern edge that draws the eye and sparks conversation. Teal brings a sense of vibrancy and playfulness to the living room, infusing it with personality and character.

          Achieve a perfect equilibrium by using light green as the dominant colour and strategically incorporating pops of teal throughout the space. Create focal points with teal accent furniture, such as an eye-catching teal armchair or a statement teal coffee table. Balance the composition with light green accessories, like cushions or a light green area rug, to maintain a cohesive and harmonious look.

          For those seeking a more daring statement, let teal take the lead while light green adds a soothing touch. Paint an accent wall in a bold and captivating teal hue, instantly transforming the room into a showstopper. Complement the intensity with light green furnishings and decor, such as a light green sofa or light green curtains, creating a striking contrast that exudes modern elegance.

          Embrace the opportunity to introduce patterns and textures that elevate the light green and teal palette. Explore geometric prints, botanical motifs, or textured materials like velvet and woven fabrics. Integrate these elements through artwork, cushions, or drapery, adding depth, visual interest, and a touch of luxury to the living room.

          Illuminate your living space with a combination of natural and artificial lighting to enhance the beauty of the light green and teal colour combination. Embrace natural light by keeping windows unobstructed, allowing the soft rays to bathe the room in a warm glow. Supplement with carefully placed lighting fixtures, such as pendant lights or floor lamps, to create a captivating ambiance that accentuates the colours and sets the mood.

          6. Purple and Pink Living Room Colour Combination

          2024 Interior designer in Ahmedabad

          Immerse yourself in a world of mesmerizing charm and undeniable allure with the extraordinary combination of purple and pink in your living room. This unique and captivating colour duo transforms your space into a haven of elegance, playfulness, and undeniable style, leaving a lasting impression on all who enter.

          Purple takes center stage, casting a spell of enchantment with its regal and mysterious aura. Whether you opt for the depth of royal purple or the softness of lavender, purple adds a touch of sophistication and intrigue to your living room. Symbolizing creativity and spirituality, purple sets the stage for a space that exudes elegance and stimulates the imagination.

          Introduce the vibrant energy of pink as the perfect companion to purple, creating a harmonious dance of femininity and warmth. From bold and deep fuchsia to delicate and whimsical blush, pink injects a sense of joy and optimism into the colour palette. This romantic hue adds a playful touch to the living room, balancing the richness of purple with its youthful charm.

          Achieve a perfect balance by using purple as the dominant colour and strategically incorporating pops of pink throughout the room. Select accent pieces such as pink cushions, a chic pink armchair, or captivating pink artwork to create focal points that draw the eye and infuse the space with a touch of whimsy. Enhance the harmony by integrating purple elements through furniture upholstery, rugs, or curtains, creating a seamless fusion of the two colours.

          For those seeking a bolder statement, let pink take the lead while purple adds a touch of mystery and depth. Paint an accent wall in a daring shade of pink, instantly transforming the room into a vibrant and daring sanctuary. Complement this audacious backdrop with purple furnishings and decor accents, such as a luxurious purple velvet chaise lounge or a statement purple pendant light, adding an air of sophistication and elegance to the living room.

          Embrace the opportunity to unleash your creativity by incorporating patterns and textures that elevate the purple and pink palette. Explore floral prints, geometric designs, or textured materials like velvet and silk, infusing the space with visual interest and tactile appeal. Introduce these elements through curtains, rugs, or decorative accessories, adding depth and personality to the room.

          Illuminate your living room with a combination of soft and ambient lighting to enhance the beauty of the purple and pink colour combination. Opt for warm and gentle overhead fixtures, such as dimmable chandeliers or pendant lights, to create a cozy and inviting atmosphere. Complement the general lighting with strategically placed table lamps or floor lamps, casting a soft glow that accentuates the colours and creates an enchanting ambiance.

          7. White & Teal Colour Combination for Living Room

          2024 Interior designer in Ahmedabad

          Immerse yourself in a living room sanctuary that combines the purity of white with the invigorating charm of teal. This unique and captivating colour combination breathes life into your space, creating a haven of serenity, style, and contemporary elegance that will leave you and your guests in awe.

          White, with its timeless and versatile appeal, forms the foundation for a bright and airy living room. Its clean and crisp aesthetic opens up the space, reflecting natural light and creating an atmosphere of freshness and purity. White acts as a blank canvas, allowing you to experiment with various textures and elements while maintaining a cohesive and harmonious look.

          Introduce the vibrant energy of teal as the perfect companion to white, infusing the room with an exquisite touch of sophistication and depth. Teal, with its cool and calming tones reminiscent of tropical waters, adds a sense of tranquility and harmony to the colour palette. It brings a refreshing burst of colour, making it an excellent choice for accent pieces or focal points that instantly draw the eye.

          Achieve a harmonious equilibrium by using white as the dominant colour and strategically incorporating pops of teal throughout the room. Select teal accent furniture, such as a statement armchair or a sleek side table, to create visual interest and introduce a modern twist. Enhance the overall ambiance with teal throw pillows, area rugs, or drapes, adding a sense of cohesion and balance to the space.

          For a more daring approach, let teal take the spotlight while using white as a complementary backdrop. Paint an accent wall in a bold shade of teal, instantly transforming the living room into a captivating retreat. Complement the intensity of teal with white furniture and decor accents, such as a sleek white sectional or a minimalist white bookshelf, creating a striking contrast that exudes contemporary elegance.

          Embrace the opportunity to play with textures and patterns that elevate the white and teal combination. Incorporate elements like textured cushions, geometric prints, or woven baskets to add depth and visual interest to the living room. Consider introducing metallic accents in silver or copper to infuse a touch of glamour and sophistication into the space.

          Illuminate your living room with a combination of natural and artificial lighting to enhance the beauty of the white and teal colour palette. Maximize natural light by keeping windows unobstructed, allowing it to bathe the room in a warm and inviting glow. Complement with carefully placed lighting fixtures, such as pendant lights or floor lamps with teal accents, to create a cozy and inviting atmosphere that accentuates the colours and sets the mood.

          8. Colour Combination for Living Room – Pink and Brown

          2024 Interior designer in Ahmedabad

          Transform your living room into a captivating haven of modern elegance with the mesmerizing fusion of pink and brown. This distinct and daring colour combination infuses your space with a unique blend of sophistication, versatility, and a touch of whimsy that will leave a lasting impression on all who enter.

          With its wide range of shades from blush to magenta, pink brings a sense of femininity and charm to the living room. It creates an atmosphere of joy and positivity, radiating a youthful energy that uplifts the space. Whether you opt for a soft pastel pink or a vibrant hue, pink serves as a delightful canvas for creativity and self-expression.

          Introduce the richness of brown as the perfect companion to pink, adding depth, warmth, and a grounding element to the colour palette. Brown evokes a sense of stability and comfort, creating a cozy and inviting ambiance in the living room. Embrace the versatility of brown by exploring different shades such as chocolate, caramel, or walnut, each offering a unique character to the space.

          Achieve a harmonious balance by using pink as the dominant colour and incorporating brown accents strategically throughout the room. Choose brown furniture pieces, like a plush sectional or a sleek coffee table, to anchor the space and provide a sense of stability. Enhance the overall aesthetic with pink throw pillows, area rugs, or artwork, infusing bursts of colour that beautifully complement the earthy tones of brown.

          For a bold and contemporary statement, allow brown to take the lead while pink accents add a delightful contrast. Paint an accent wall in a deep, rich brown, instantly creating a focal point that exudes sophistication. Complement this striking backdrop with pink furniture or accessories, such as a sleek pink armchair or a vibrant pink pendant light, injecting a touch of playfulness into the room.

          Embrace the opportunity to showcase textures and patterns that enhance the pink and brown palette. Experiment with materials like velvet, faux fur, or woven textiles to add depth and tactile interest to the living room. Incorporate geometric prints, floral patterns, or abstract designs in cushions, curtains, or wallpaper to infuse a sense of modernity and personality.

          Illuminate your living room with warm and ambient lighting to accentuate the beauty of the pink and brown colour combination. Opt for soft, warm-toned lighting fixtures such as table lamps or string lights to create a cozy and inviting atmosphere. Consider incorporating statement pendant lights or wall sconces that feature unique designs or metallic accents, adding a touch of glamour and enhancing the overall aesthetic.

          9. Red and Purple Colour Combination for Living Room

          Ignite your living room with a captivating blend of red and purple, creating a truly unique and mesmerizing color combination that exudes charm, creativity, and a touch of mystique. This extraordinary pairing adds a sense of vibrancy and sophistication to your space, transforming it into a haven of artistry and individuality.

          Red, with its bold and passionate nature, infuses the living room with an undeniable energy and allure. Whether you opt for a fiery scarlet or a deep maroon, red demands attention and becomes the focal point of the room. It stimulates conversation and ignites a sense of excitement, making it an excellent choice for accent walls or statement furniture pieces.

          Introduce the enchanting allure of purple as the perfect complement to red, adding a layer of depth and luxury to the color palette. Purple, with its range of shades from regal eggplant to delicate lavender, brings a touch of elegance and mystique to the living room. It evokes a sense of creativity and introspection, creating an atmosphere that encourages self-expression and contemplation.

          Achieve a harmonious balance by using red as the dominant color and strategically incorporating purple accents throughout the room. Choose red furniture pieces, such as a plush sofa or a sleek coffee table, to anchor the space and create a sense of drama. Enhance the overall aesthetic with purple throw pillows, curtains, or artwork, infusing pops of color that beautifully complement the richness of red.

          For a daring and unconventional approach, let purple take the lead while red accents provide a striking contrast. Paint an accent wall in a deep purple hue, instantly creating a captivating backdrop that exudes sophistication. Complement this artistic foundation with red furniture or accessories, such as a bold red chair or a vibrant red rug, adding a sense of vibrancy and playfulness to the room.

          Embrace the opportunity to experiment with textures and patterns that enhance the red and purple palette. Incorporate velvet, silk, or textured fabrics in cushions, drapes, or upholstery to add depth and a tactile element to the living room. Play with patterns such as floral motifs, abstract designs, or geometric shapes in rugs, wallpaper, or artwork, infusing the space with visual interest and personal flair.

          Illuminate your living room with a combination of warm and ambient lighting to enhance the beauty of the red and purple color combination. Install soft, warm-toned lighting fixtures such as pendant lights or floor lamps to create a cozy and inviting atmosphere. Consider incorporating dimmers to control the intensity of the light, allowing you to set the desired mood and ambiance.

          10. Two Colour Combinations for Living Room – Grey and White

          Two-Colour-Combination-for-Living-Room-Grey-and-White

          Unleash the charm and allure of a captivating living room with the mesmerizing combination of grey and white. This unique pairing transcends trends, creating a space that is both modern and timeless, exuding a sense of sophistication and tranquility that is sure to captivate your senses.

          Grey takes center stage, enveloping the living room with its understated elegance and versatility. From soft dove grey to deep slate, this neutral hue sets a serene tone, allowing other design elements to shine. Its subtle variations create depth and dimension, adding a touch of intrigue to the overall aesthetic. Whether you prefer a cool or warm-toned grey, it provides a sophisticated backdrop for your living room’s style.

          White becomes the perfect companion to grey, infusing the space with a refreshing sense of lightness and purity. This crisp and clean hue elevates the room, making it feel open, airy, and filled with natural brightness. White accents, whether in furniture, walls, or accessories, bring a sense of freshness and simplicity, creating a timeless appeal that complements various design styles.

          Strike a harmonious balance by using grey as the dominant color and incorporating white accents strategically throughout the room. Choose grey furniture pieces, such as a plush sofa or a sleek coffee table, to anchor the space and establish a sense of modernity. Enhance the overall aesthetic with white decorative elements, such as throw pillows, area rugs, or wall art, adding contrasting pops of brightness and texture.

          For those seeking a minimalist and contemporary approach, let white take the spotlight while grey plays a supporting role. Paint the walls in a clean shade of white, allowing it to serve as a blank canvas for your artistic vision. Complement this pristine backdrop with grey furniture or decorative accents, such as a statement armchair or a textured rug, adding depth and visual interest to the room.

          Embrace the opportunity to infuse the grey and white palette with unique textures and patterns. Incorporate materials like velvet, faux fur, or woven textiles in cushions, curtains, or upholstery, adding a tactile dimension to the living room. Experiment with patterns such as herringbone, abstract motifs, or nature-inspired designs in wallpaper, artwork, or accent pieces, infusing your space with personality and individuality.

          Illuminate your living room with a thoughtful blend of lighting fixtures to accentuate the beauty of the grey-and-white color combination. Embrace natural light by arranging furniture to maximize sunlight exposure and using sheer curtains that allow soft rays to filter through. Enhance the ambiance with carefully placed lighting elements, such as adjustable sconces or floor lamps, creating a warm and inviting atmosphere that highlights the elegance of the space.

          In conclusion, dpod studio invites you to embark on a transformative journey to create a living room that truly reflects your unique style and showcases the power of color combinations. With our expertise in interior design, we understand the intricate interplay between colors, textures, and lighting to craft a space that is nothing short of extraordinary.

          From the modern elegance of a two-color combination to the vibrant fusion of red and purple, dpod studio knows how to bring your living room to life with impeccable taste and attention to detail. Our talented team of professionals is dedicated to turning your vision into a reality, ensuring that every aspect of your living room exudes sophistication, warmth, and individuality.

          At dpod studio, we go beyond the ordinary to create exceptional living spaces that leave a lasting impression. With our expertise in color psychology and design principles, we carefully curate color combinations that evoke the desired mood and atmosphere, making your living room a sanctuary of comfort and inspiration.

          Partnering with dpod studio means unlocking a world of creativity and innovation. We take pride in staying up-to-date with the latest trends and techniques, ensuring that your living room reflects the contemporary style you desire. Our commitment to excellence, coupled with our passion for interior design, sets us apart as a trusted partner in bringing your living room dreams to fruition.

          So, trust dpod studio to transform your living room into a breathtaking masterpiece. Let our expertise guide you in selecting the perfect color combination, creating a space that not only showcases your personal style but also captures the essence of modern living. Experience the joy of living in a thoughtfully designed and beautifully executed living room, crafted with love and expertise by dpod studio.